Design for Game Center
Add to favorites
Learn how to design for Game Center
UI Design Handbook
1
UI Design Aesthetic
3:52
2
Design for accessibility
1:59
3
Localization
1:14
4
Color Selection
5:06
5
Pick Fonts
3:35
6
Font Managers
2:06
7
Icon Organizer
2:59
8
UI Sound Design
4:25
9
Stock Images
1:29
10
Image optimization
1:46
11
Illustrations
1:38
12
Realistic Mockups
2:47
13
UI 3D Assets
2:29
14
Introduction to Animations
5:09
15
UI Animation Resources
1:45
16
Apple Watch Faces
2:06
17
Designing for Apple Watch
4:24
18
Designing for Apple TV
1:58
19
Design for Game Center
3:43
20
Designing for CarPlay
1:37
21
Designing App Clips
7:05
22
Designing Widgets
3:29
23
Design Systems
1:27
24
UI Kits
3:33
25
Prototyping Tools
3:22
26
Voice prototyping
2:14
27
Prototyping with Code
3:01
28
Turn your Designs into Code
2:18
29
Version Control Tools
2:12
30
Developer Handoff
1:05
31
Color Theory
10:35
32
Dark Interfaces
3:53
33
Icons
10:32
34
Background Patterns
5:41
35
Typographic Scales
2:40
Access Point
It is a UI element that helps the user access their Game Center information from within the game. You can place the access point in any corner regarding the context of your UI's game but Apple recommends that if possible, place it in the top left corner.

Access Point Layout
In portrait, on the iPhone, the width of the expanded access point is 335 points and the height is 62 points with a safe area of 114. In landscape the width of the expanded access point is 280 points, the height is 62 points with a safe area of 91. You can read more about it in the Human Interface Guidelines.

Game Center Iconography
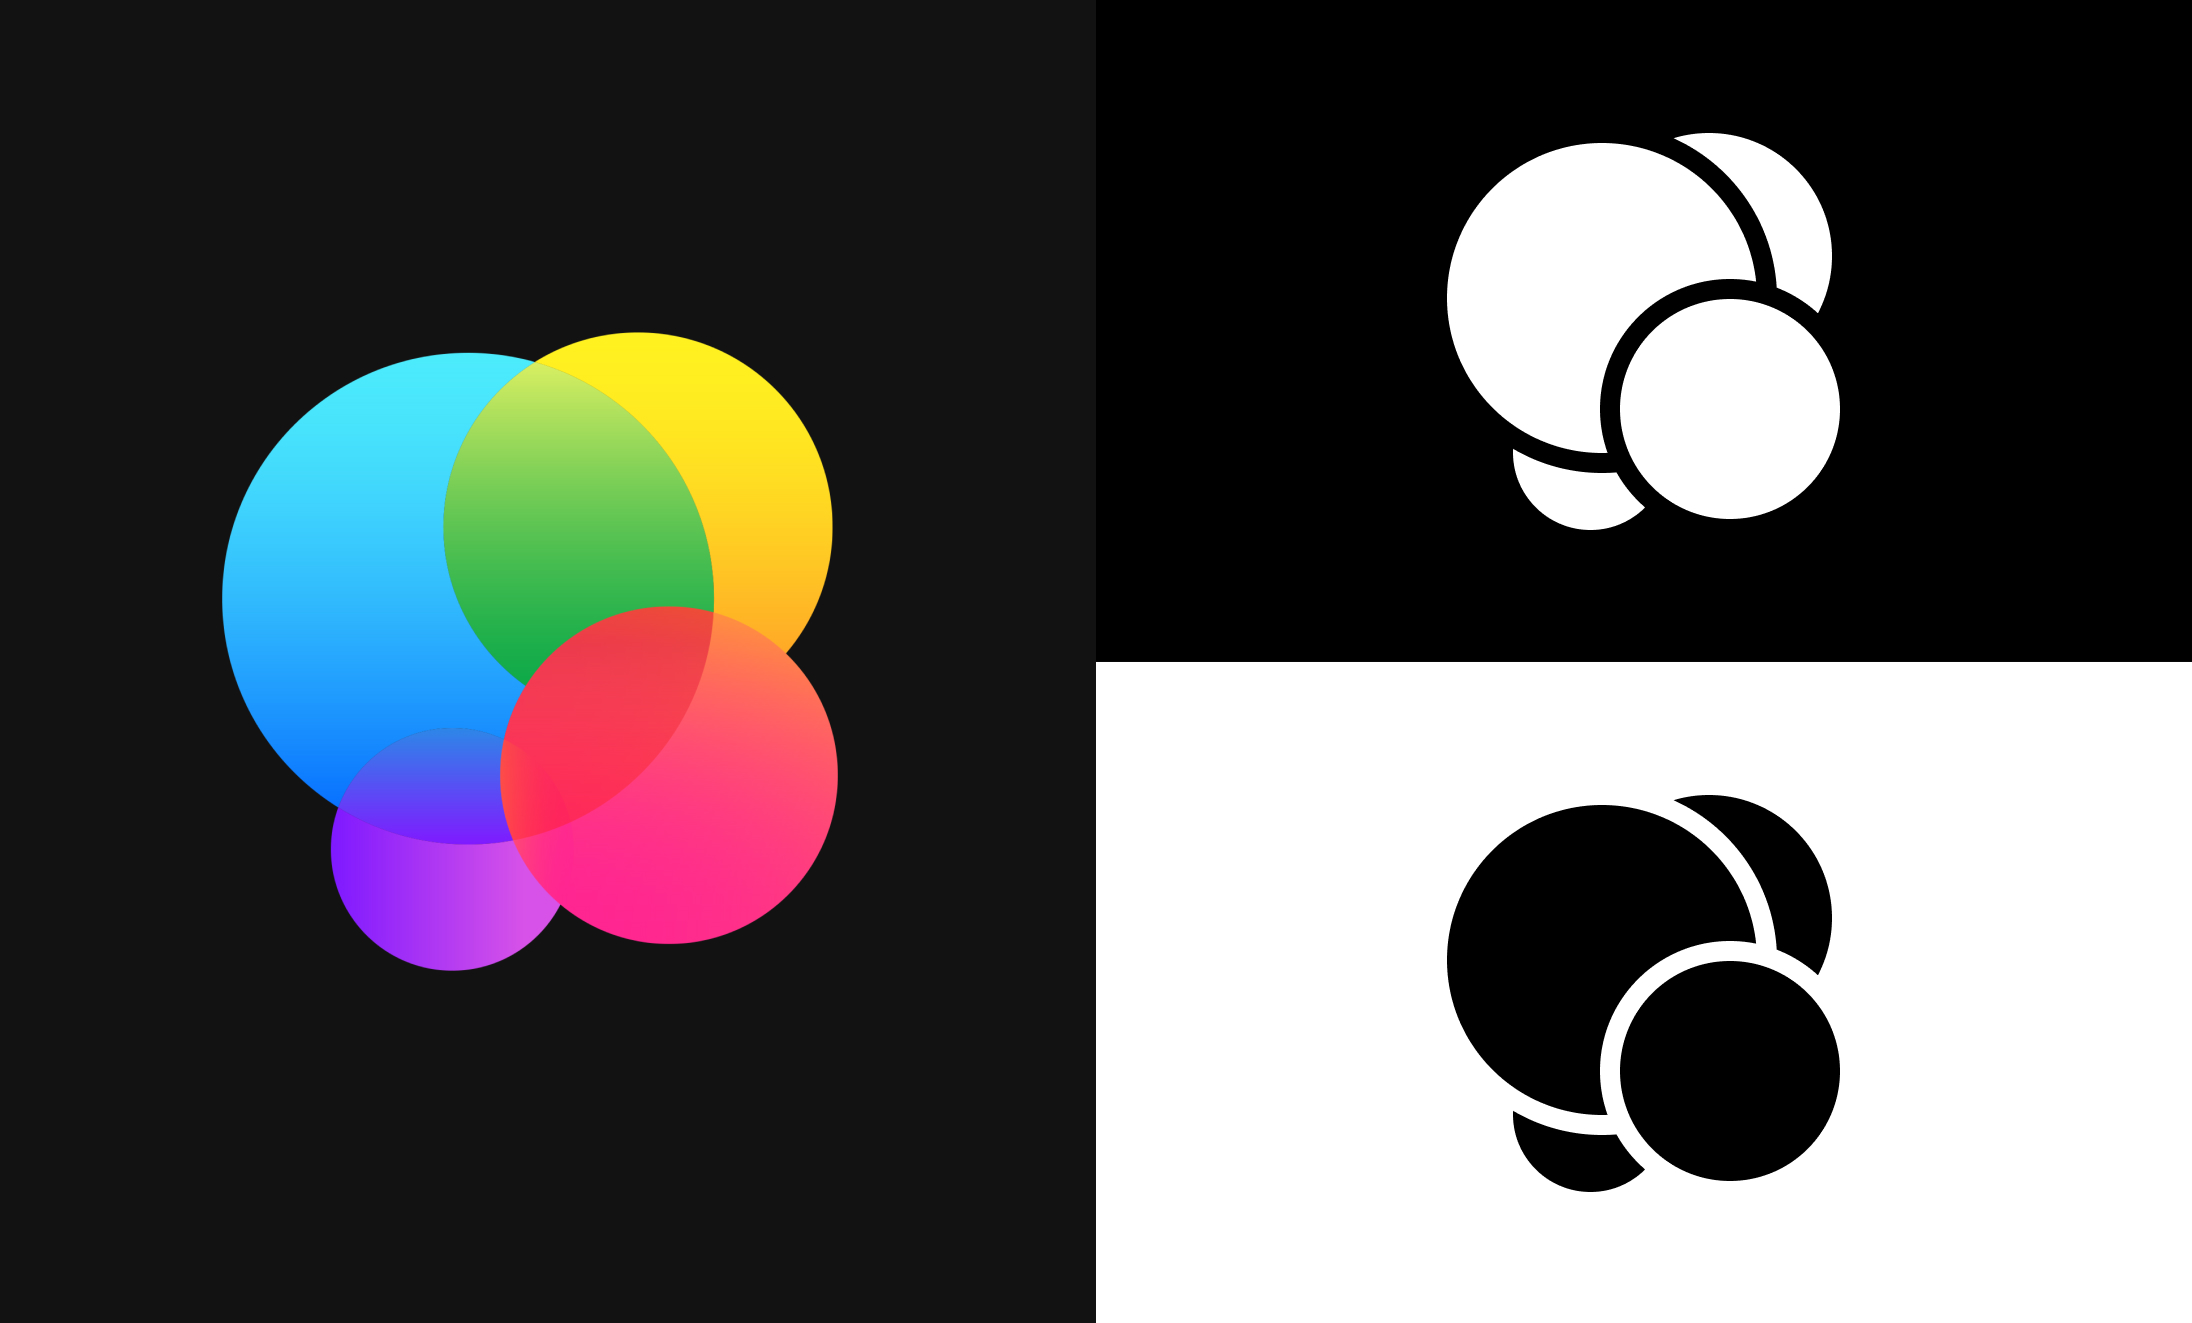
In case you would like to use your UI to link to Game Center, Apple provides different icon options in full color and black and white. You will find all the variants in Apple's Design Resources.
Dashboard & Profile
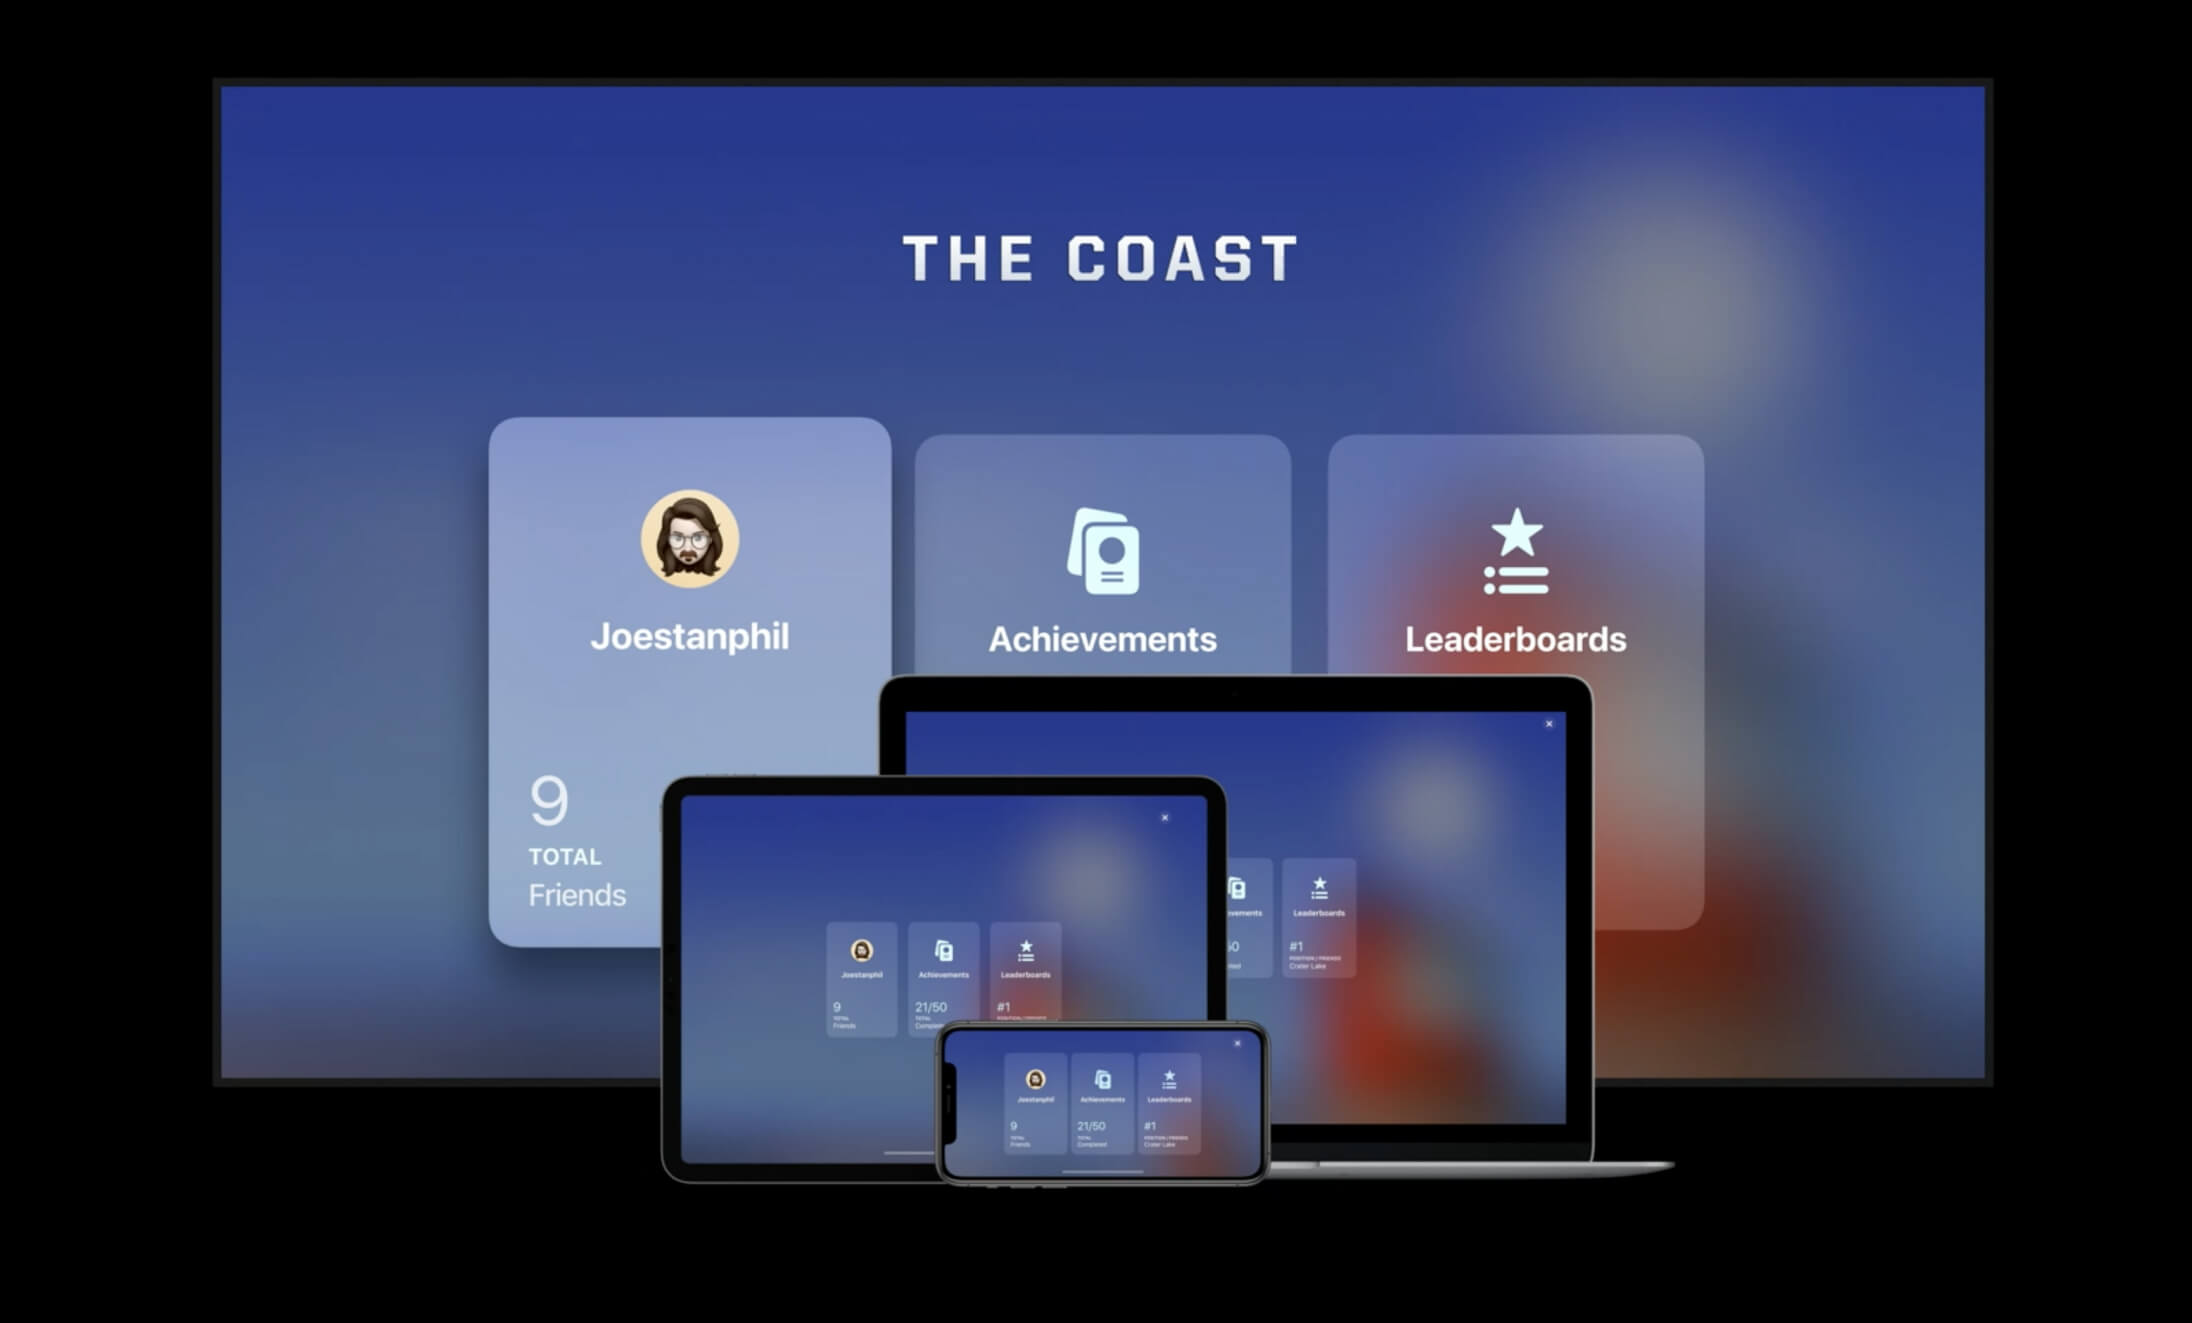
Once you tap the access point, it will take you to the dashboard. Make sure to pause your game once the user interface is open. Over there, you will see elements like the player's profile, achievements and the leaderboard. The dashboard supports landscape and portrait mode, and it is consistent among Apple's platforms. Just for Apple TV, you can add some additional artwork to the dashboard, please refer to Apple's human interface Guidelines to learn more about it.
Profile
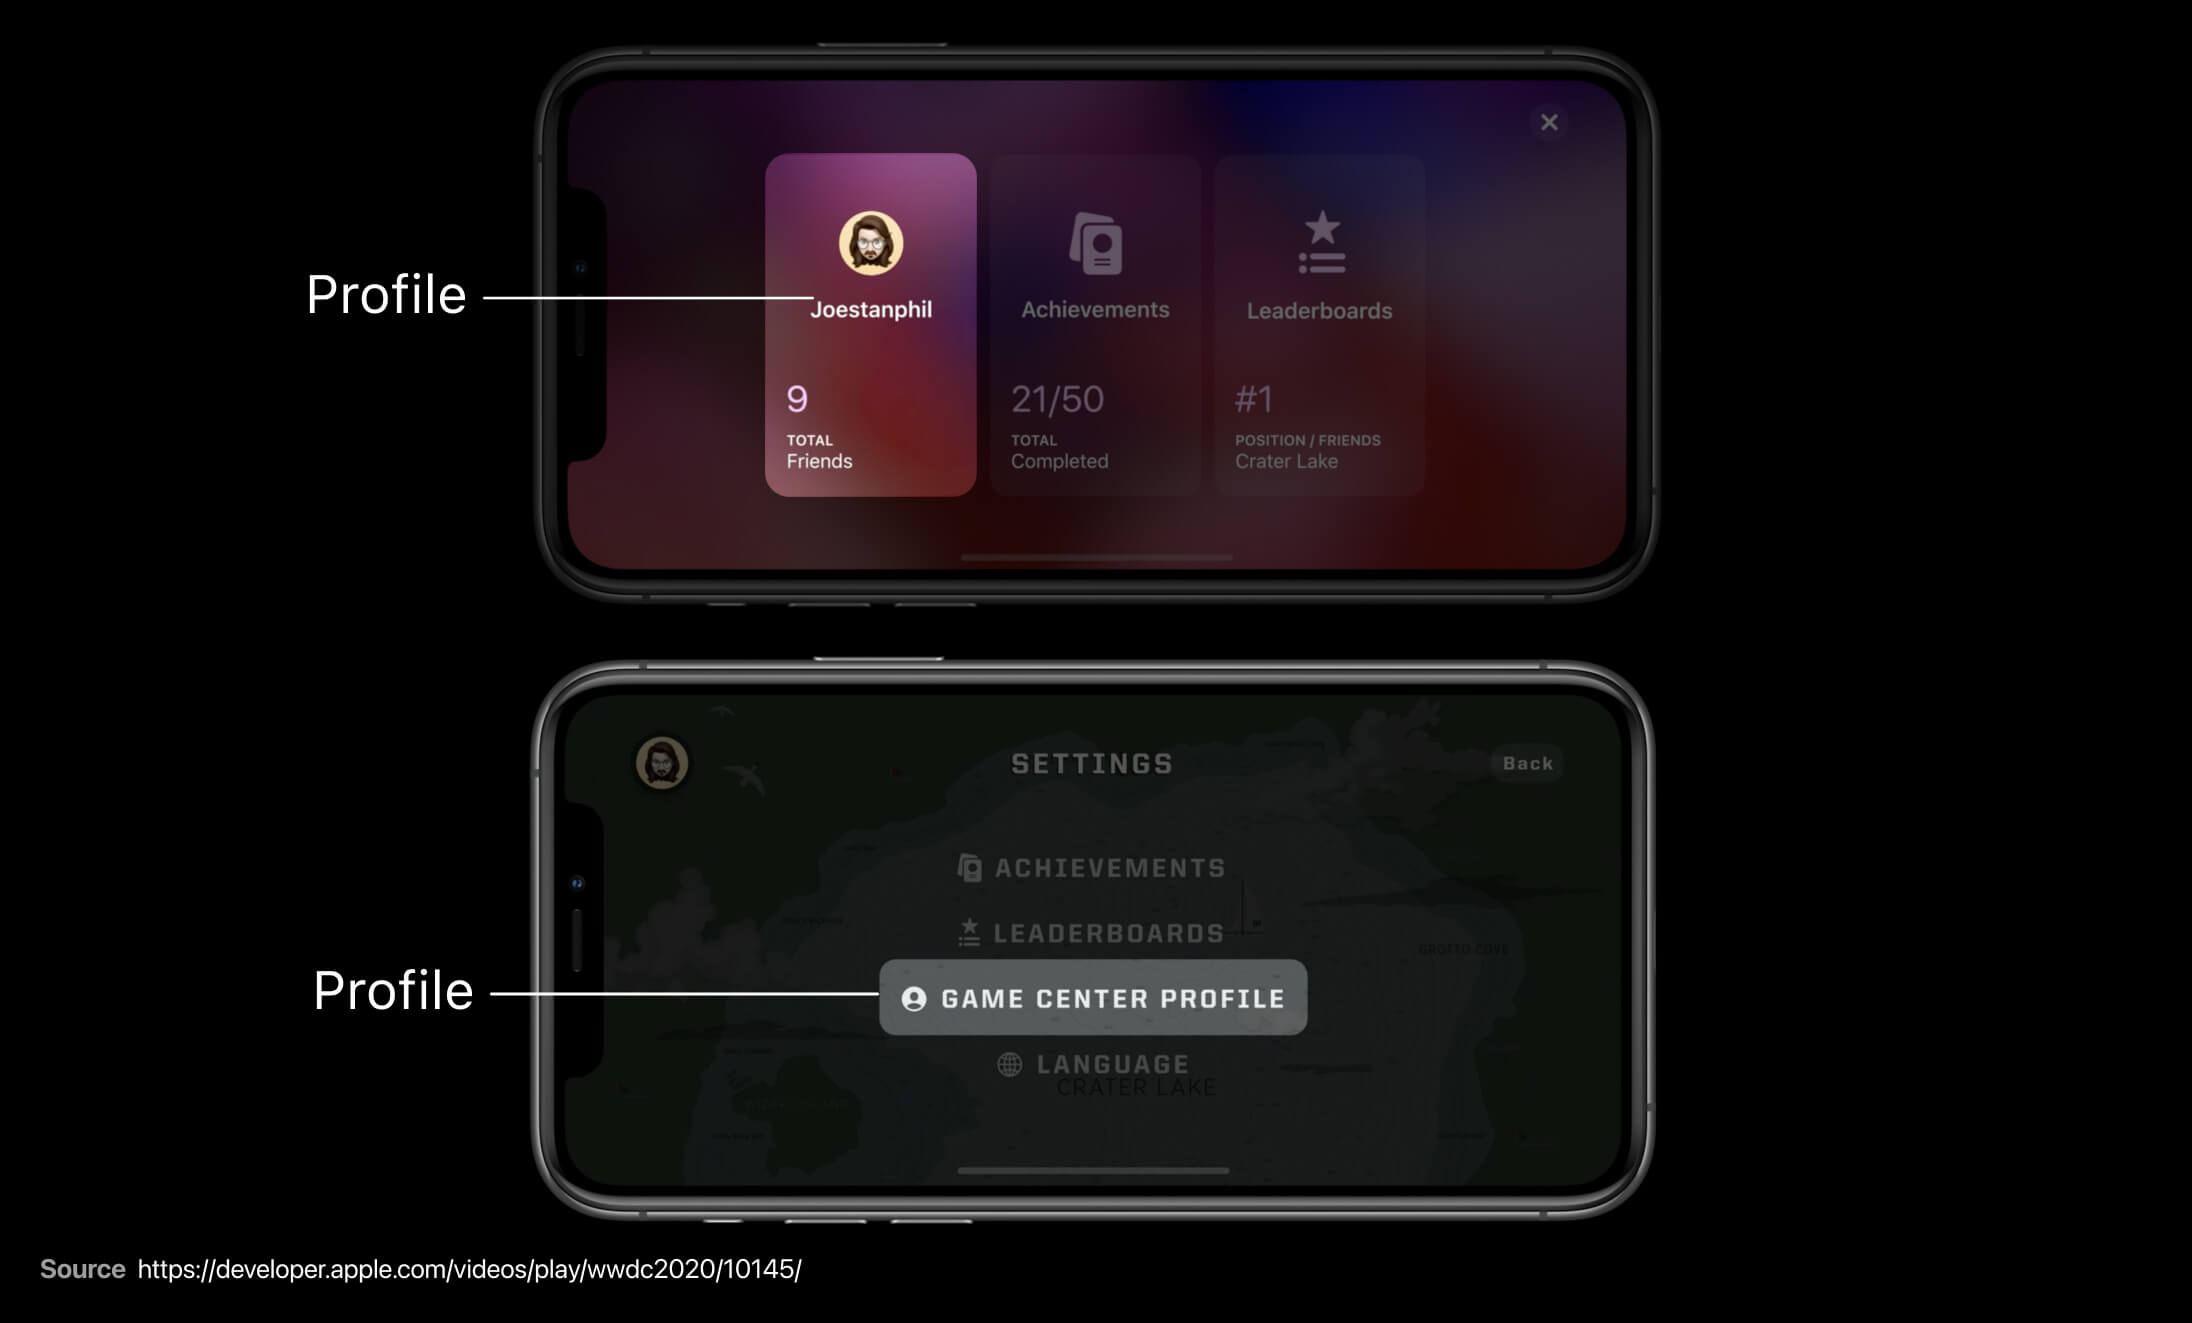
The first element on the dashboard is the Profile; nevertheless, if you'd prefer not to use the players avatar, Apple optionally provides an icon and you'll be able to add a button inside your game's profile page. The Profile shows the player's overview, friends, friend suggestions and a way to access their achievements across all of the games they have played.
Achievements
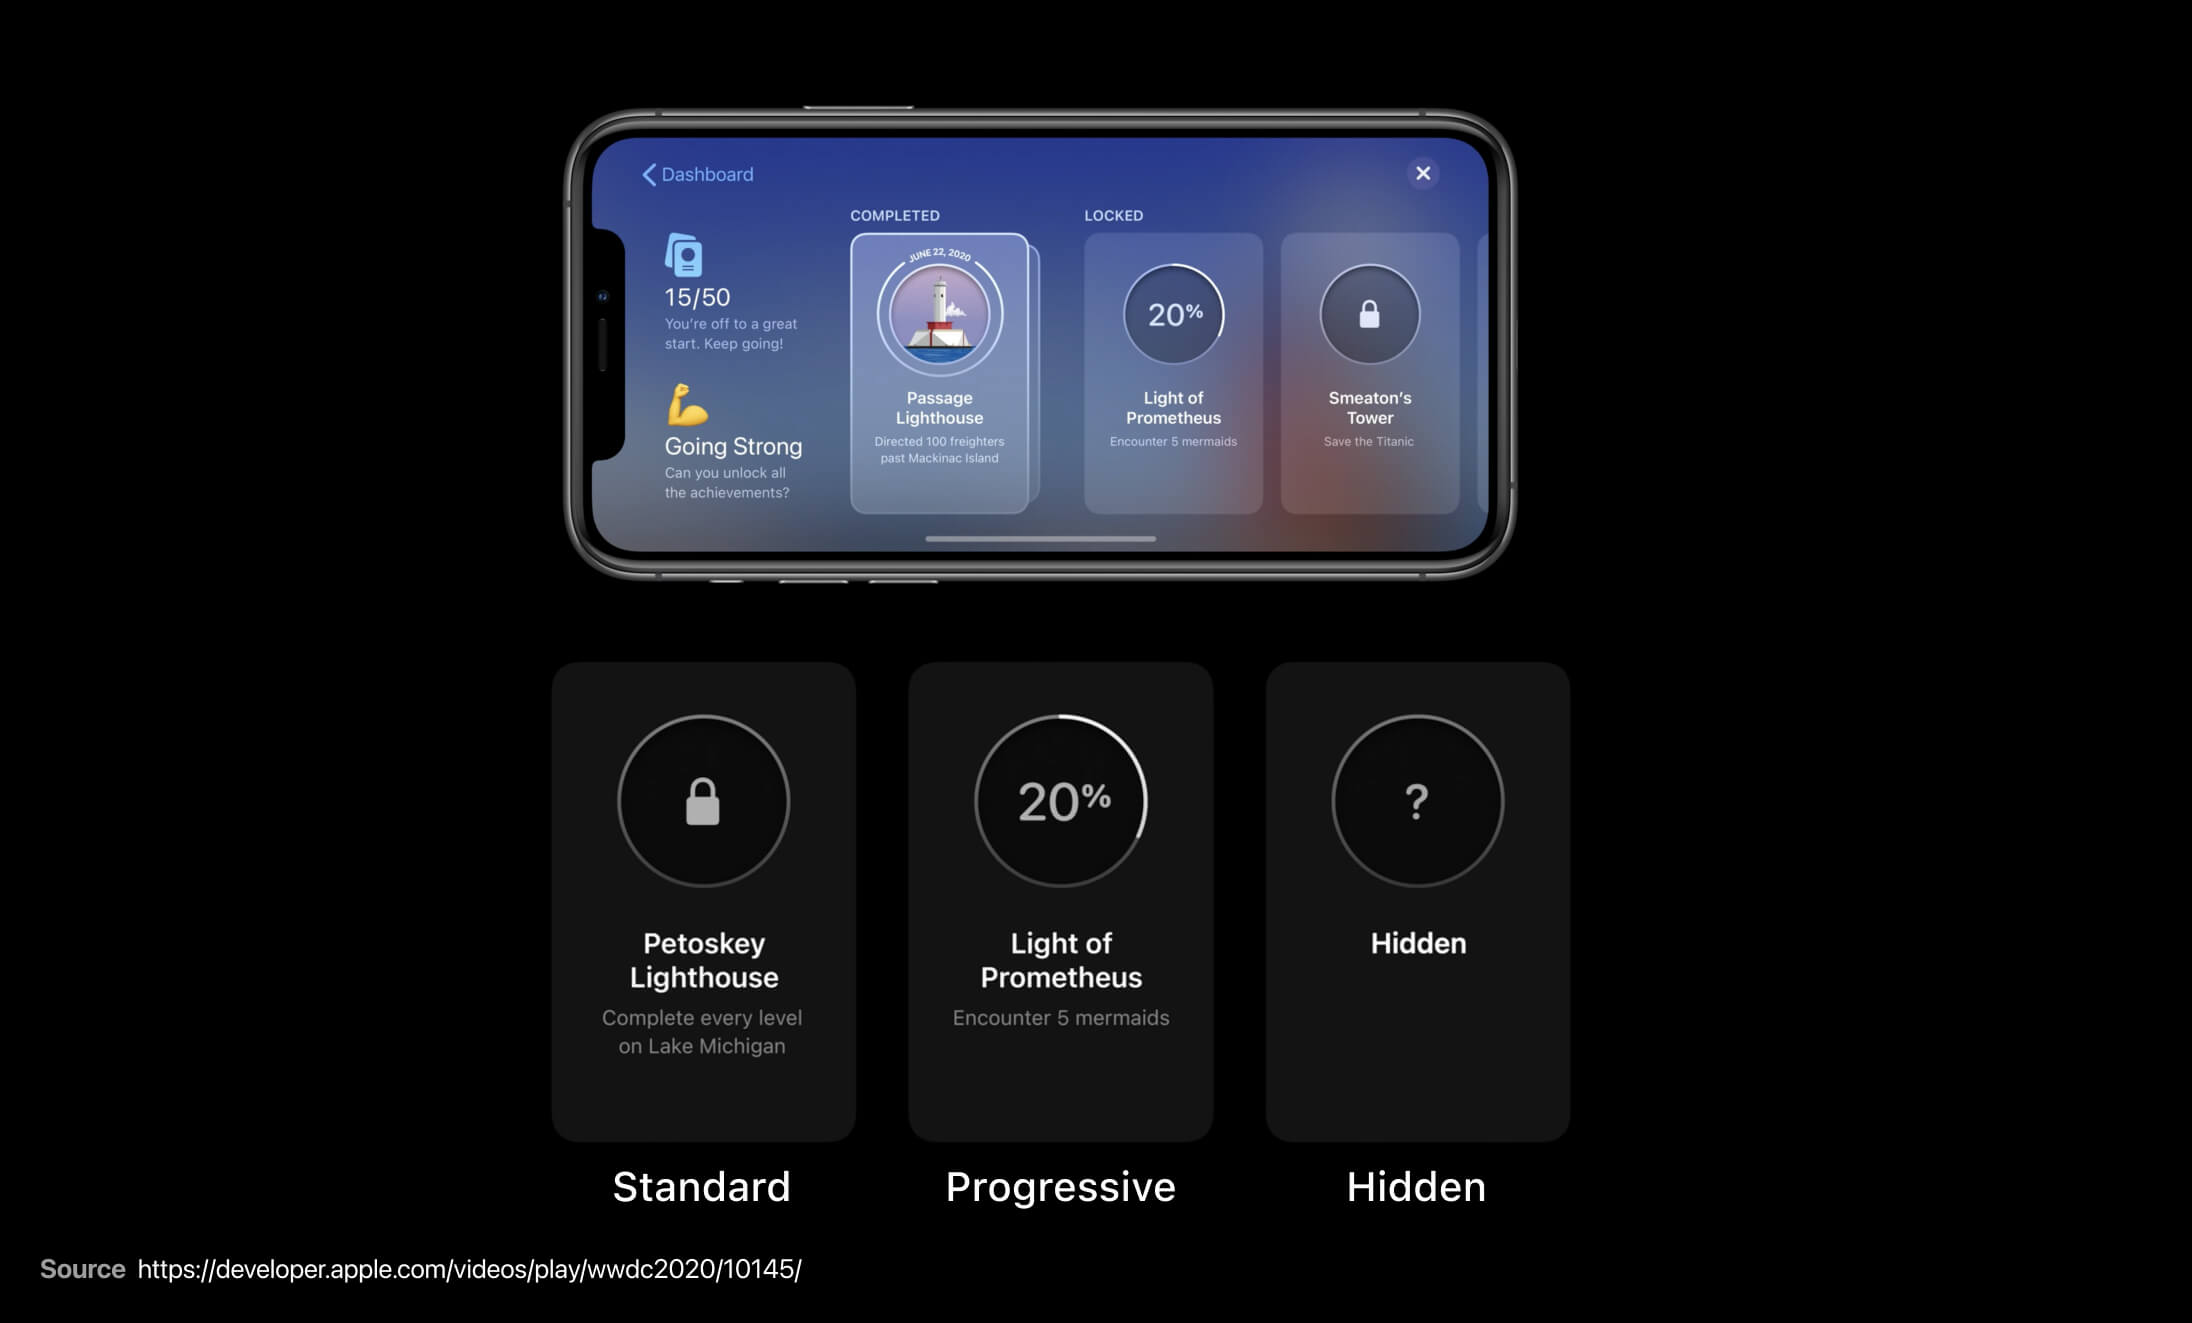
Achievements is a great way to keep the player engaged with the game and a good reason for the player to return frequently to the game. Apple created three types of achievements - standard, progressive and hidden. Besides the art for your achievements, make sure to describe the achievement with a title and description. You can find more information in Apple's HIG or on the WWWDC video about designing for Game Center.
Leaderboards
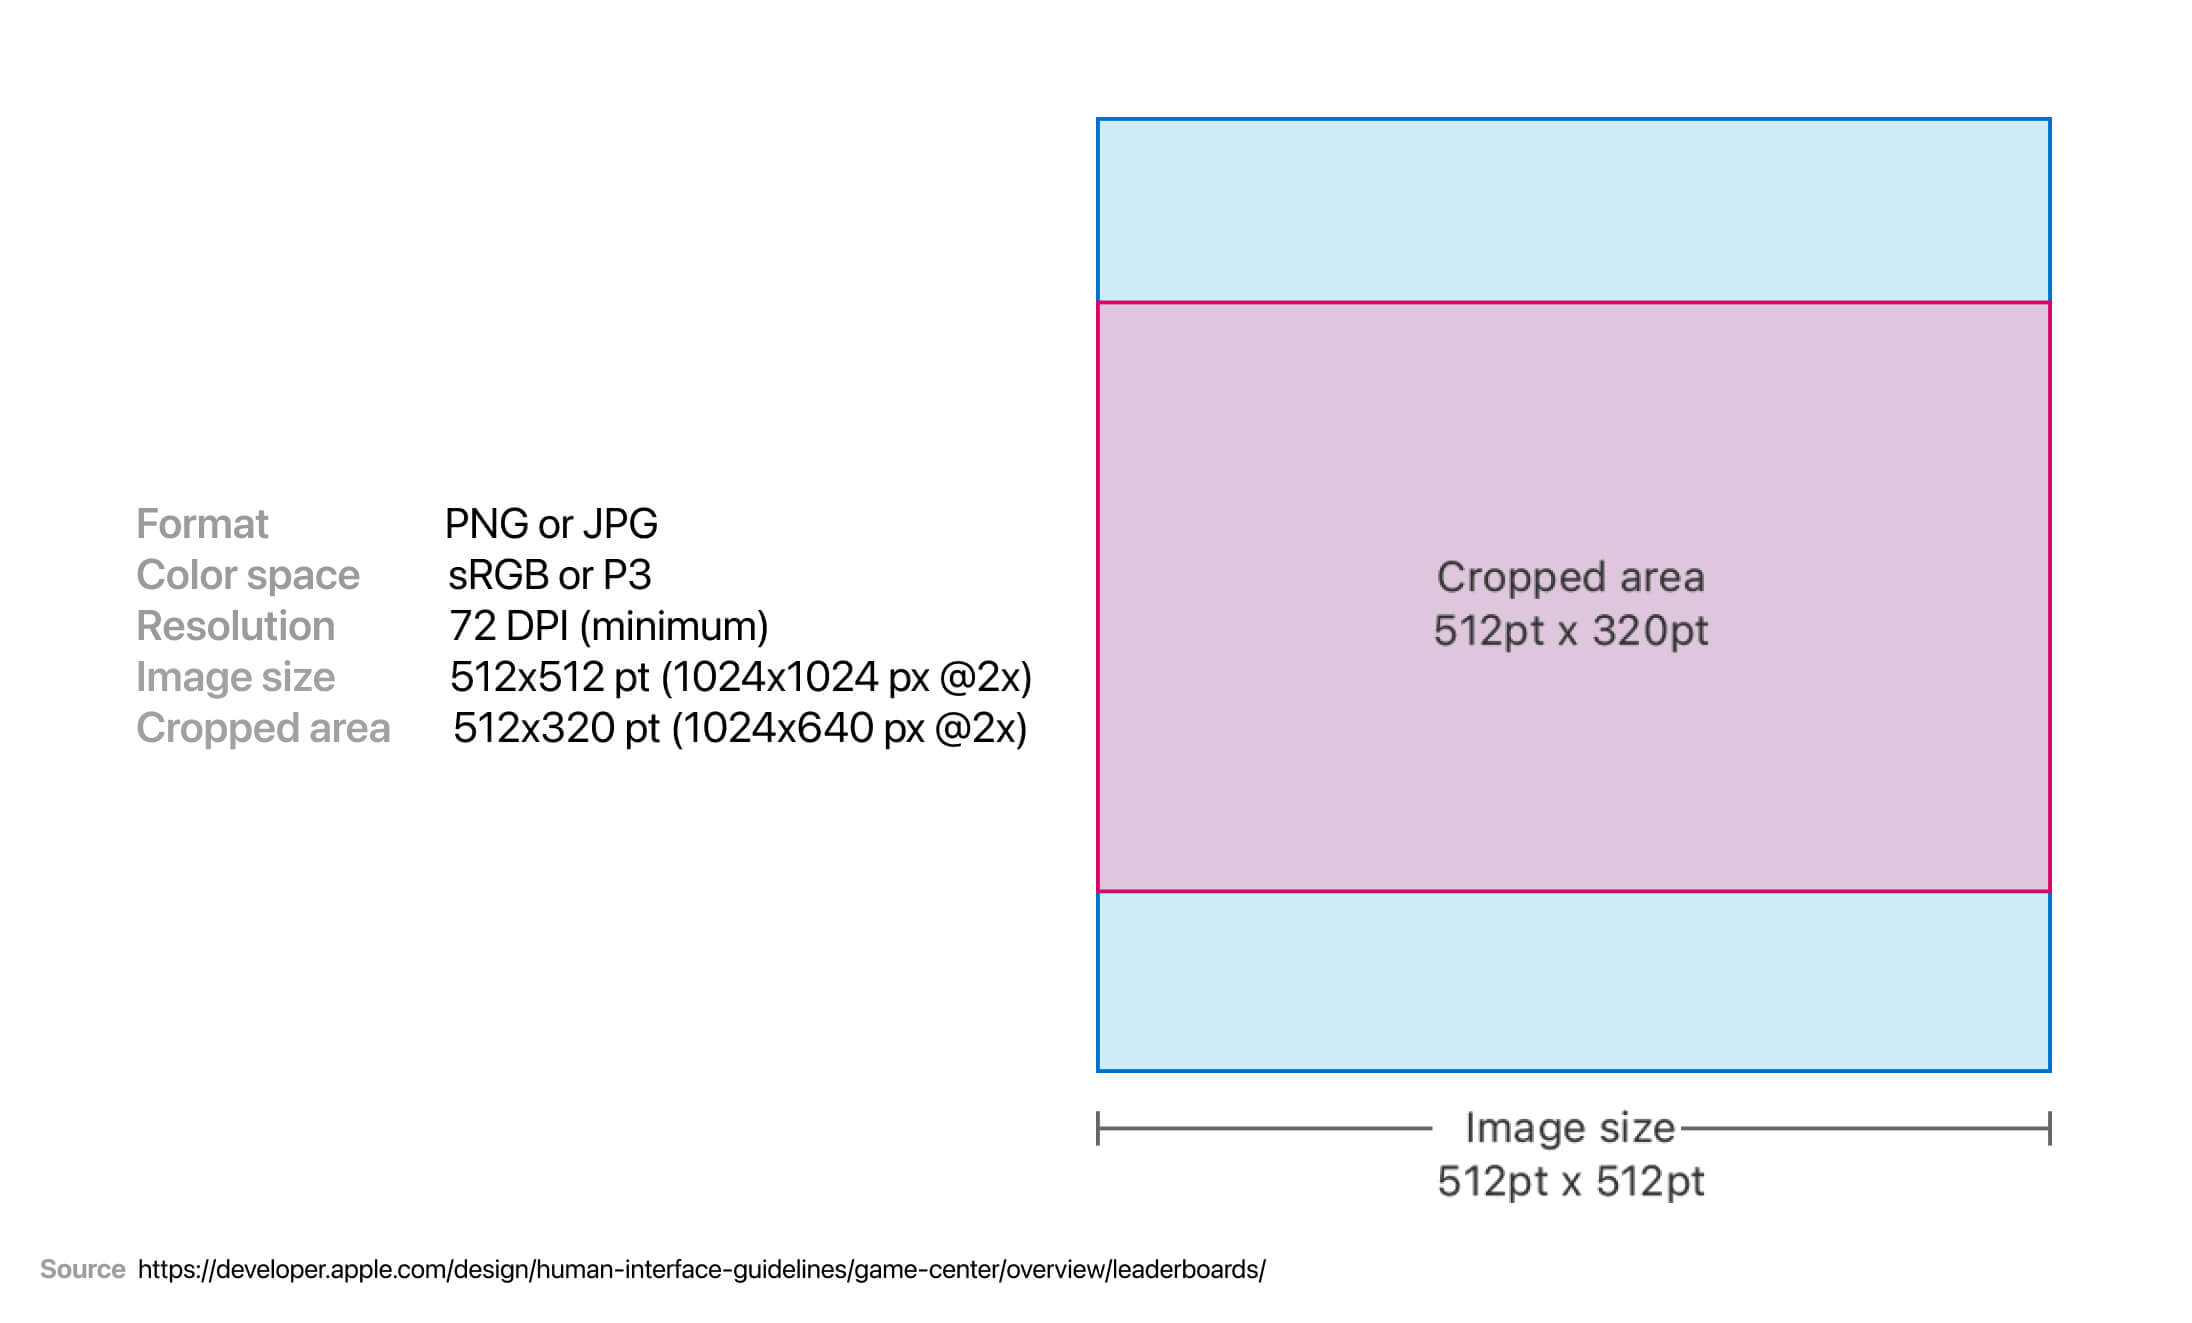
The sense of competitiveness is part of human nature. We want to increase our skills and learn who can be a worthy rival. With the leaderboard, you can show the user the score of their friends playing the same game. Make sure to create great imagery and to follow the format that Apple recommends. To learn more about it and also learn how to optimize your image for tvOS, please refer to the HIG.
Multiplayer
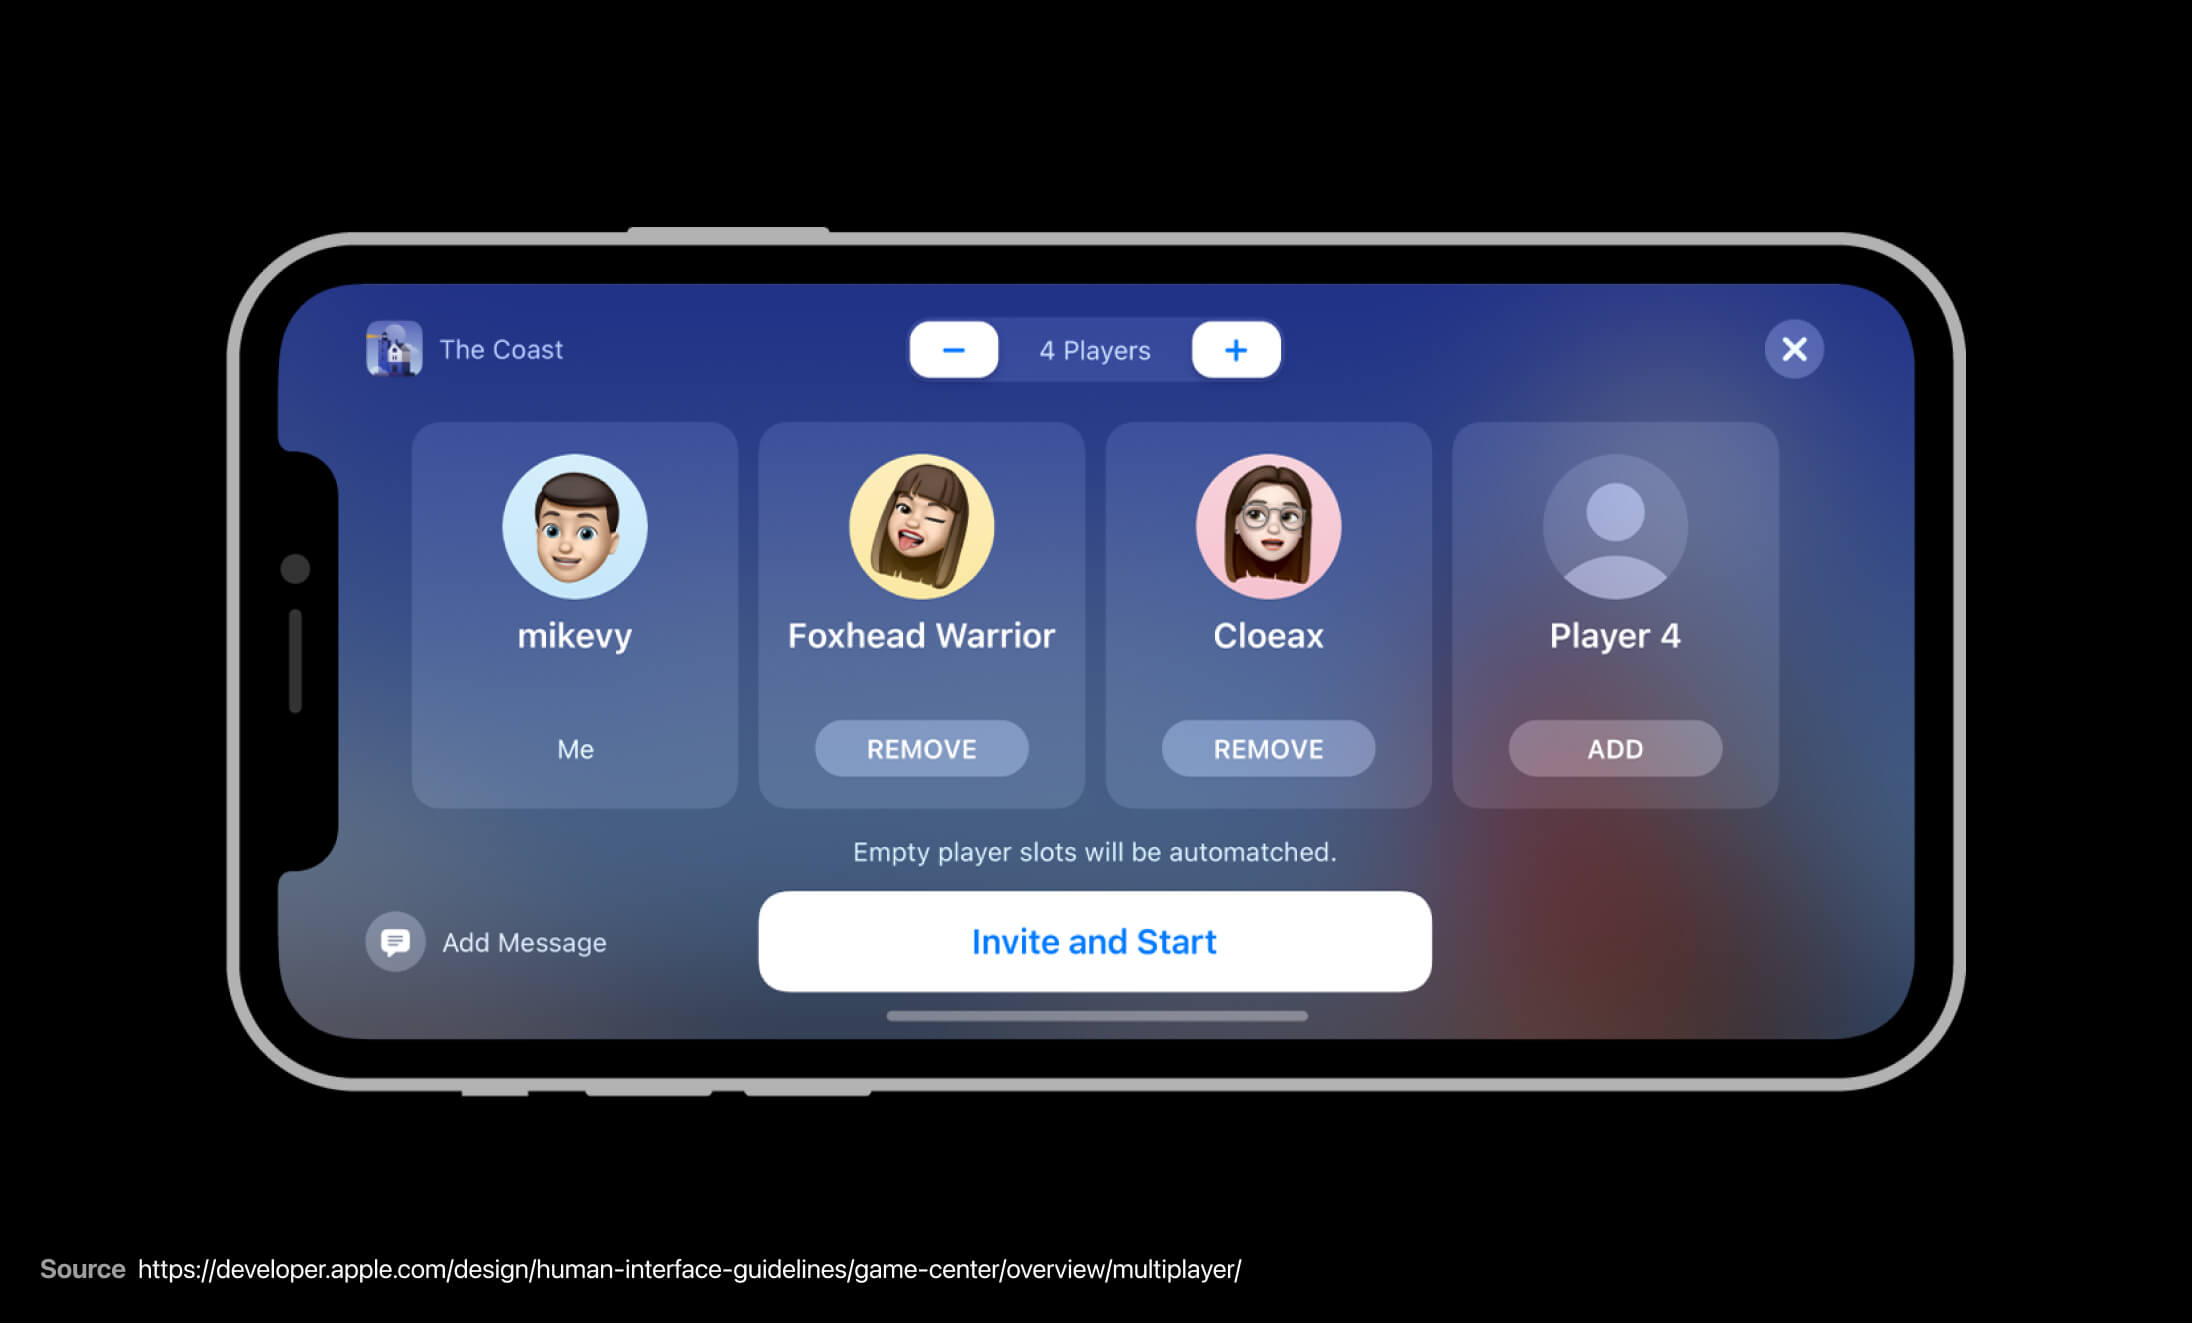
You need to add a specific button to redirect your player to the multiplayer lobby. Once in the lobby, the player will be able to invite friends, add the number of players the player will like to invite and add some other special features that Apple provides. You can learn more about Multiplayer on Apple's Human Interface Guidelines.
Further Reading
If you are planning to design for Game Center, we recommend watching Apple's WWDC video which explains the process in more detail and you can also read more about it in Apple's Human Interface Guidelines. Always refer to Apple's Human Interface Guidelines, since it is the official source and they are always adding updates to the guidelines.
Animate a progress circle
In this exercise I will show you how to animate a progress circle in Principle. I will be using Figma but feel free to use Figma or Sketch. Let’s open our exercise file in Figma so we can set some of the assets.
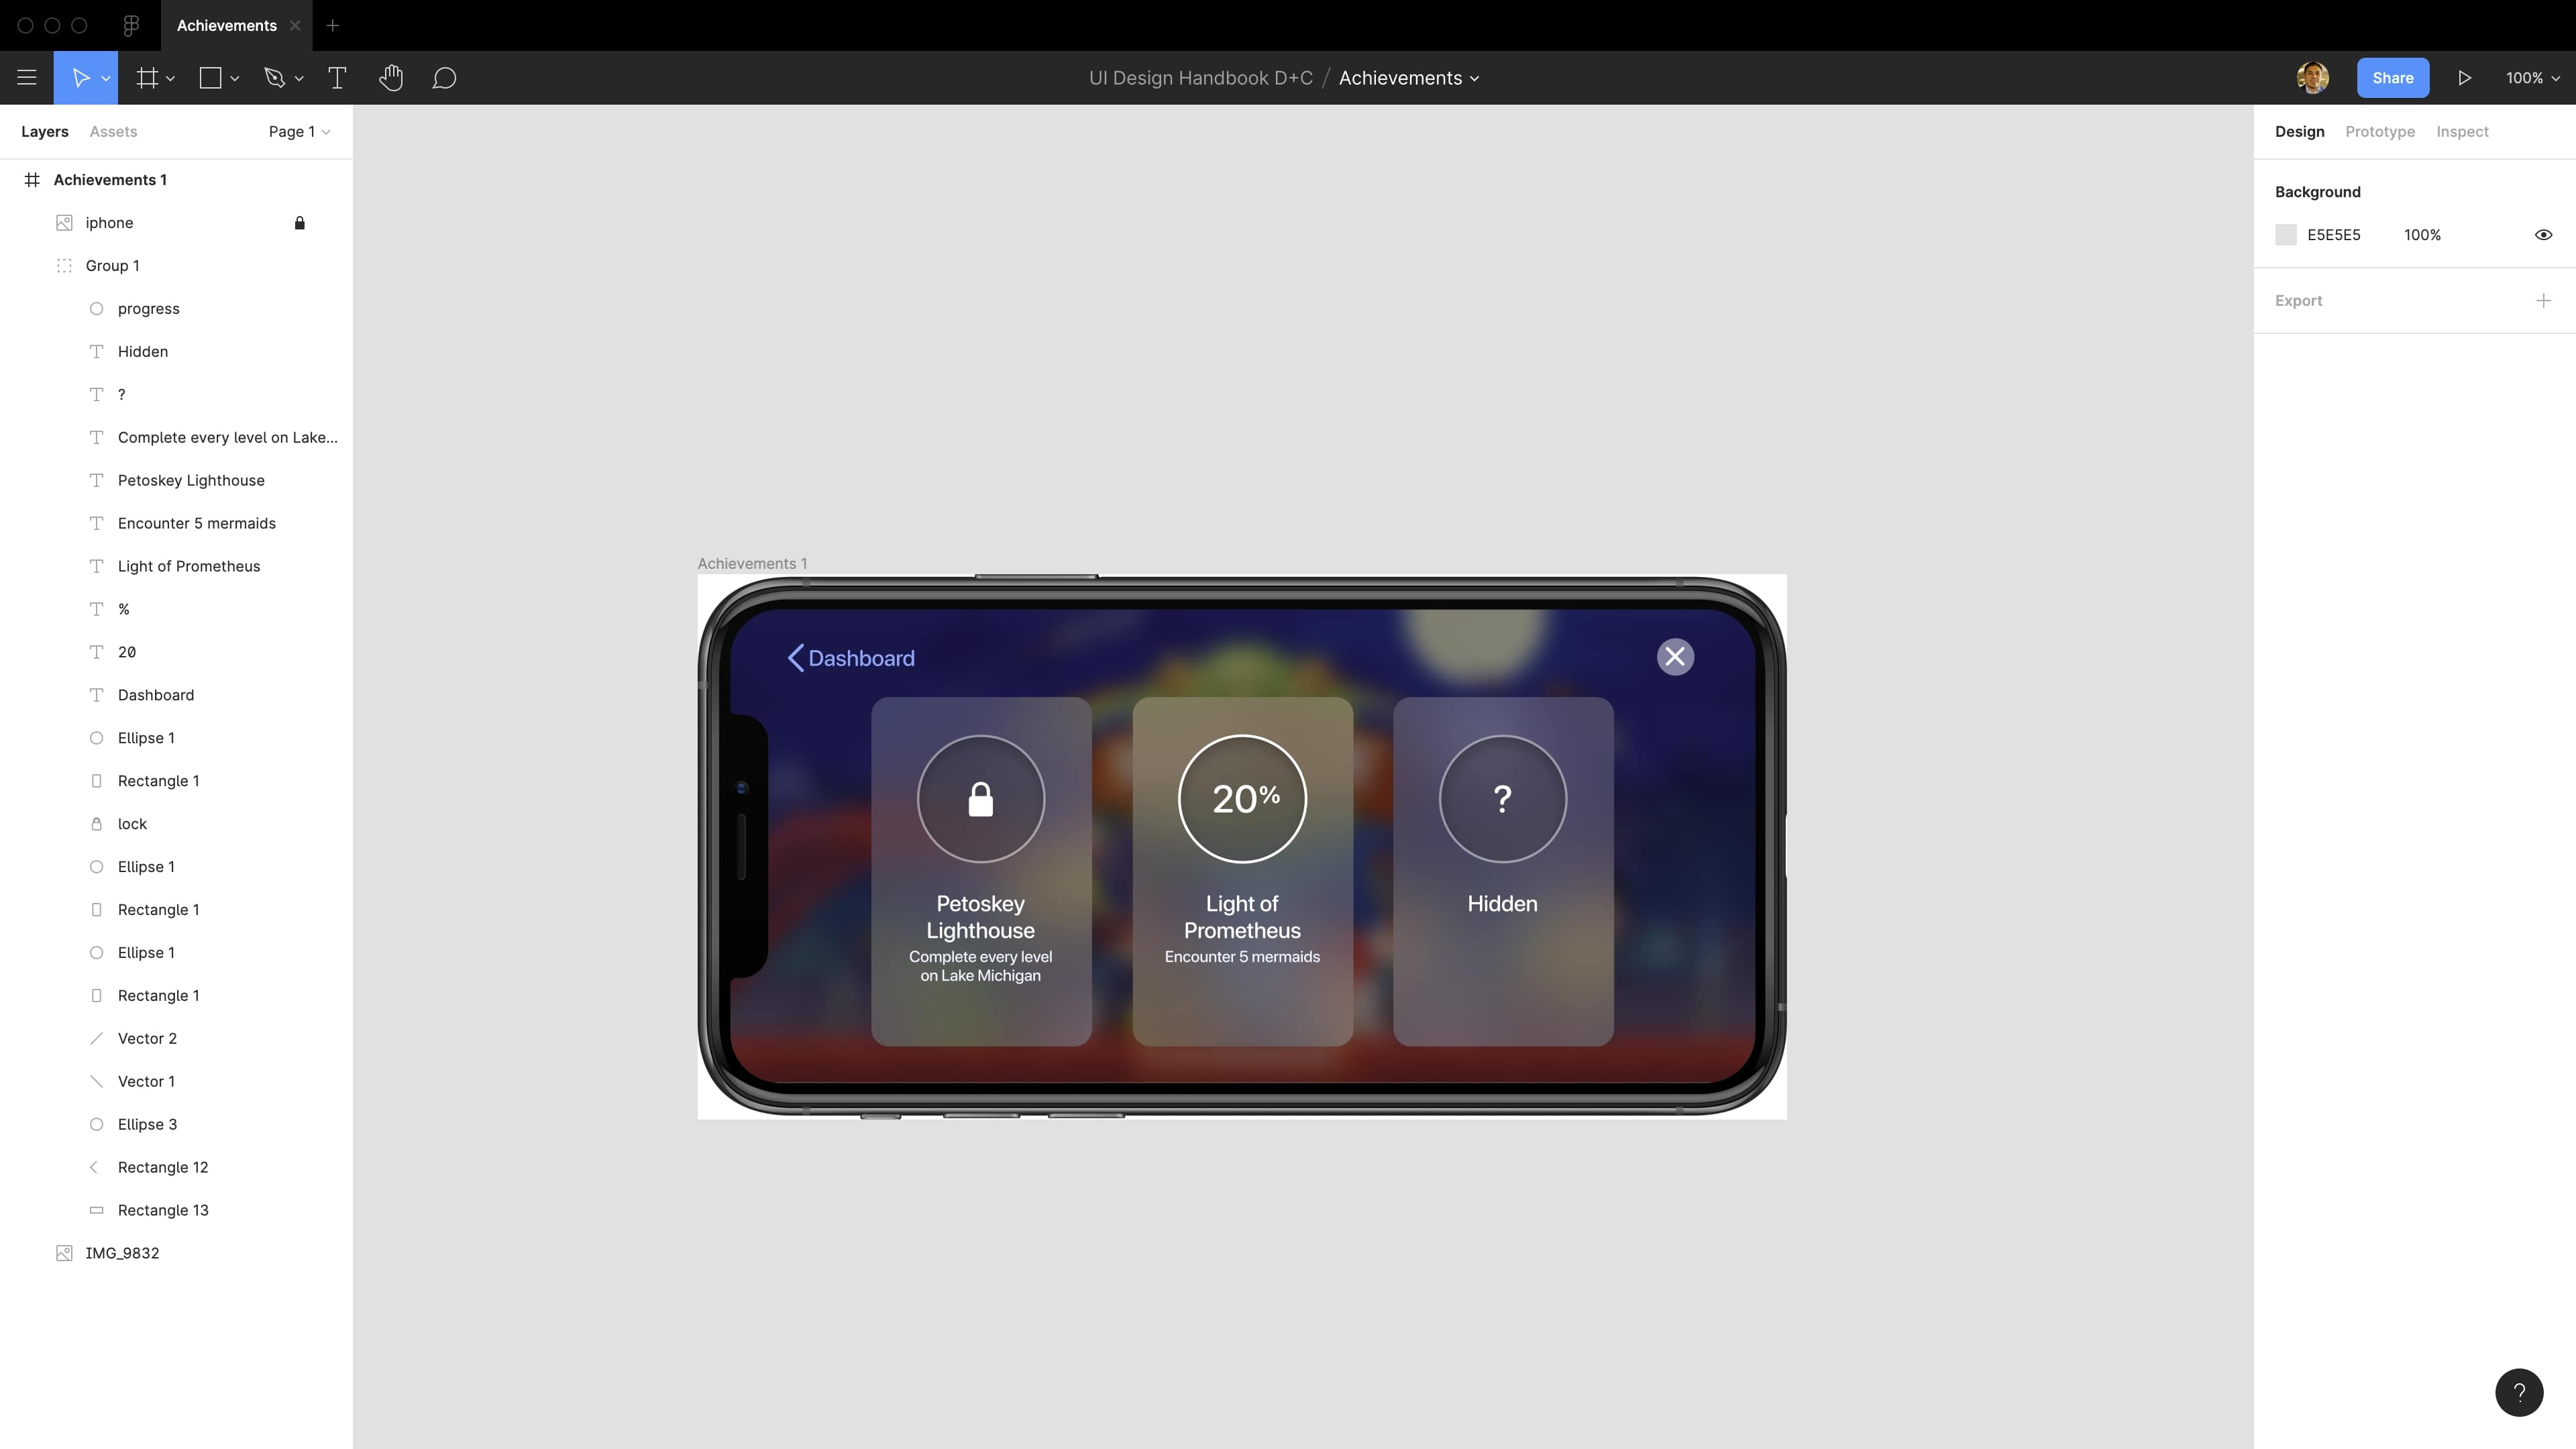
We will create three more copies of the original frame, so in total we will have four. In the first frame, put the opacity of the dashboard to 1%.
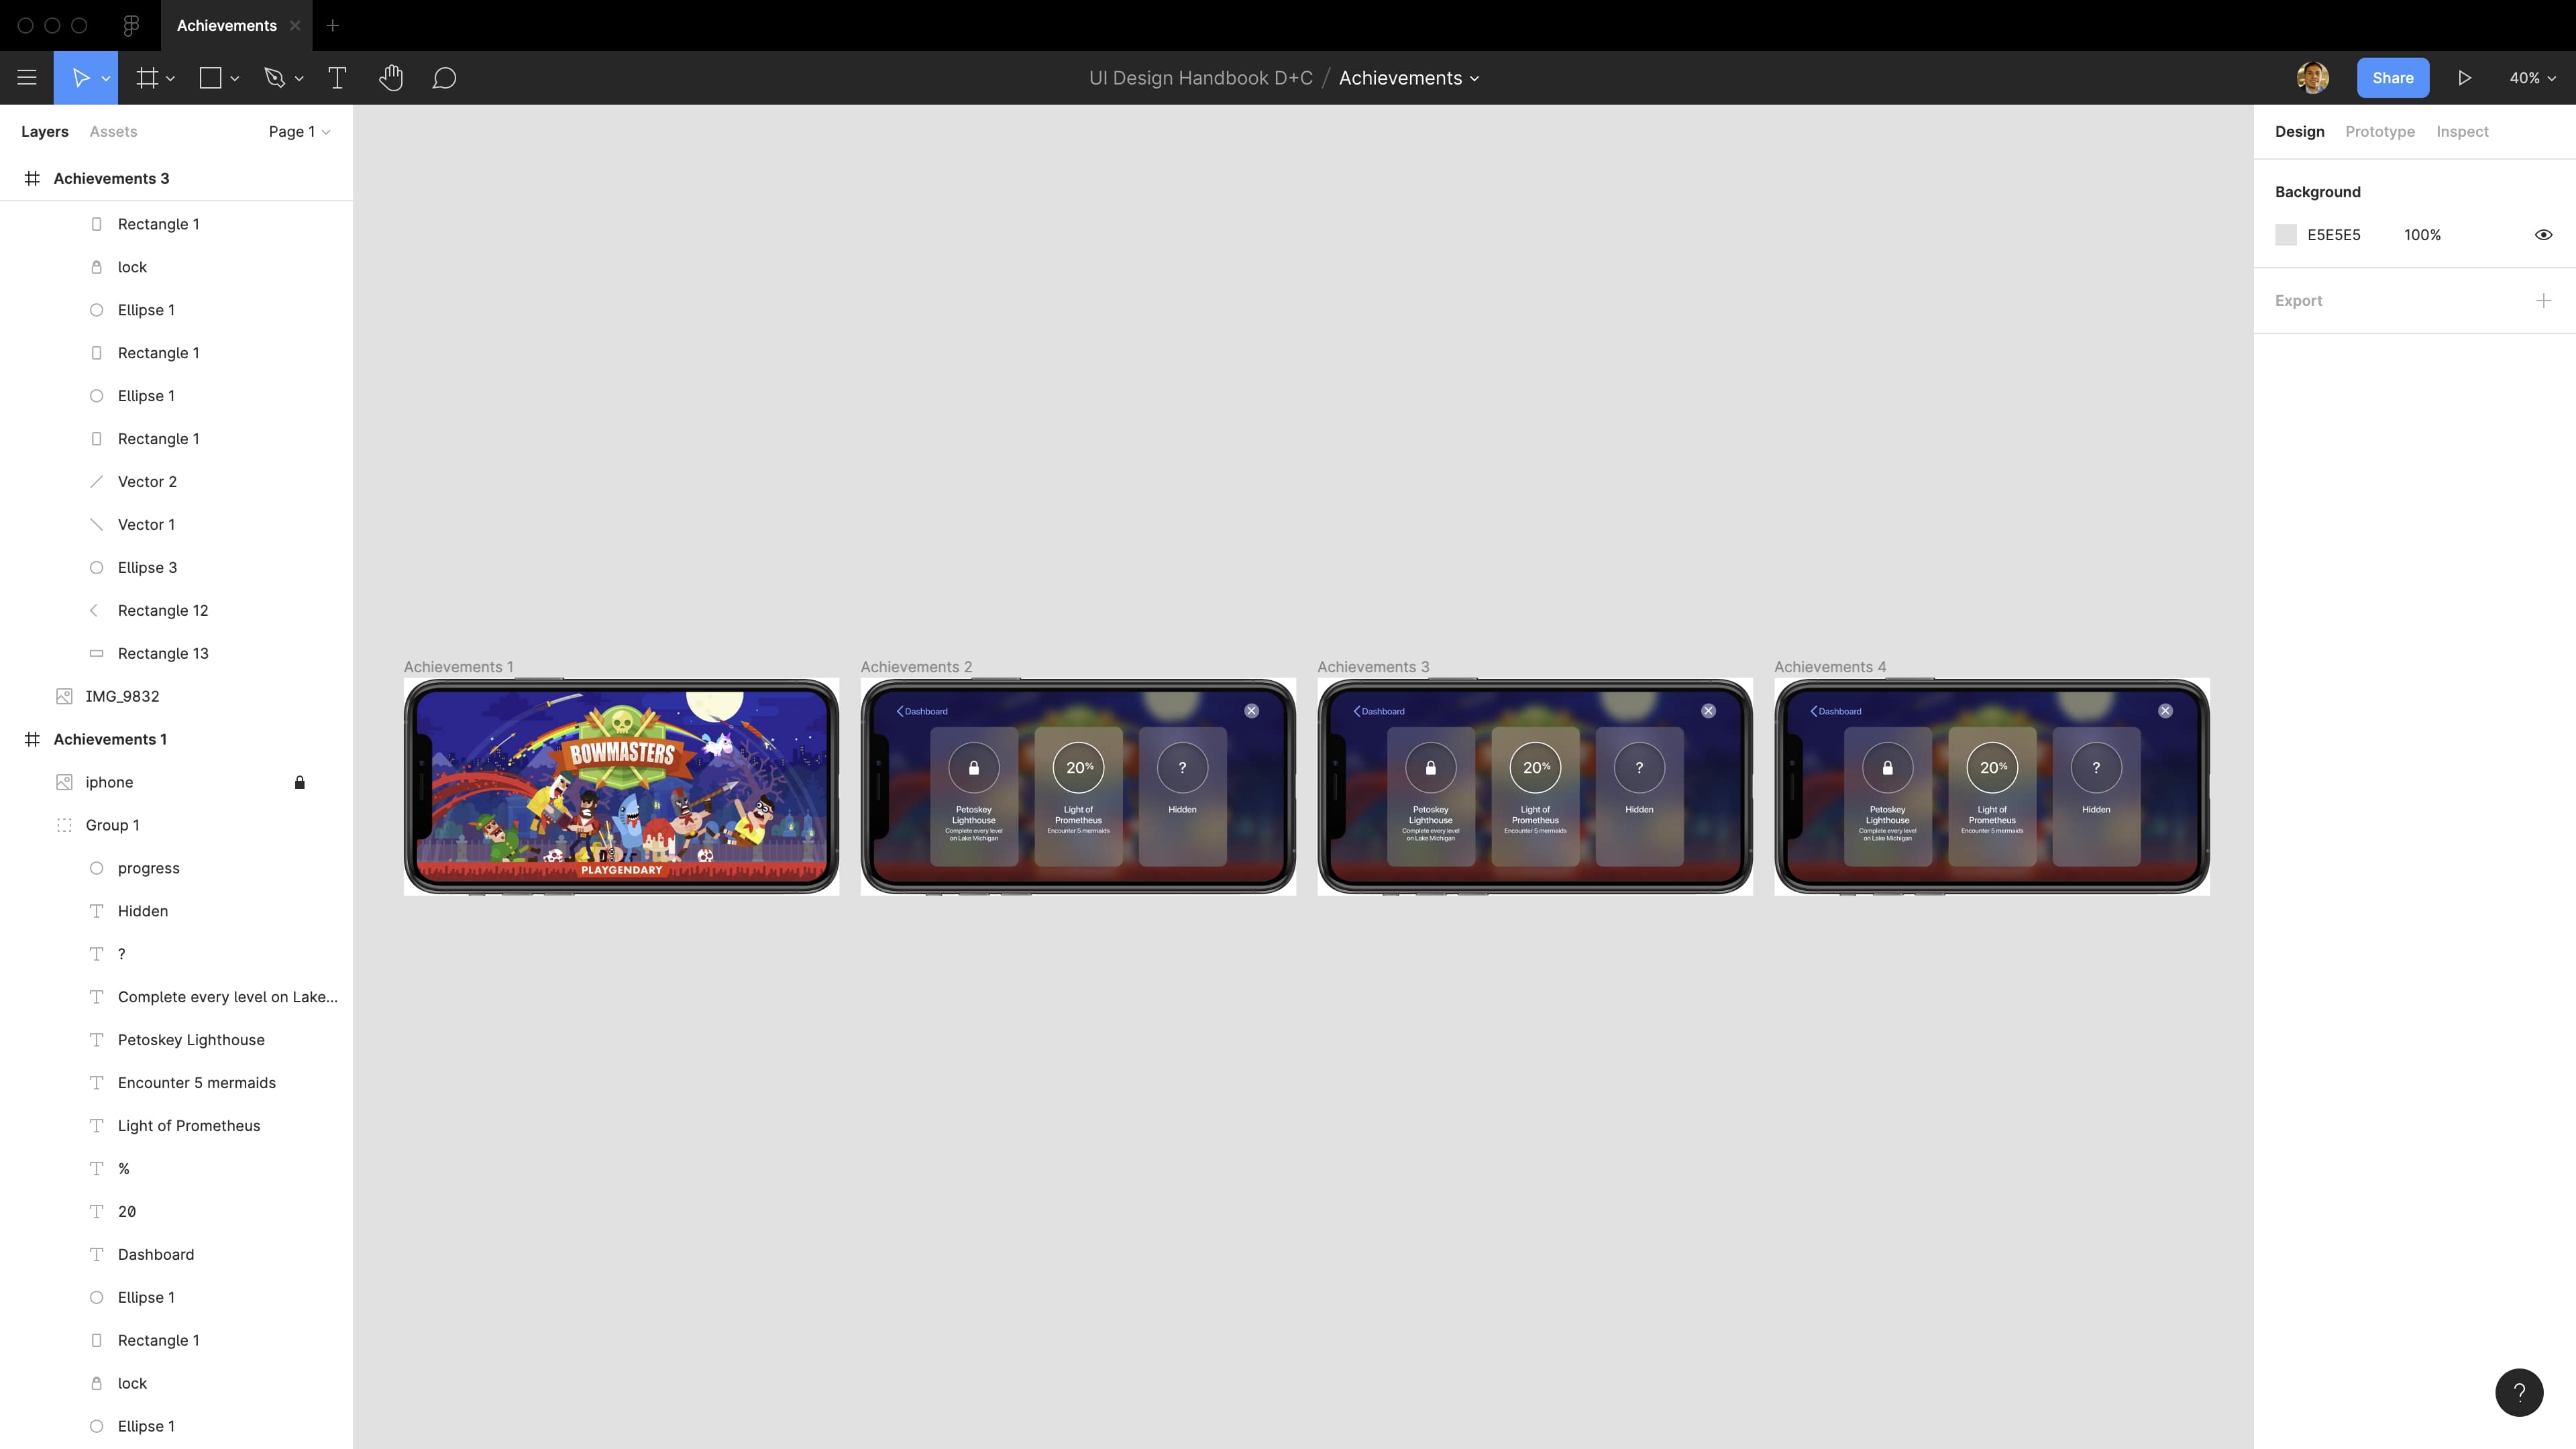
Next, in the frame called Achievements 4, select the oval called progress. You will notice that when we select the circle, a small dot in the right side of the circle appears, so drag the dot to the middle of the circle.
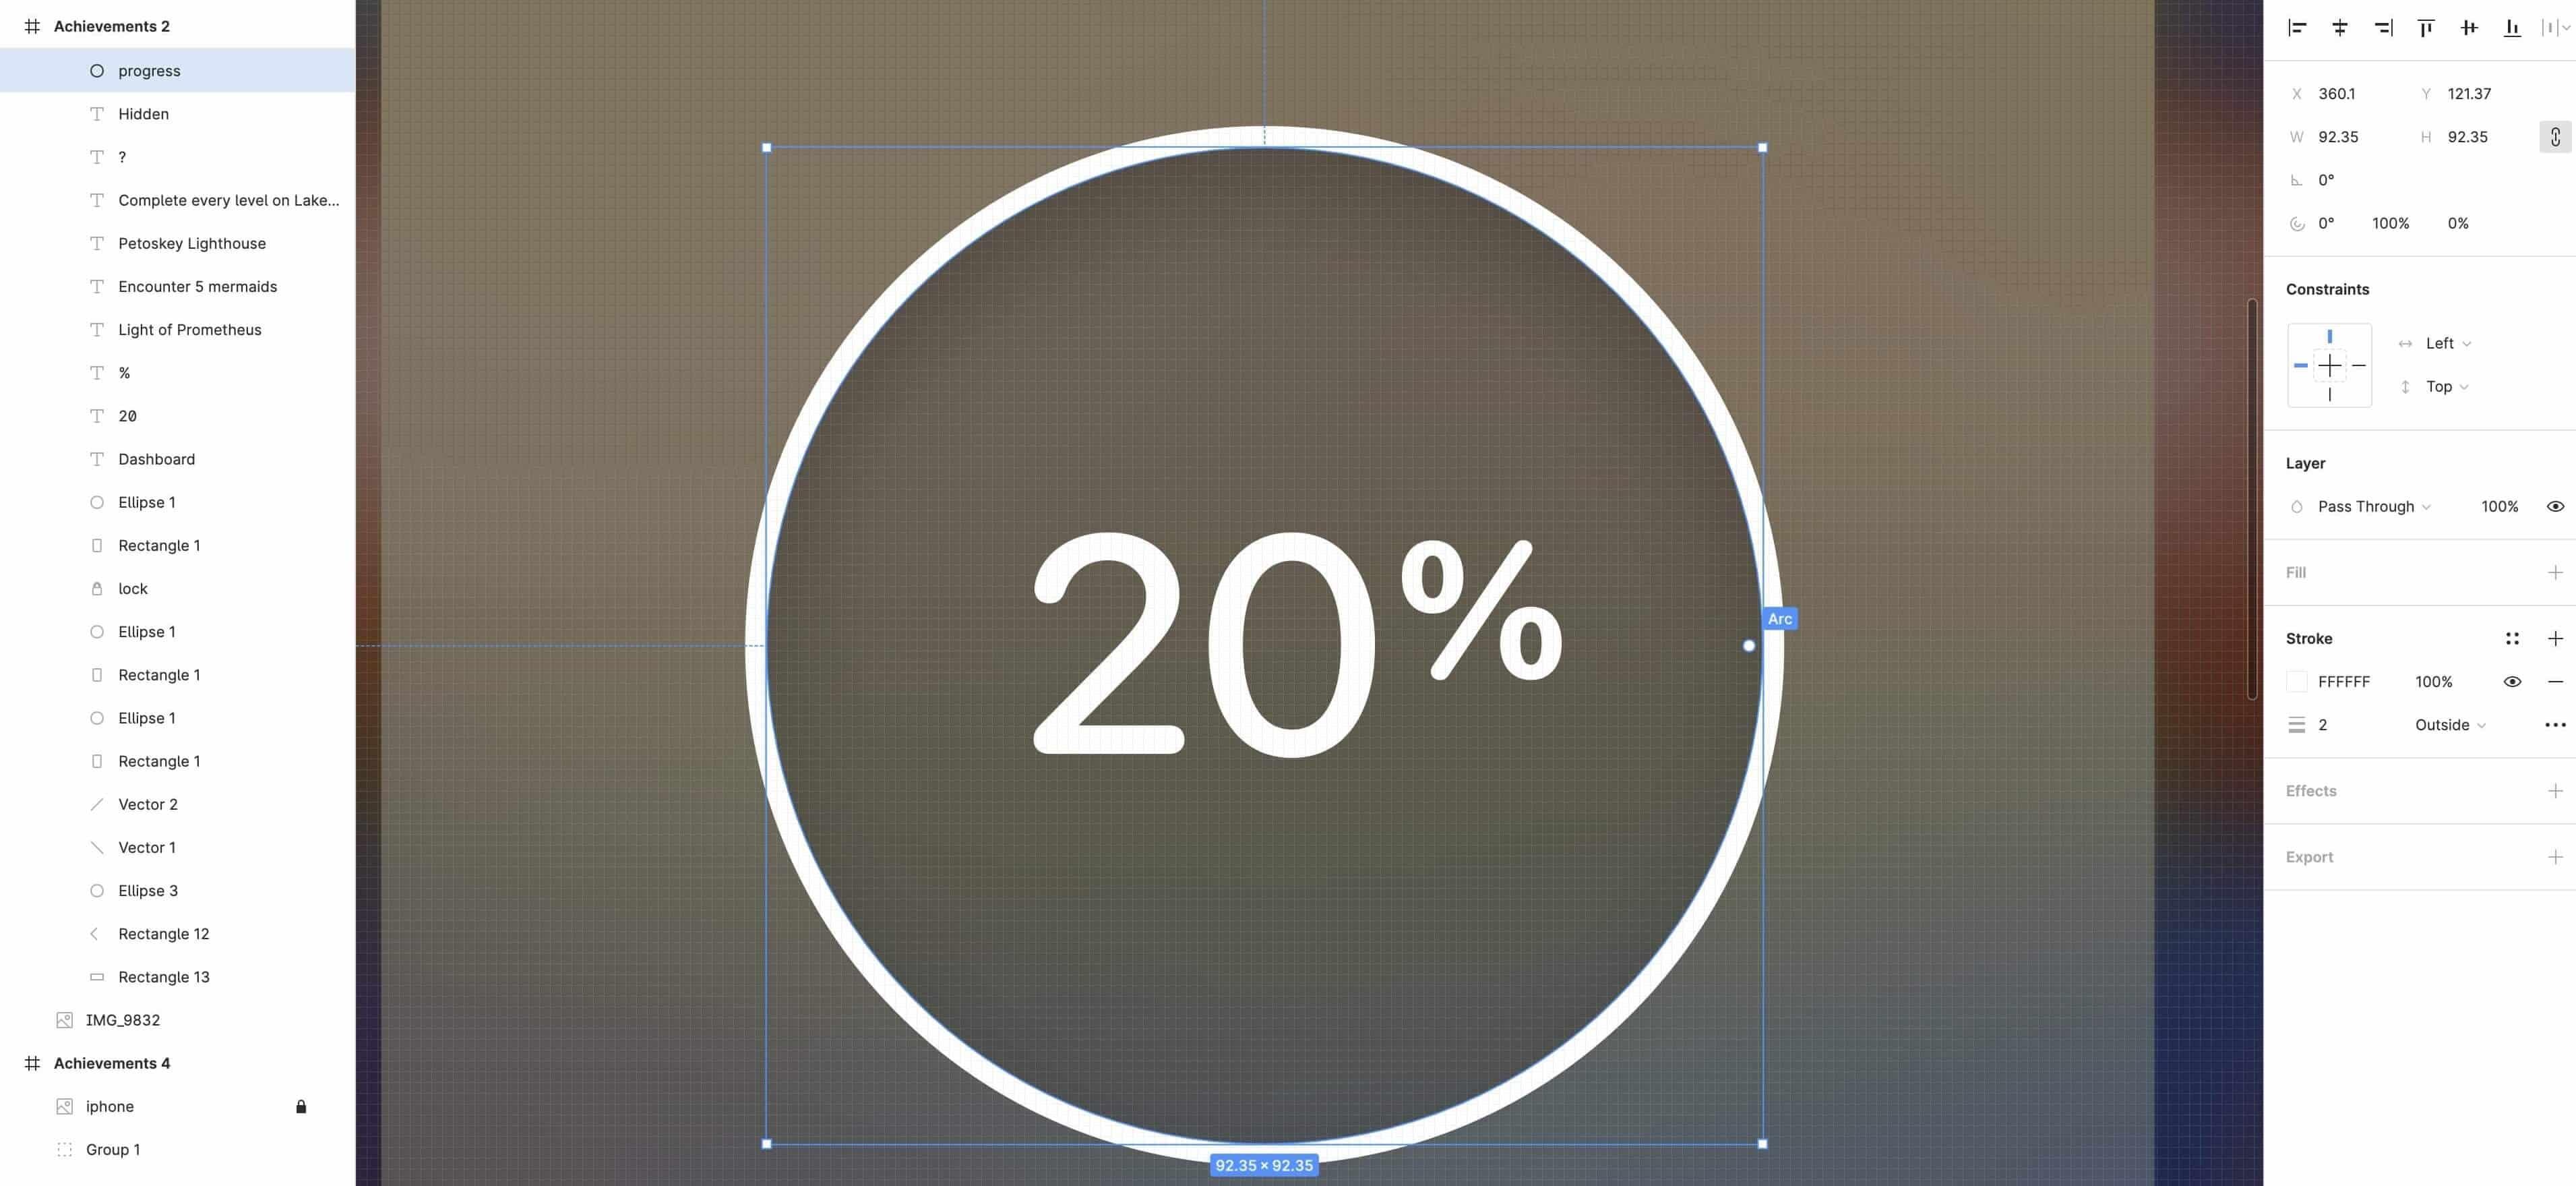
Let's select the progress circle, and give it the following parameters: -90°, 20% and 100%. Then, add an outline pressing Shift+Cmnd+O which will convert the vector into fill. Repeat the same process for the Achievements 2 frame, using these values: -90°, 0.5%, 100%.

Again, repeat the same process for Achievements 3 frame, with the following values: -90°, 10%, 100%. Just like that we can have a full sequence for the circle progress.
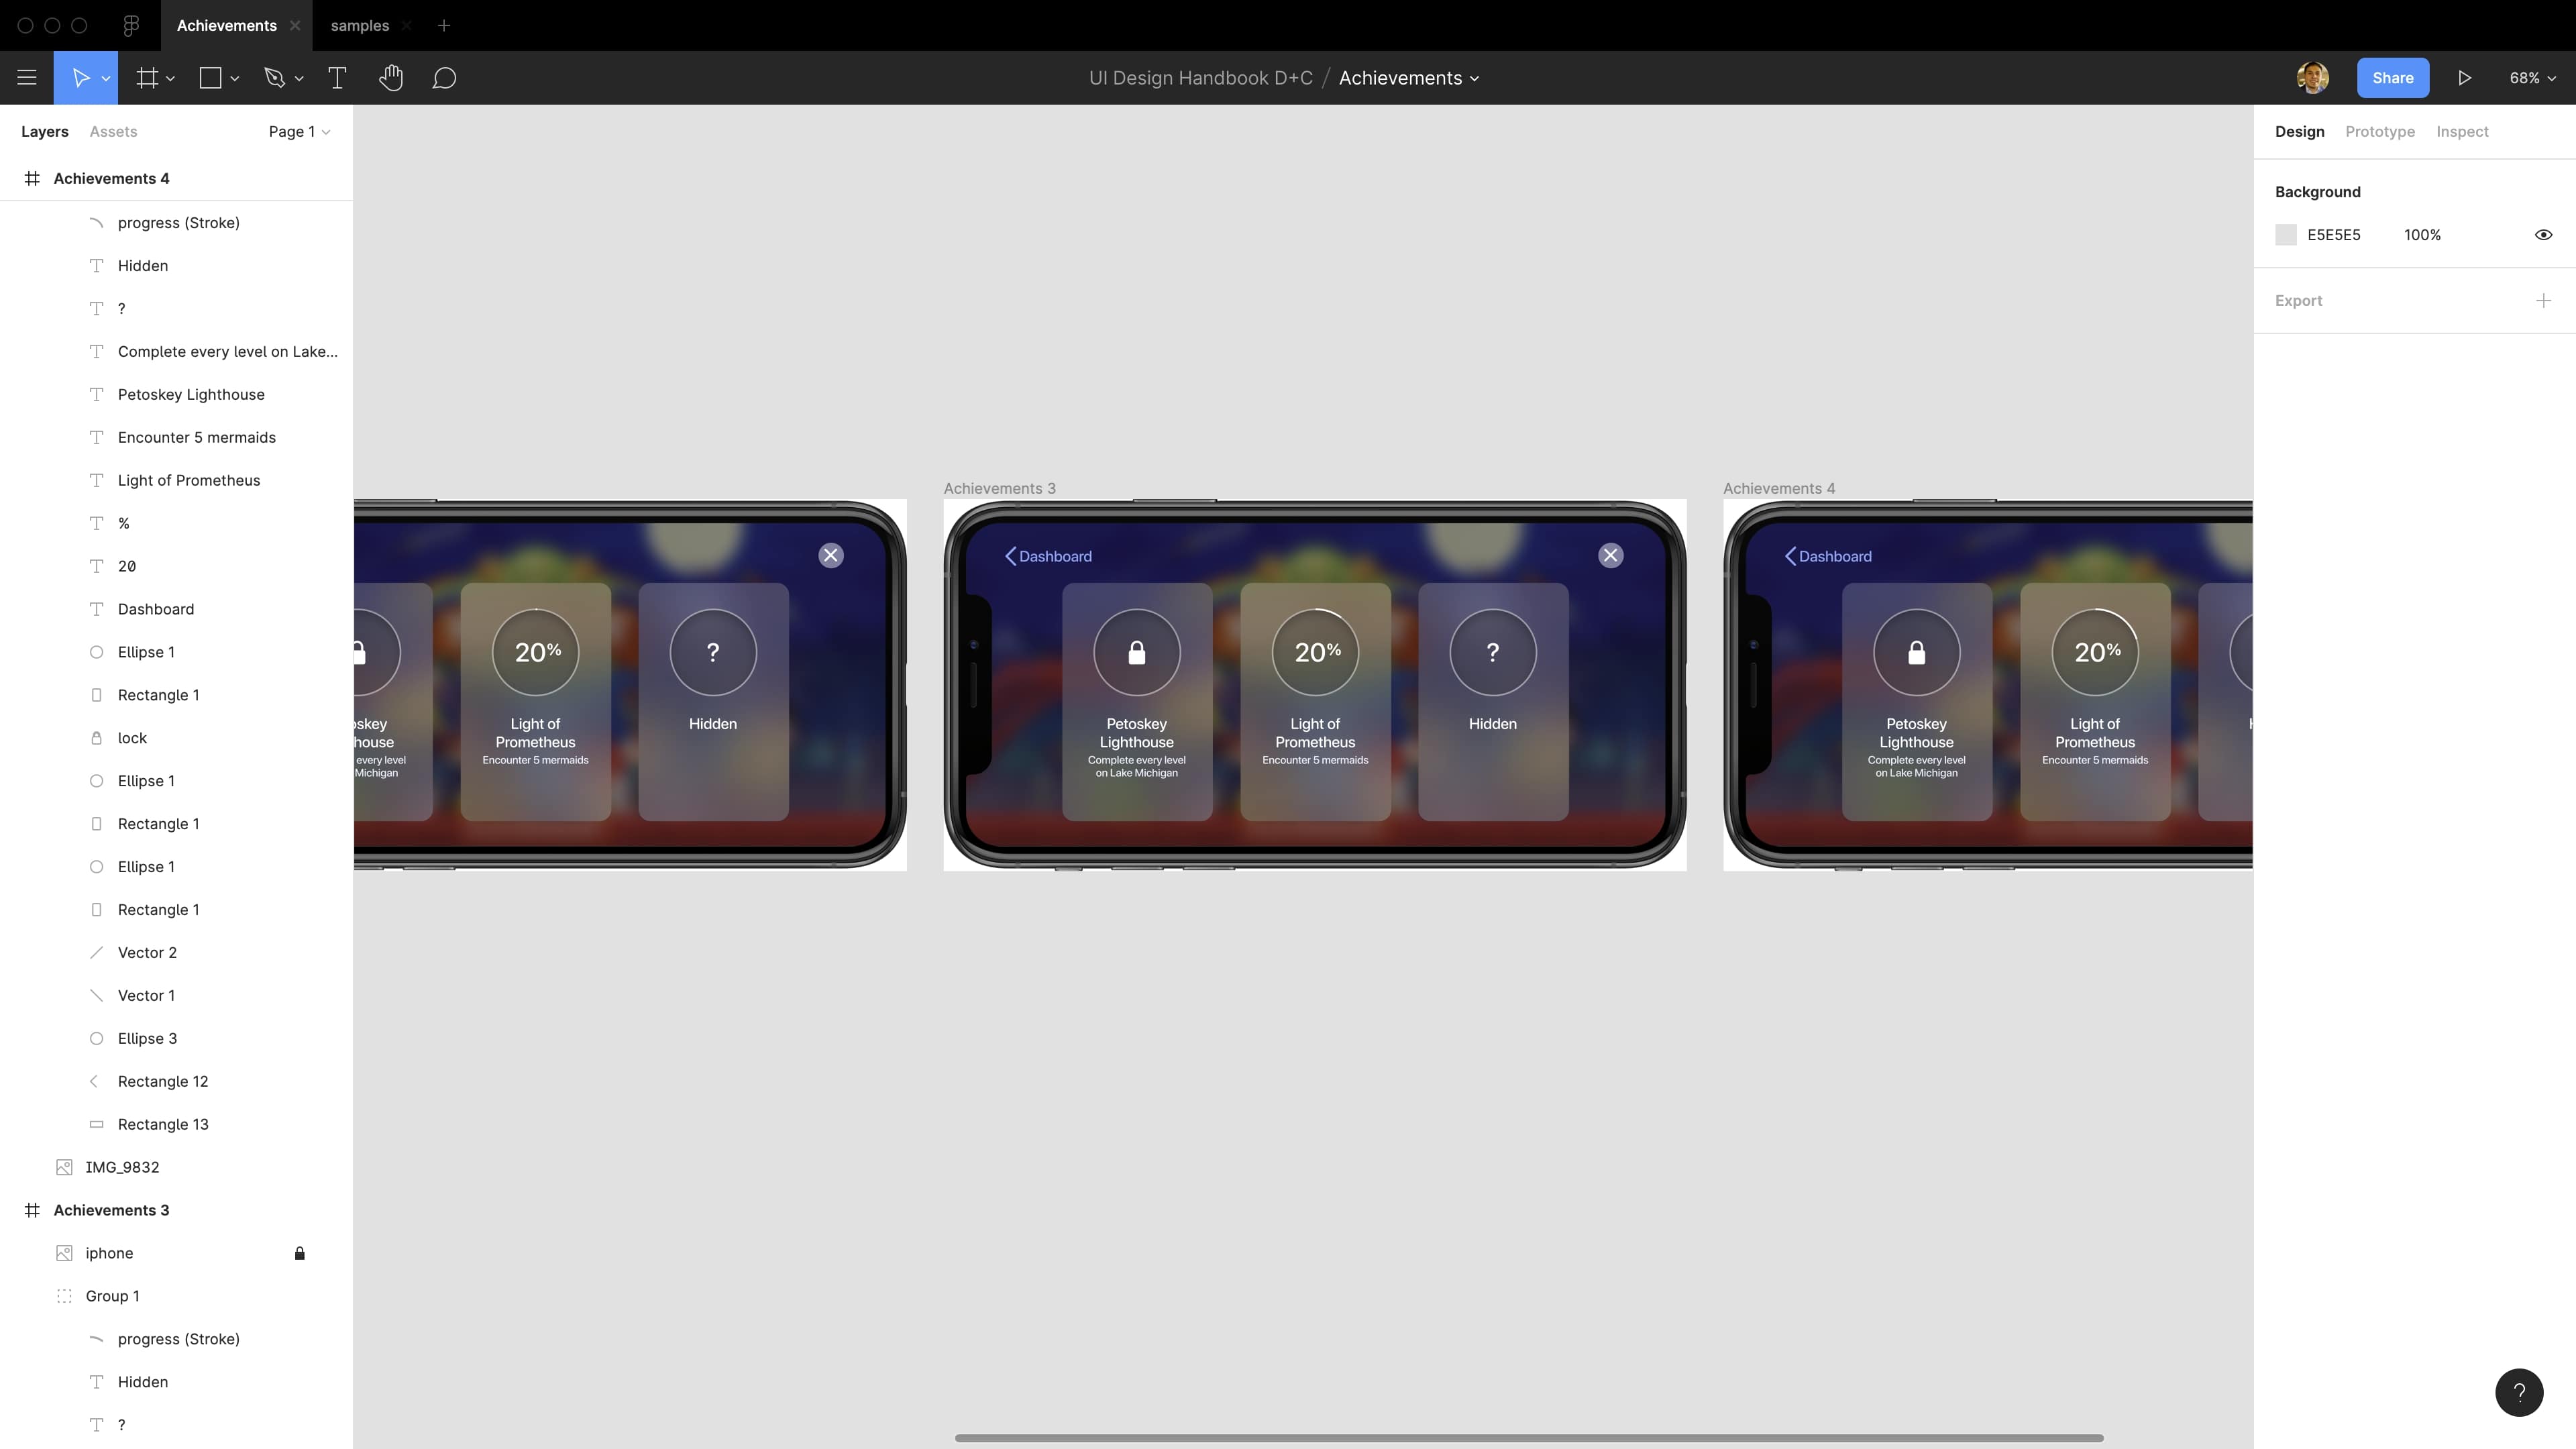
Now, we are ready to import the assets from Figma to Principle. To do so, go to Principle and click on import on the tab bar. Select the Figma tab and hit on Import Page.
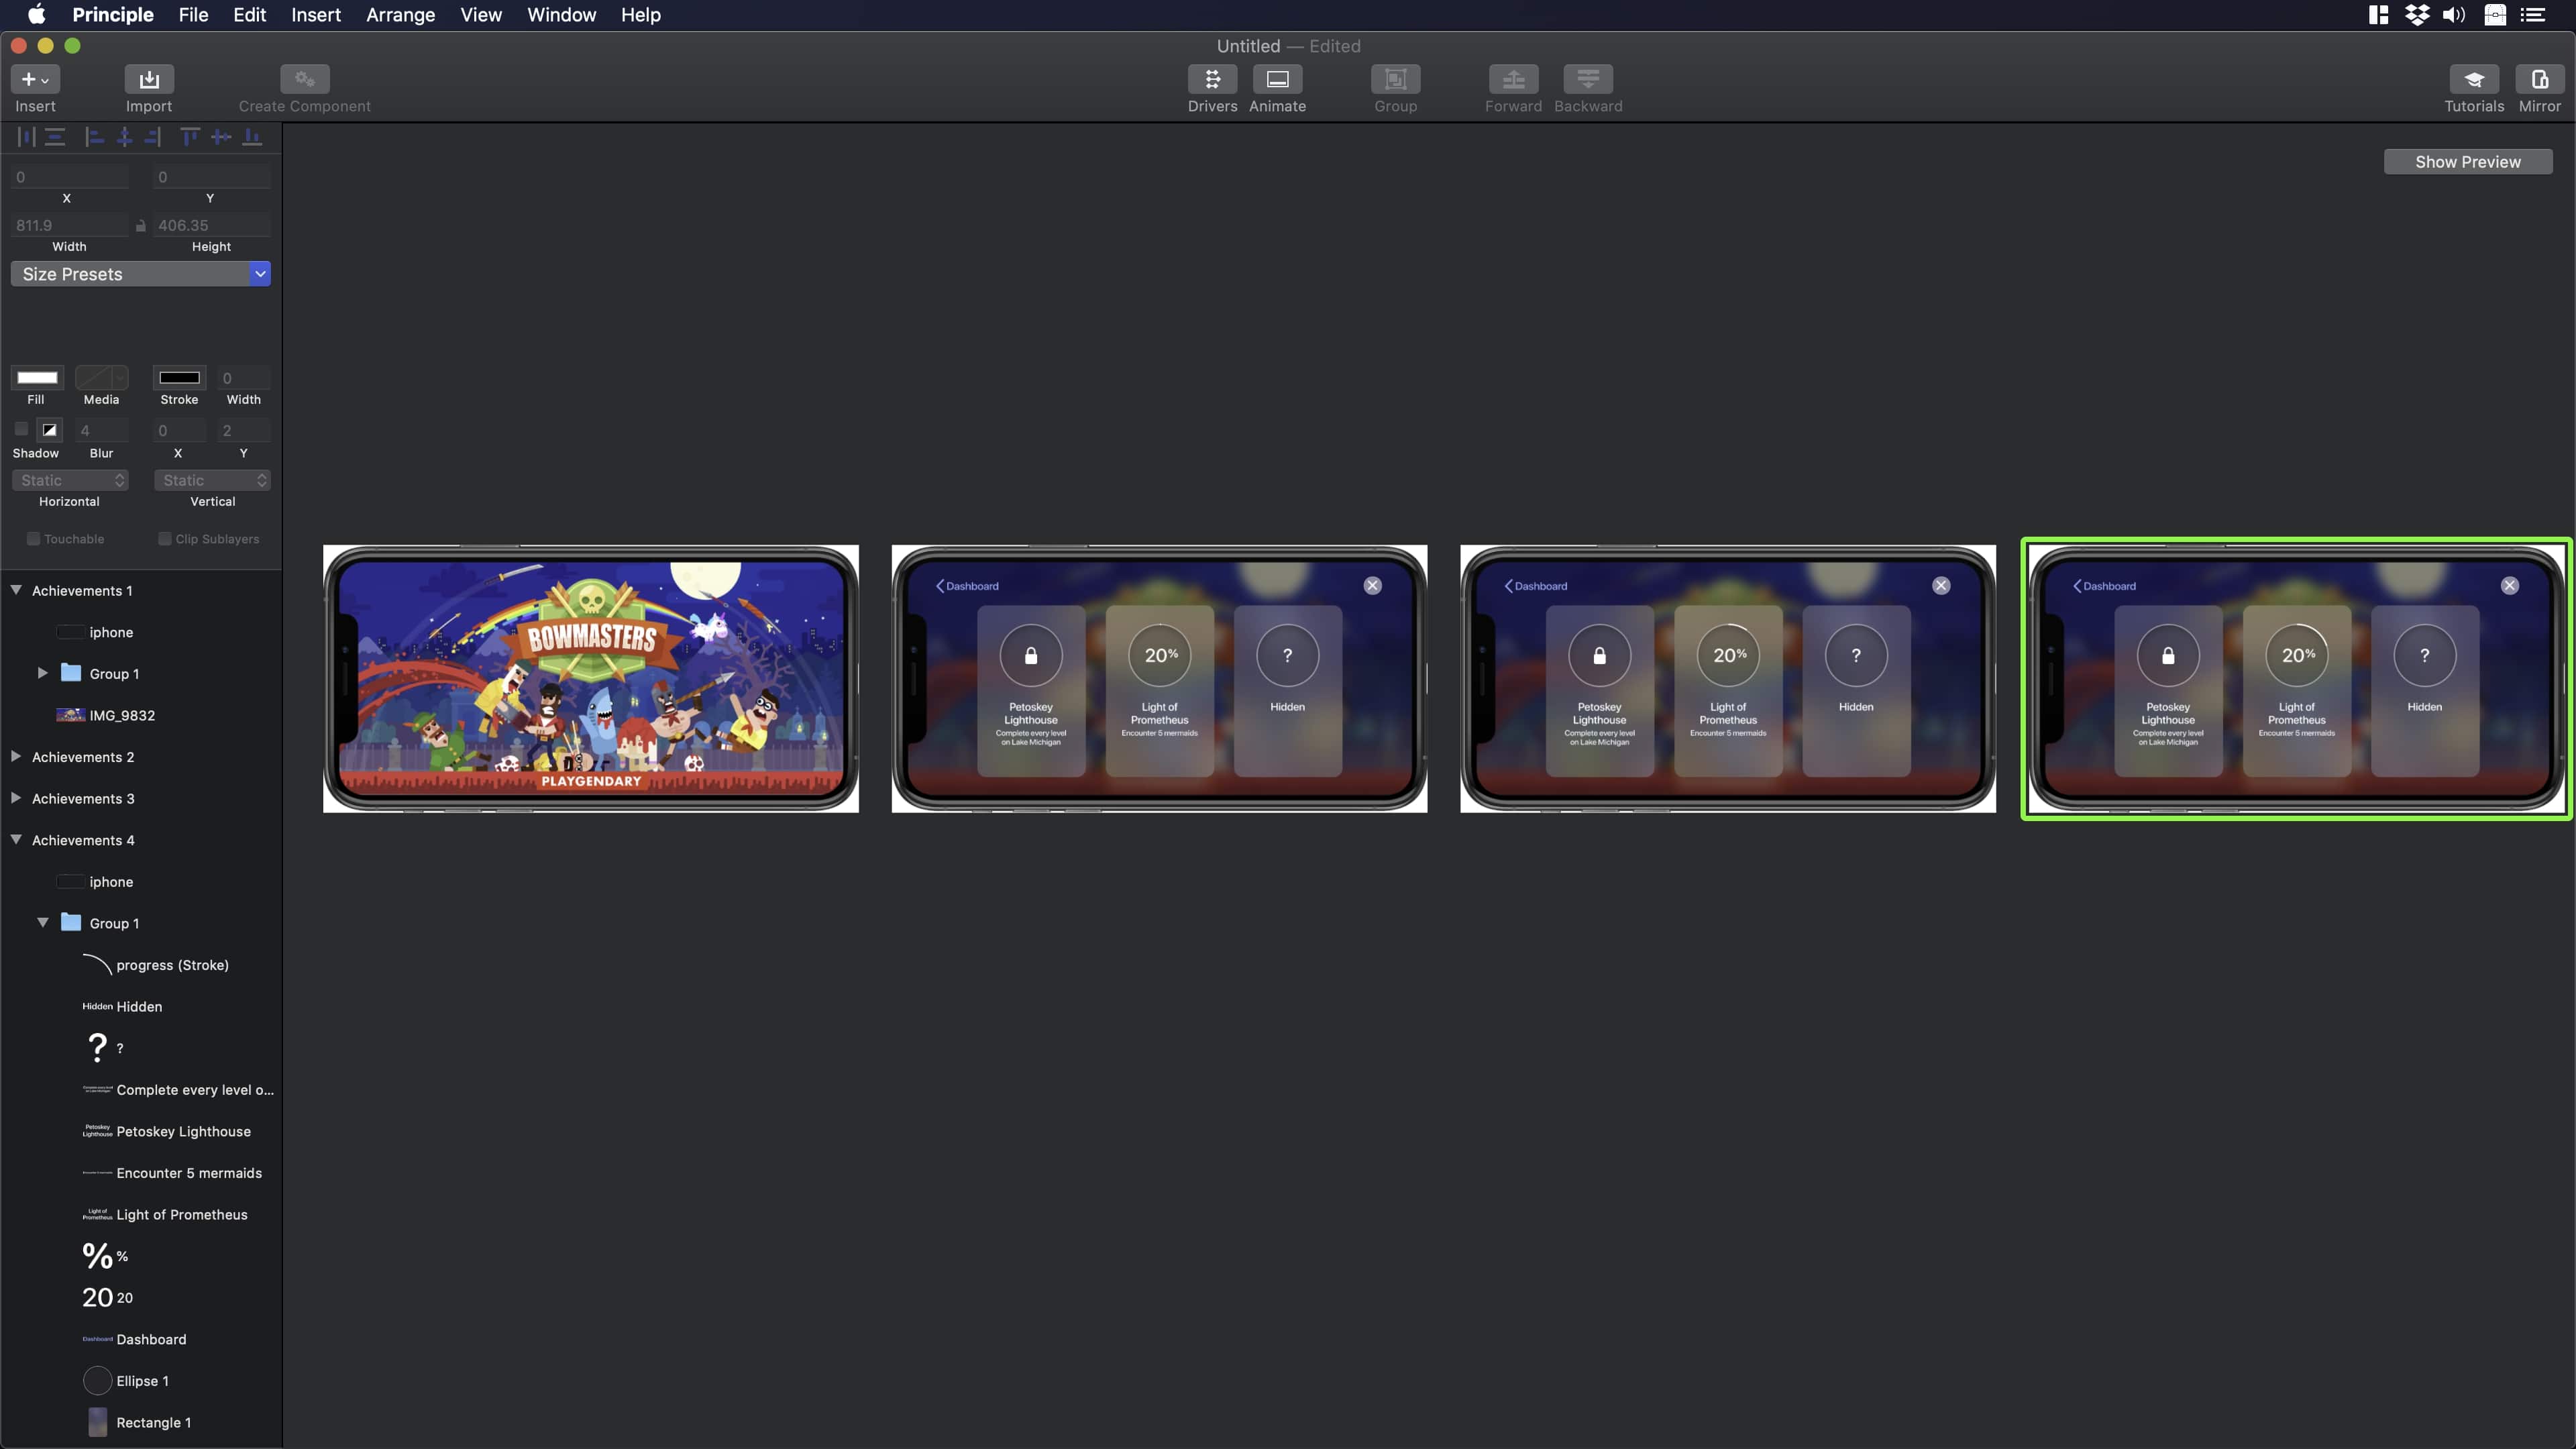
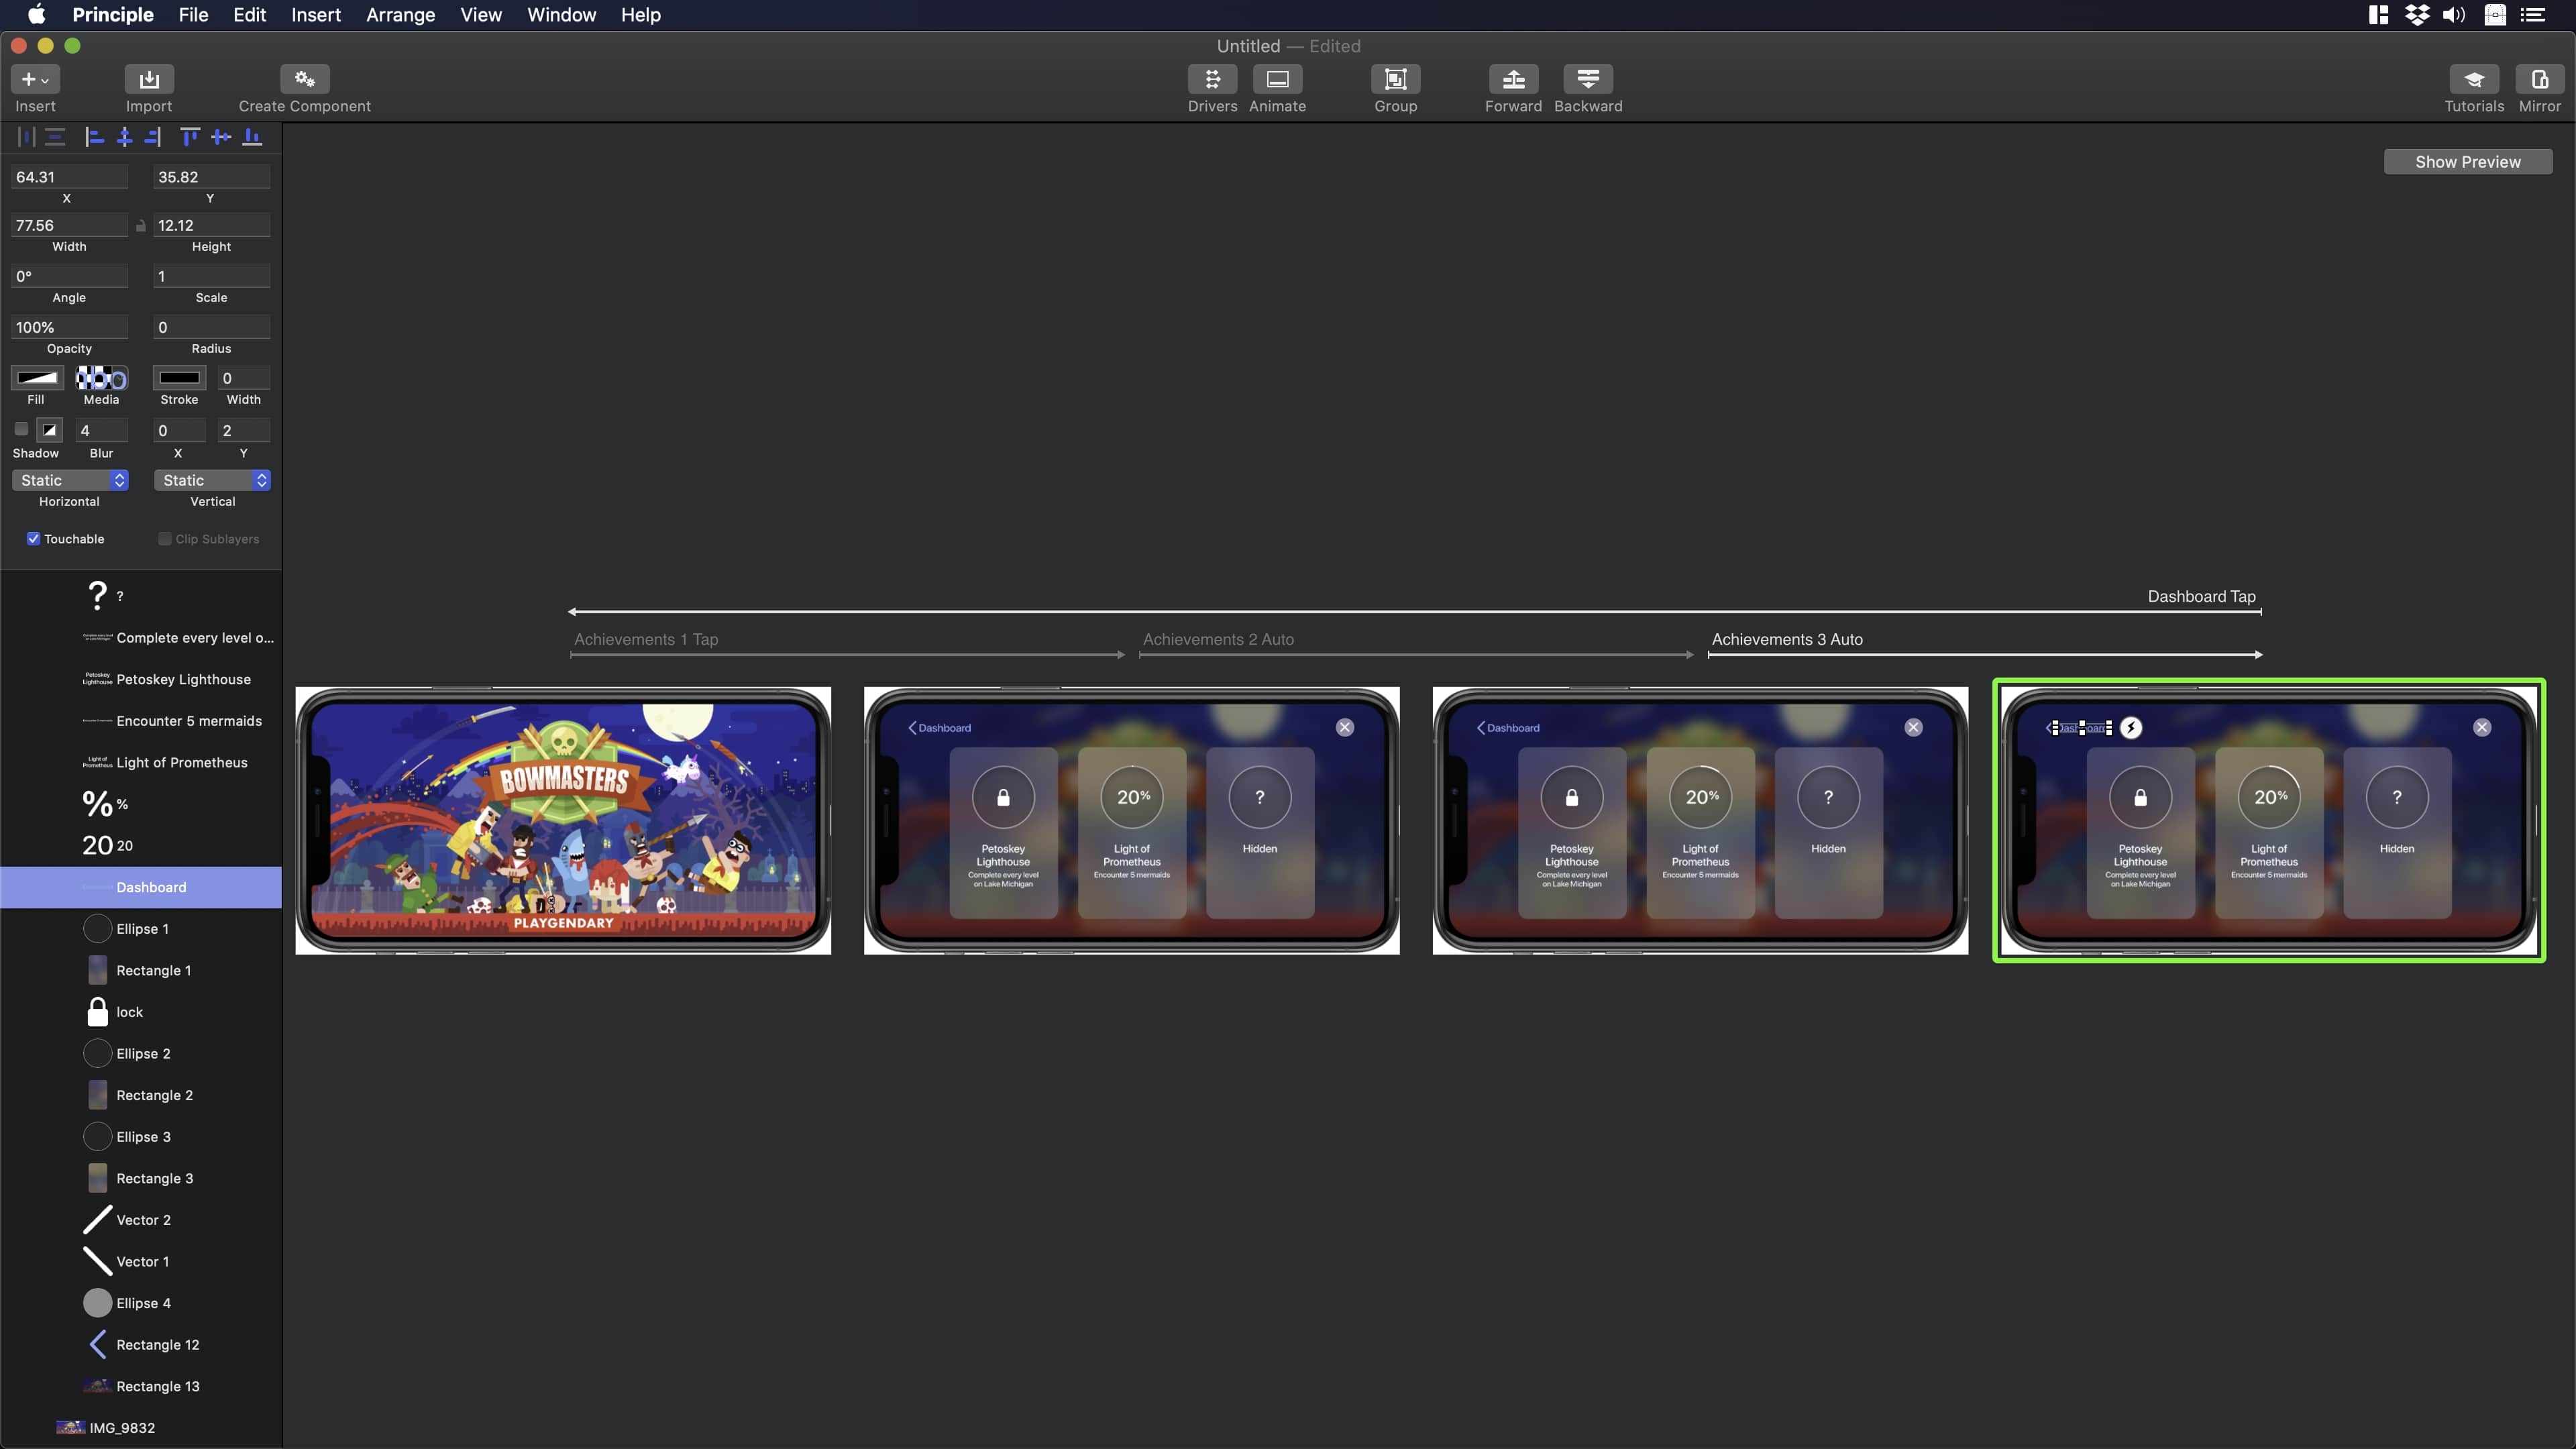
Next, select Achievements 1 and add the Tap action. For Achievements 2, 3 and 4, add the Auto action.

Now, change the type of animation for all the actions to linear as you can see in the image below.
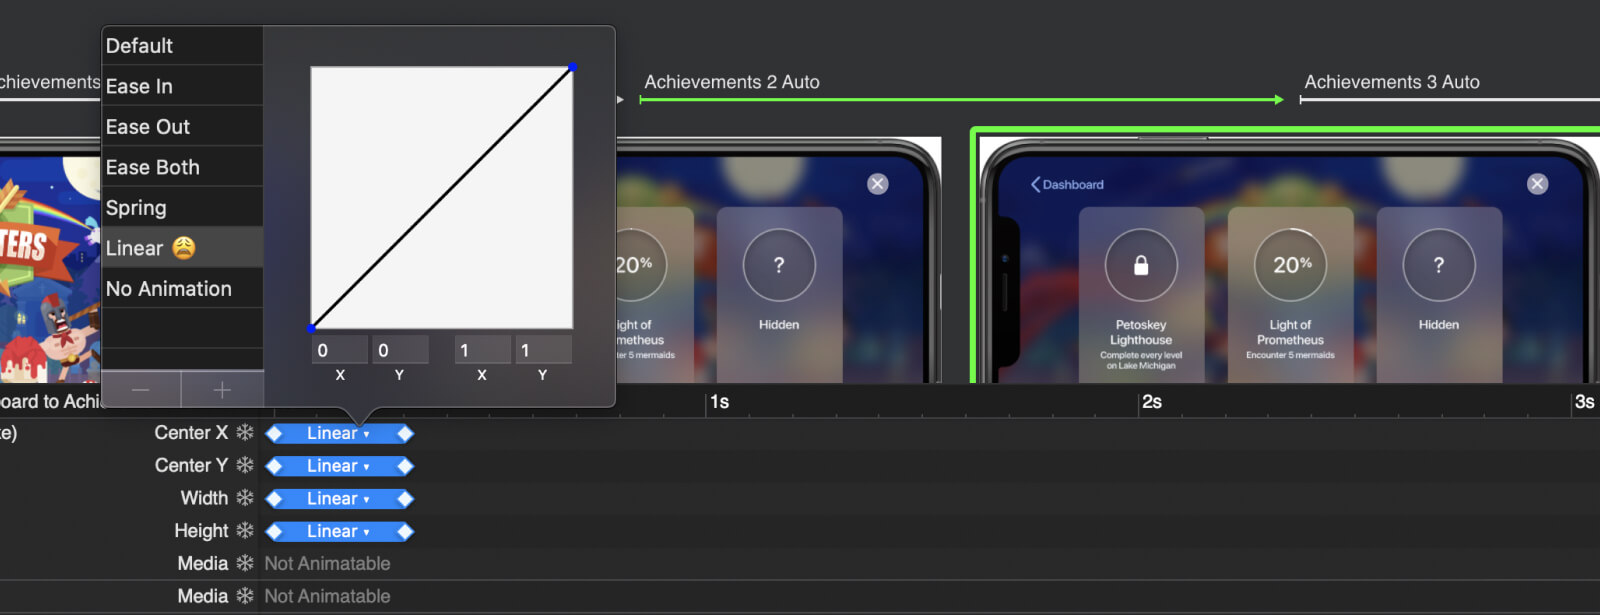
Finally, to close the animation loop in Achievement 4, select the dashboard asset and add a new tap action that will point to Achievements 1.
Conclusion
When you are building games, make sure to integrate Game Center in your game. It will give you some powerful social features that will help create a strong liaison between the game and the player. Achievements, leaderboards and multiplayer experiences encourage the players to be more committed to the game.
Learn with videos and source files. Available to Pro subscribers only.
Purchase includes access to 50+ courses, 320+ premium tutorials, 300+ hours of videos, source files and certificates.
Templates and source code
Download source files
Download the videos and assets to refer and learn offline without interuption.
Design template
Source code for all sections
Video files, ePub and subtitles
Browse all downloads
1
UI Design Aesthetic
Learn about UI design aesthetics.
3:52
2
Design for accessibility
Learn about accessibility in design.
1:59
3
Localization
Read more about the importance of localization.
1:14
4
Color Selection
Select colors for your projects
5:06
5
Pick Fonts
Select the most suitable fonts for your design.
3:35
6
Font Managers
Manage your fonts more efficiently.
2:06
7
Icon Organizer
Organize your icons in a better way.
2:59
8
UI Sound Design
Importance of sound in UI design
4:25
9
Stock Images
Find the right images for your UI
1:29
10
Image optimization
Optimize your images to improve performance.
1:46
11
Illustrations
Add illustrations to your design project
1:38
12
Realistic Mockups
Resources to add realistic mockups to your design.
2:47
13
UI 3D Assets
Work with 3D assets in your design projects
2:29
14
Introduction to Animations
Learn about basic animations in UI design.
5:09
15
UI Animation Resources
List of tools and resources for UI animation.
1:45
16
Apple Watch Faces
Create customizable watch faces for the Apple watch
2:06
17
Designing for Apple Watch
Getting started with Apple Watch Design
4:24
18
Designing for Apple TV
Learn the basics steps to design for Apple TV
1:58
19
Design for Game Center
Learn how to design for Game Center
3:43
20
Designing for CarPlay
Learn the basics of designing for CarPlay
1:37
21
Designing App Clips
Learn how to design app clips for iOS
7:05
22
Designing Widgets
Design widgets for your applications.
3:29
23
Design Systems
Create design systems for a better workflow.
1:27
24
UI Kits
Learn more about UI Kits and where to find them.
3:33
25
Prototyping Tools
Learn about prototyping tools.
3:22
26
Voice prototyping
Take a look at voice prototyping.
2:14
27
Prototyping with Code
Read more about prototyping with code.
3:01
28
Turn your Designs into Code
Learn how to turn your Designs into Code.
2:18
29
Version Control Tools
Share and synchronize your files with your team
2:12
30
Developer Handoff
Learn more about developer handoff.
1:05
31
Color Theory
Understand color theory to select the best color themes for your application.
10:35
32
Dark Interfaces
Add dark mode to your application.
3:53
33
Icons
Learn more about UI icons.
10:32
34
Background Patterns
Create beautiful background patterns.
5:41
35
Typographic Scales
Learn more about typographic scales.
2:40
Meet the instructor
We all try to be consistent with our way of teaching step-by-step, providing source files and prioritizing design in our courses.
Daniel Nisttahuz
Senior Product Designer at Design+Code
Motion Designer @Design+Code
7 courses - 12 hours

UX Design Handbook
Learn about design thinking, with exercises. Free tutorials for learning user experience design.
2 hrs

UI Design Handbook
A comprehensive guide to the best tips and tricks for UI design. Free tutorials for learning user interface design.
2 hrs

Create a Promo Video in After Effects
In this course we will show you how to create a promo video using After Effects.
2 hrs

Animating in Principle
Learn how to animate interactive user interfaces from Figma to Principle. Get to design the app flow for multiple screens, interactions, and animations. At the end of the course, you will have a beautiful prototype that you can share with stakeholders.
1 hrs

Video Editing in ScreenFlow
Learn different techniques, transitions actions and effects to edit a video using Screeflow
1 hrs

Motion Design in After Effects
Learn animation and motion design with After Effects
3 hrs

Learn iOS 11 Design
Learn colors, typography and layout for iOS 8
1 hrs
