3D Shapes and Materials
Add to favorites
Creating a 3D Icon in Spline: a step-by-step guide
Play video
3D UI Interactive Web Design with Spline
1
Introduction to Spline
10:24
2
3D Shapes and Materials
9:45
3
Weather Icon and Sculpting
13:29
4
Icon Animation
9:27
5
Path Animation
9:35
6
Waves Animation
15:33
7
3D Card with Parallax
9:57
8
Button Components
11:41
9
Screen Resize Adaptive Layout
10:43
10
Tab Bar Animation
21:23
11
UI Charts and Variables
16:54
12
Scroll Interaction and Scenes
9:18
13
Export to USDZ and Optimizations
9:28
14
Publish to 3D Site
3:48

Using 3D Icons
3D icons, like the one you've just created, can be used in various digital contexts to enhance user interaction and experience. Here are a few insights on where to use your new 3D Wi-Fi icon:
- Web and Mobile Applications: 3D icons can add depth and interactivity to your user interfaces. They can be particularly effective in applications where user engagement is key, such as gaming apps, productivity tools, or educational platforms.
- AR/VR Experiences: If you're developing augmented reality (AR) or virtual reality (VR) experiences, 3D icons can play a significant role. They can be used as interactive elements within the VR/AR environment, providing a more immersive experience for the user.
- Website Design: 3D icons can make your website stand out, giving it a modern and innovative look. They can be especially effective when used in the hero section of your website, or in interactive infographics.
- Presentation and Data Visualization: 3D icons can be used to add depth and clarity to presentations, especially when depicting complex data. They can make your presentations more engaging and easier to understand.
Remember, the key to effectively using 3D icons lies in balance. While they can add a unique depth and style to your designs, overuse can lead to visual clutter. Always consider the functionality and aesthetic of your overall design when incorporating 3D elements.
Creating the Basic Shapes
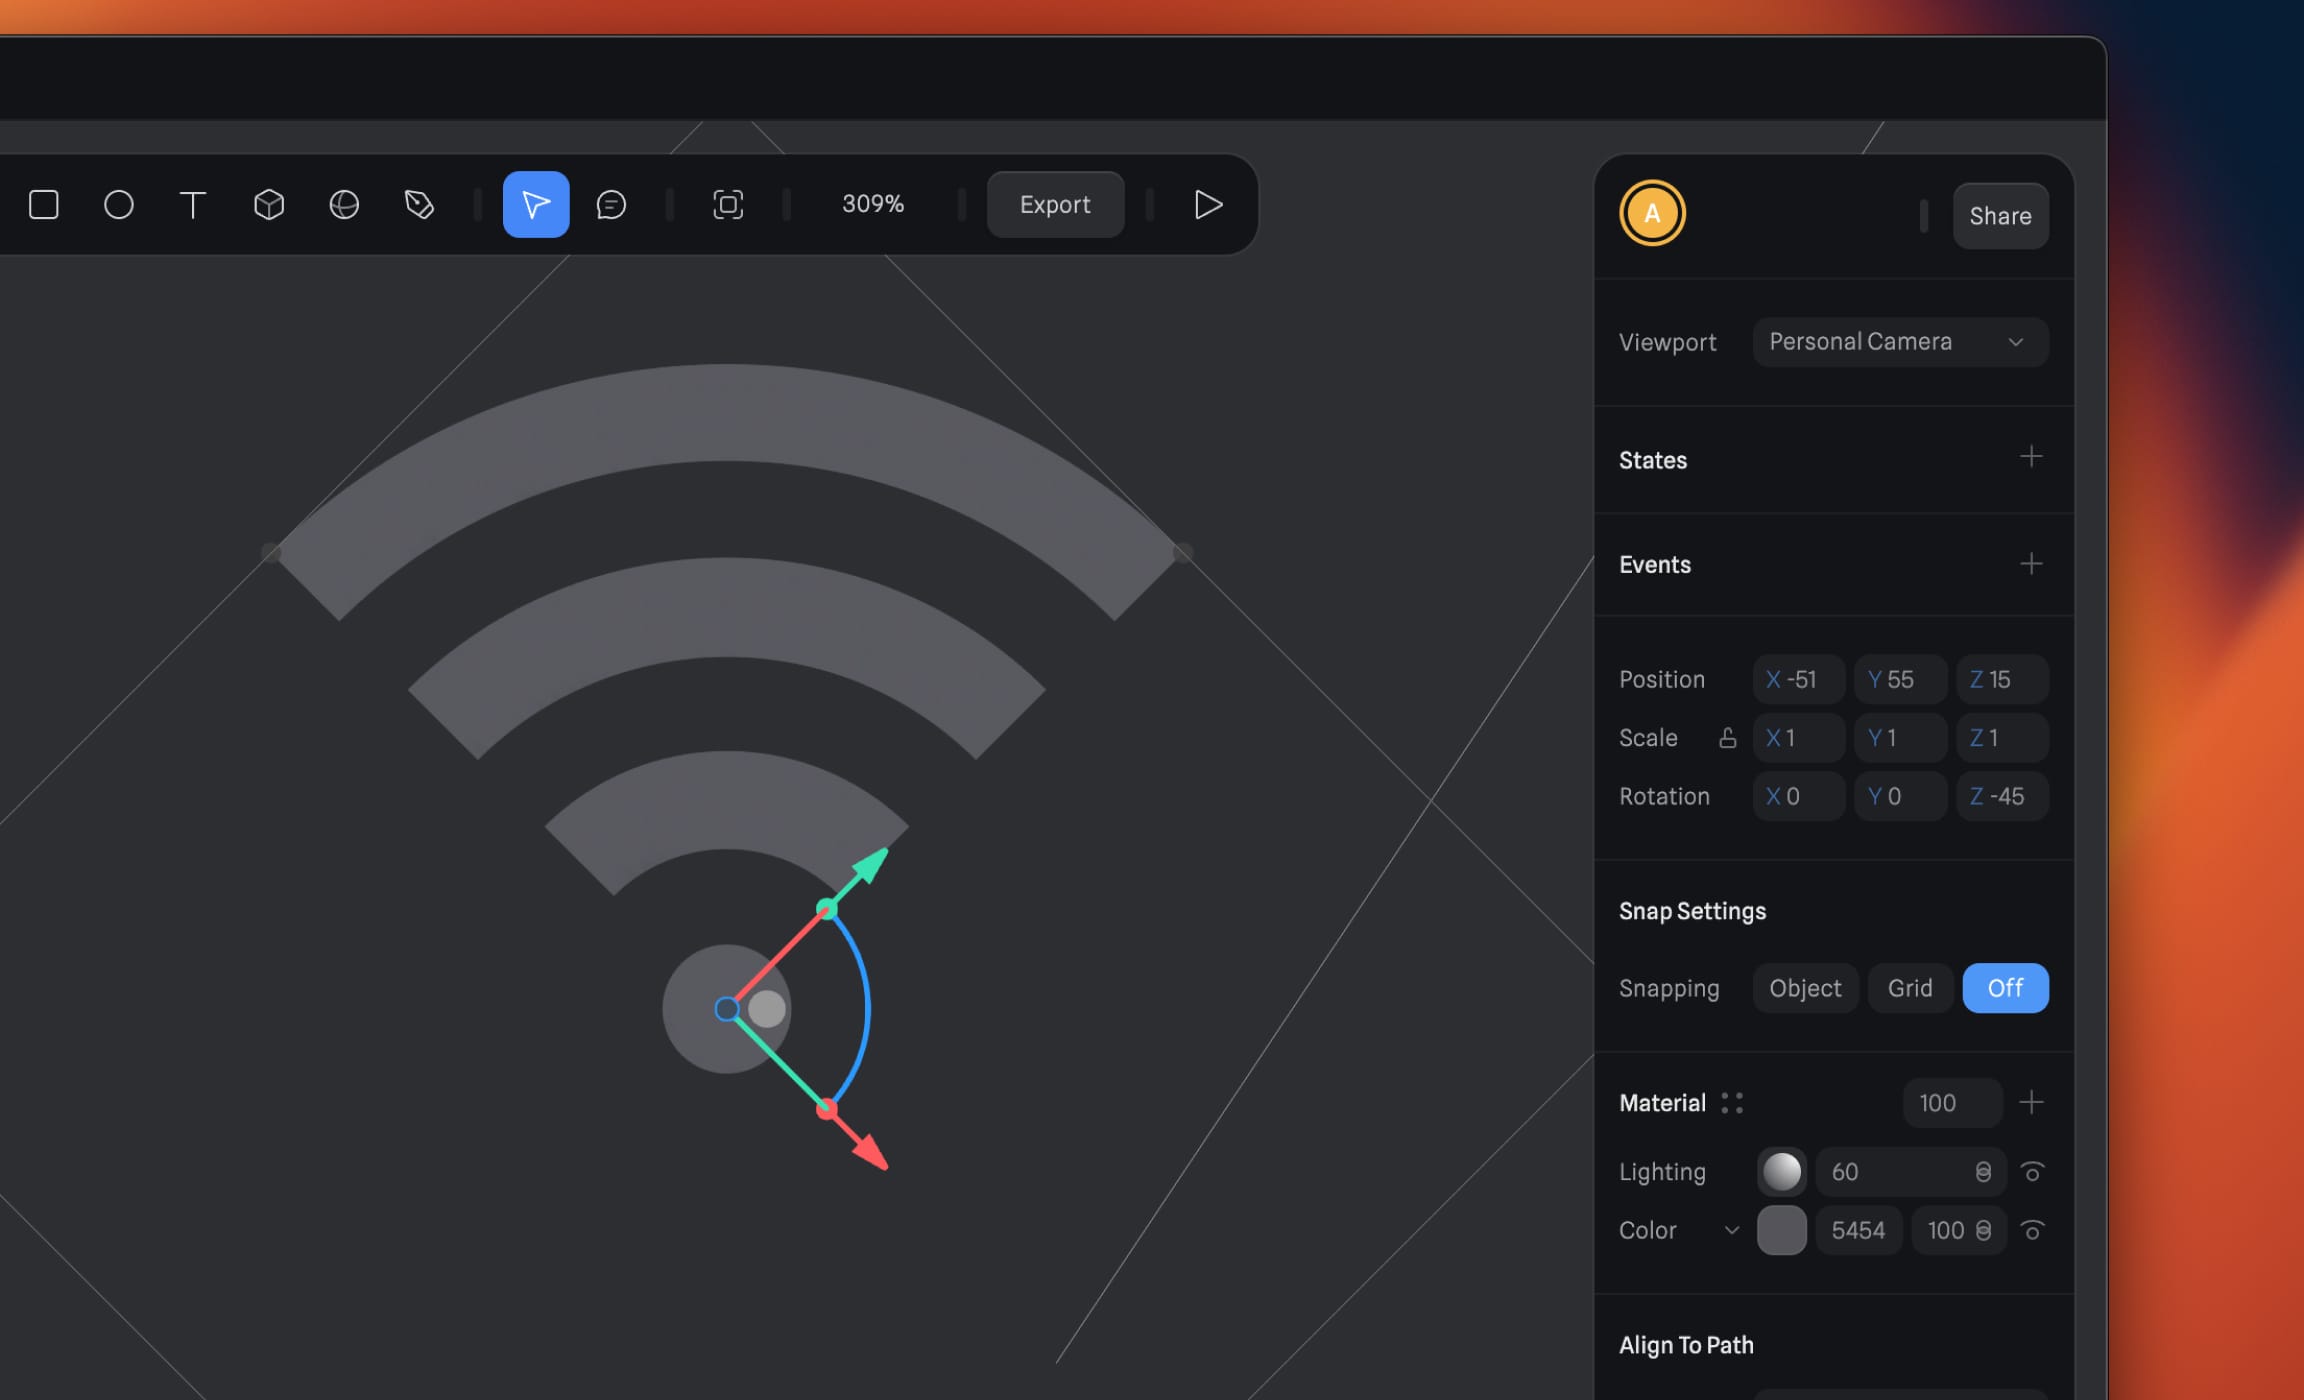
The first step is to create a new project in Spline and start building the main body of our Wi-Fi icon using circles.
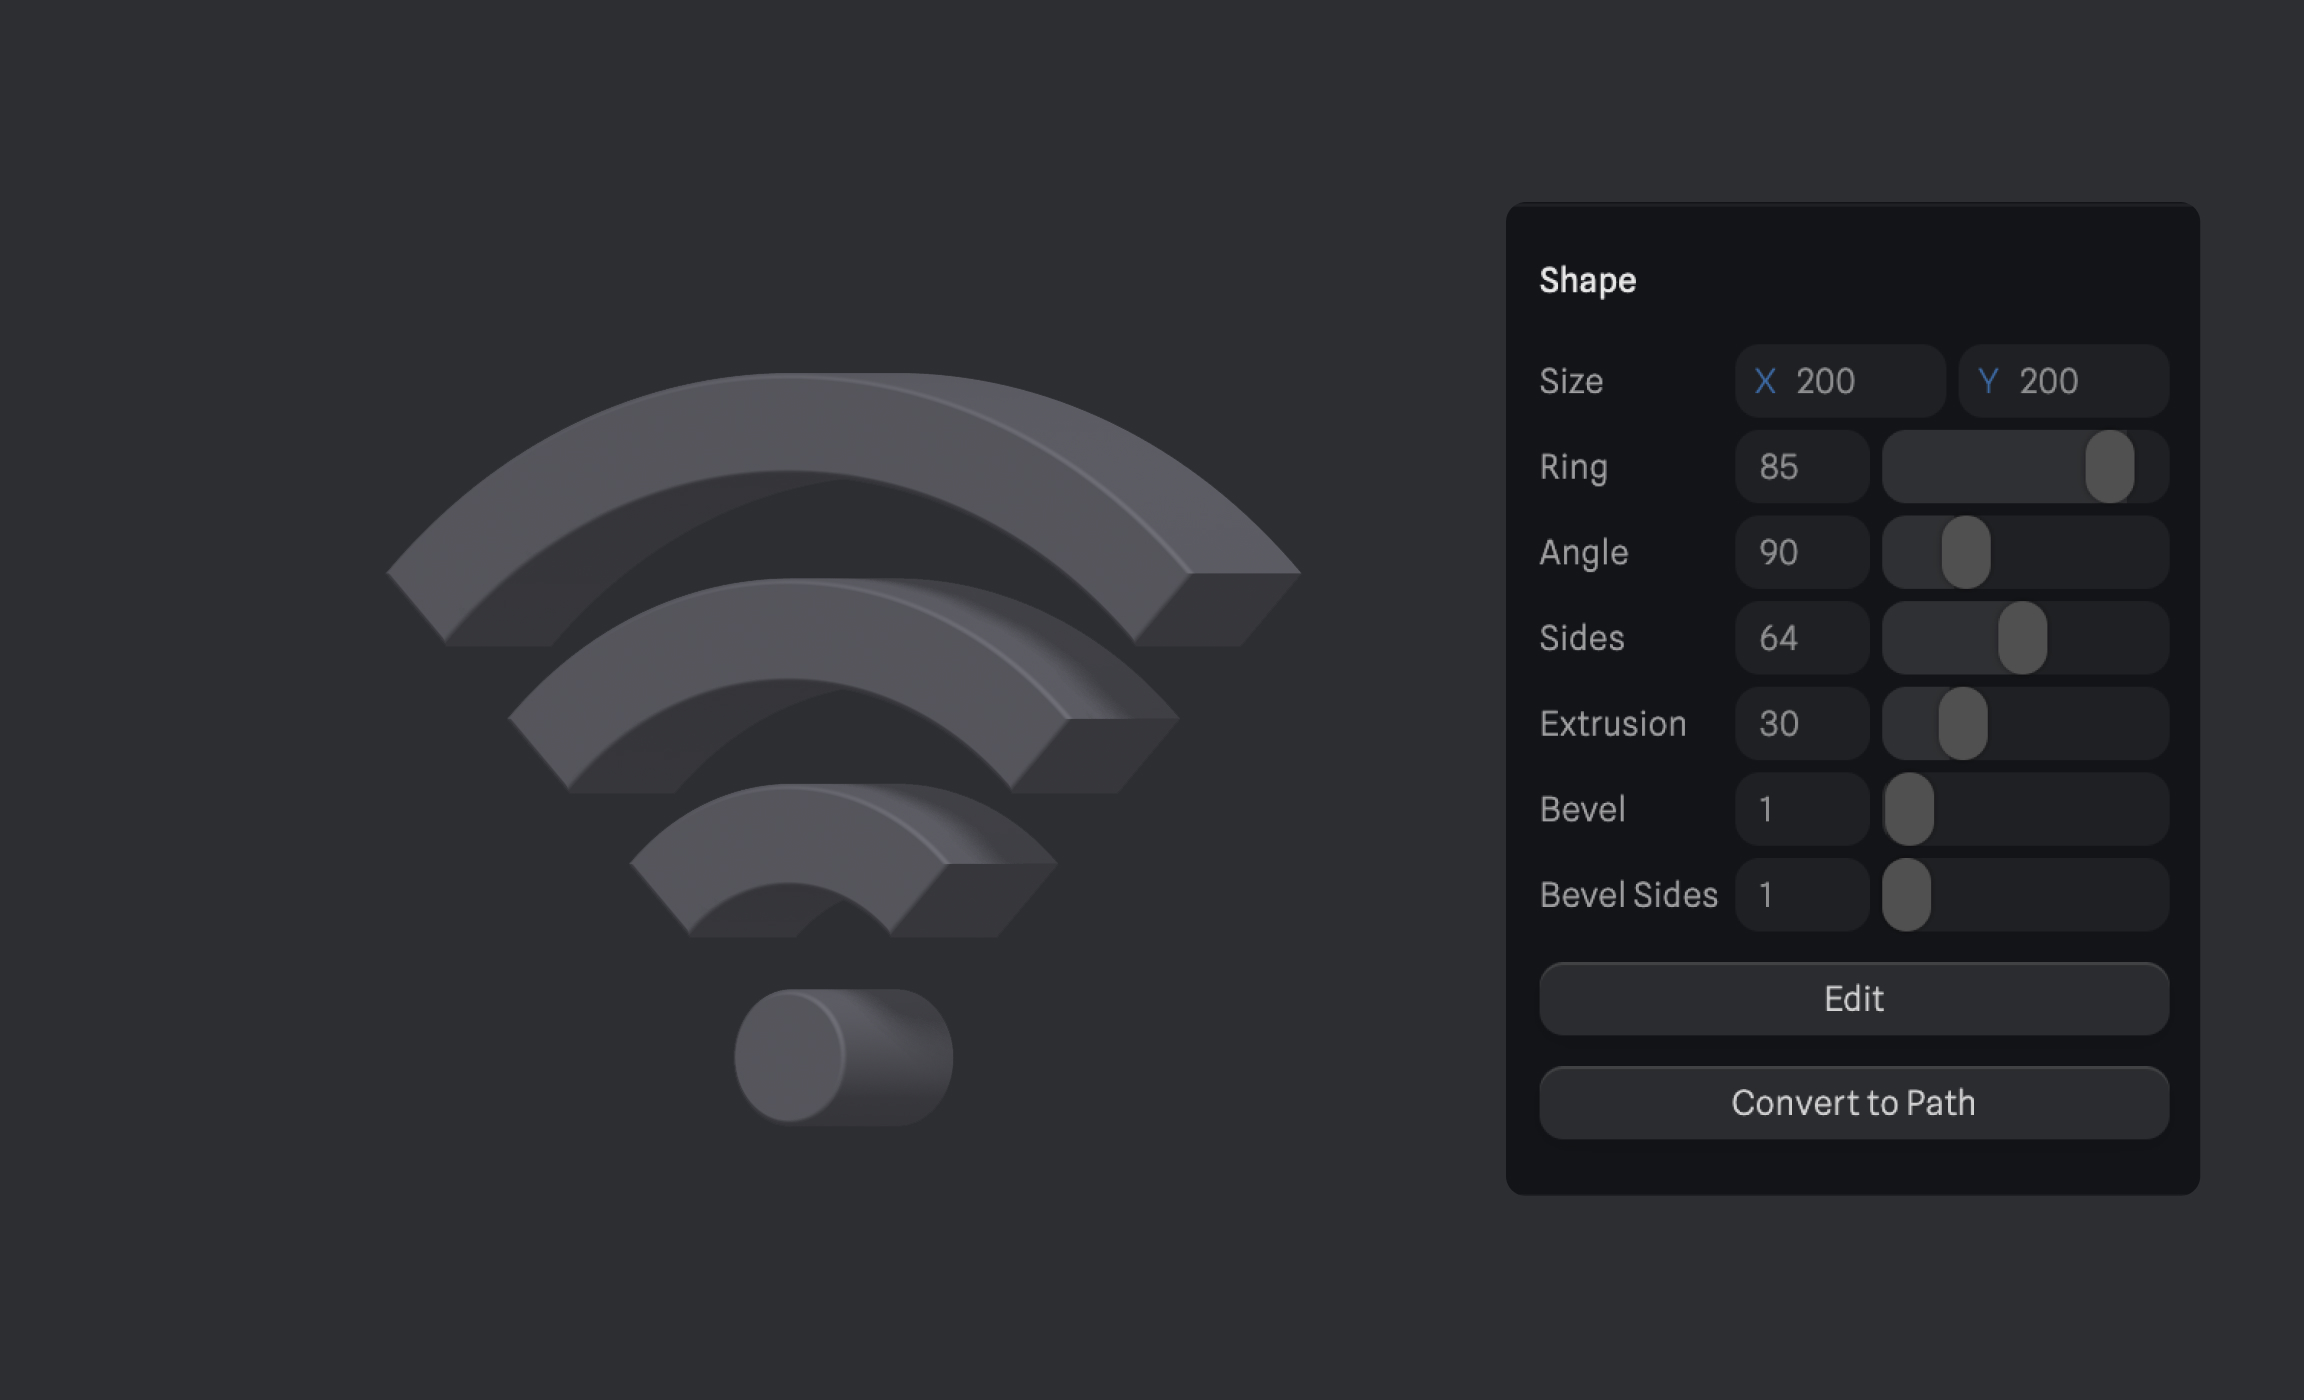
- Start with a circle, set the size to X200, Y200, adjust the ring value to 85, and set the angle to 90 degrees. Extrude it by 30 units to add depth.
![3D Shapes and Materials image 2]()
- Duplicate the first circle, adjust its size to X140, Y140, and set the ring to 78.
- Duplicate the second circle, reduce its size to X80, Y80, and adjust the ring to 62.
- Finally, duplicate the third circle, set its size to X20, Y20, set the ring to 0, and change the angle to 360 degrees.
- Group the circles and rotate them on the Z-axis by minus 45 degrees.
![3D Shapes and Materials image 3]()
- Select all the circles and change the bevel to 1 to give them a softer edge.
![3D Shapes and Materials image 4]()
Creating a Rectangle
Next, create a rectangle, and fine-tune it to achieve the desired aesthetics.
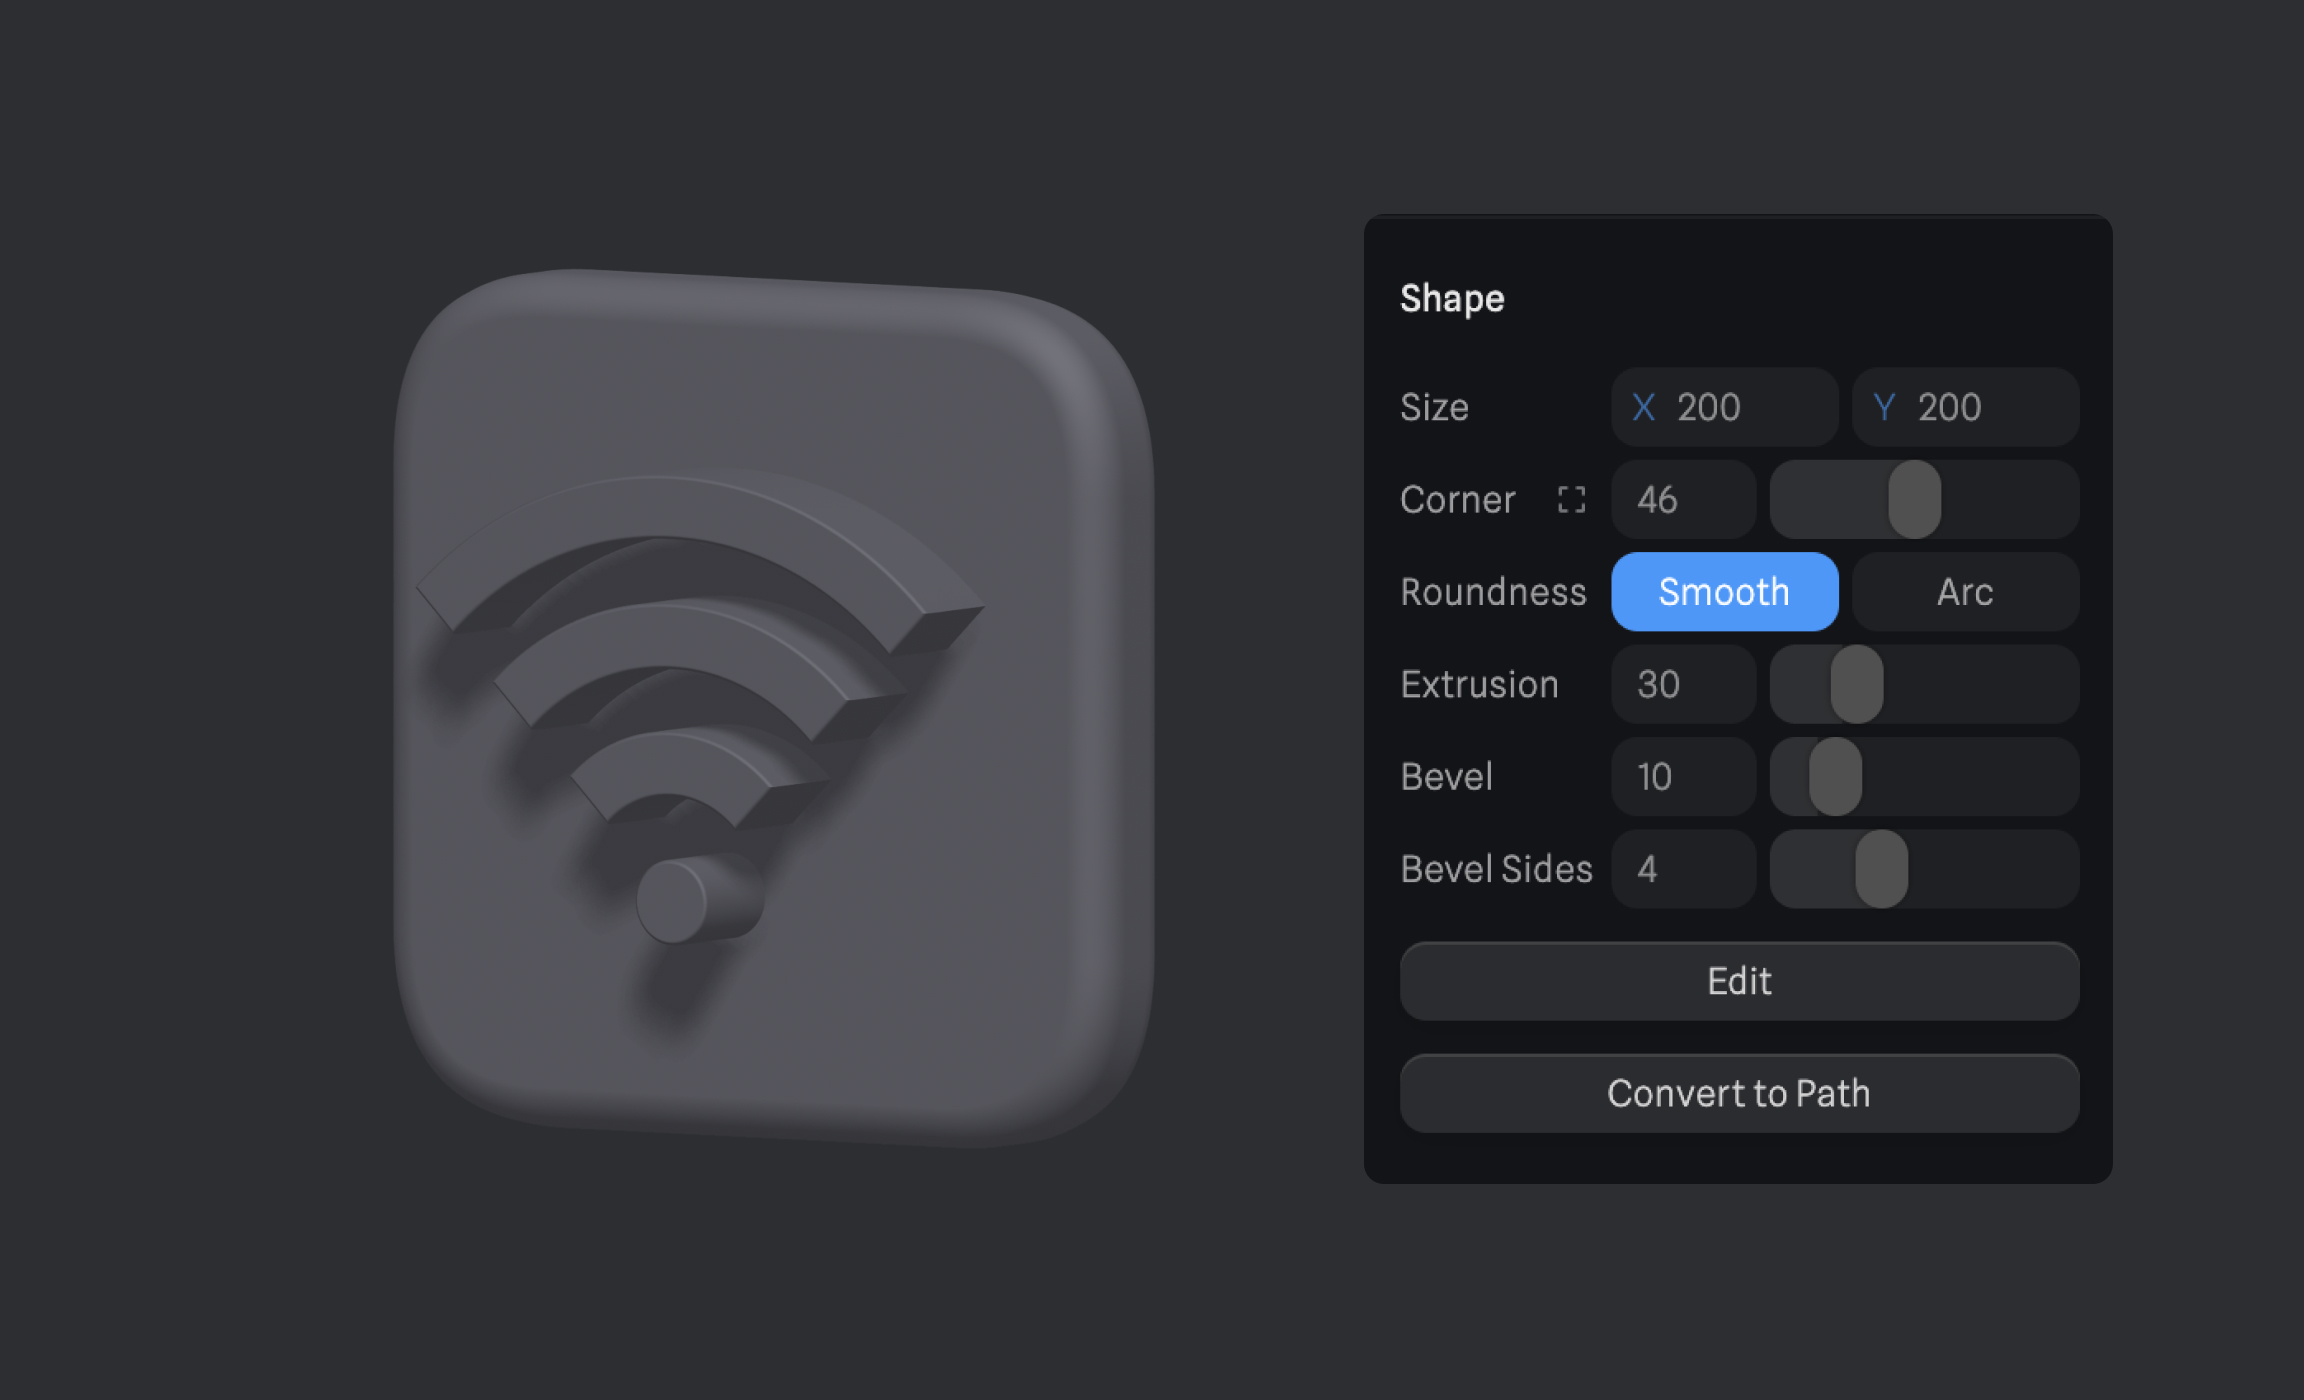
- Start by creating a rectangle with the dimensions X: 200, Y: 200.
- Enhance the rectangle's appearance by setting the corner to 46, giving it a slightly rounded edge.
- Add depth to the design by setting the extrusion to 30.
- Further improve the 3D effect by adjusting the bevel to 10 and bevel side to 4.
- Once the rectangle is created, group all the layers for easier manipulation.
- Finally, position your wifi symbol, constructed from a series of circles, at the center of the rectangle to complete your 3D icon.
![3D Shapes and Materials image 5]()
Applying Materials
Once our shapes are in place, the next step is to apply materials to them. This process will help us define their color, light interaction, and reflectivity.
- Set the circle's material color to DFE7F5 and switch the lighting mode to overlay.
- Create a new material and change the color setting to Fresnel. Adjust the Fresnel settings to Color: 8CC8F7.
- Copy the material and apply it to the other three circles.
- For the rectangle, change the color setting to depth and apply a radial gradient color of hash 608EF1. Adjust the depth of the gradient and add a Fresnel effect.
![3D Shapes and Materials image 6]()
Adding Shadows
Adding shadows to your 3D designs can provide a depth and realism. Here's how to make them softer:
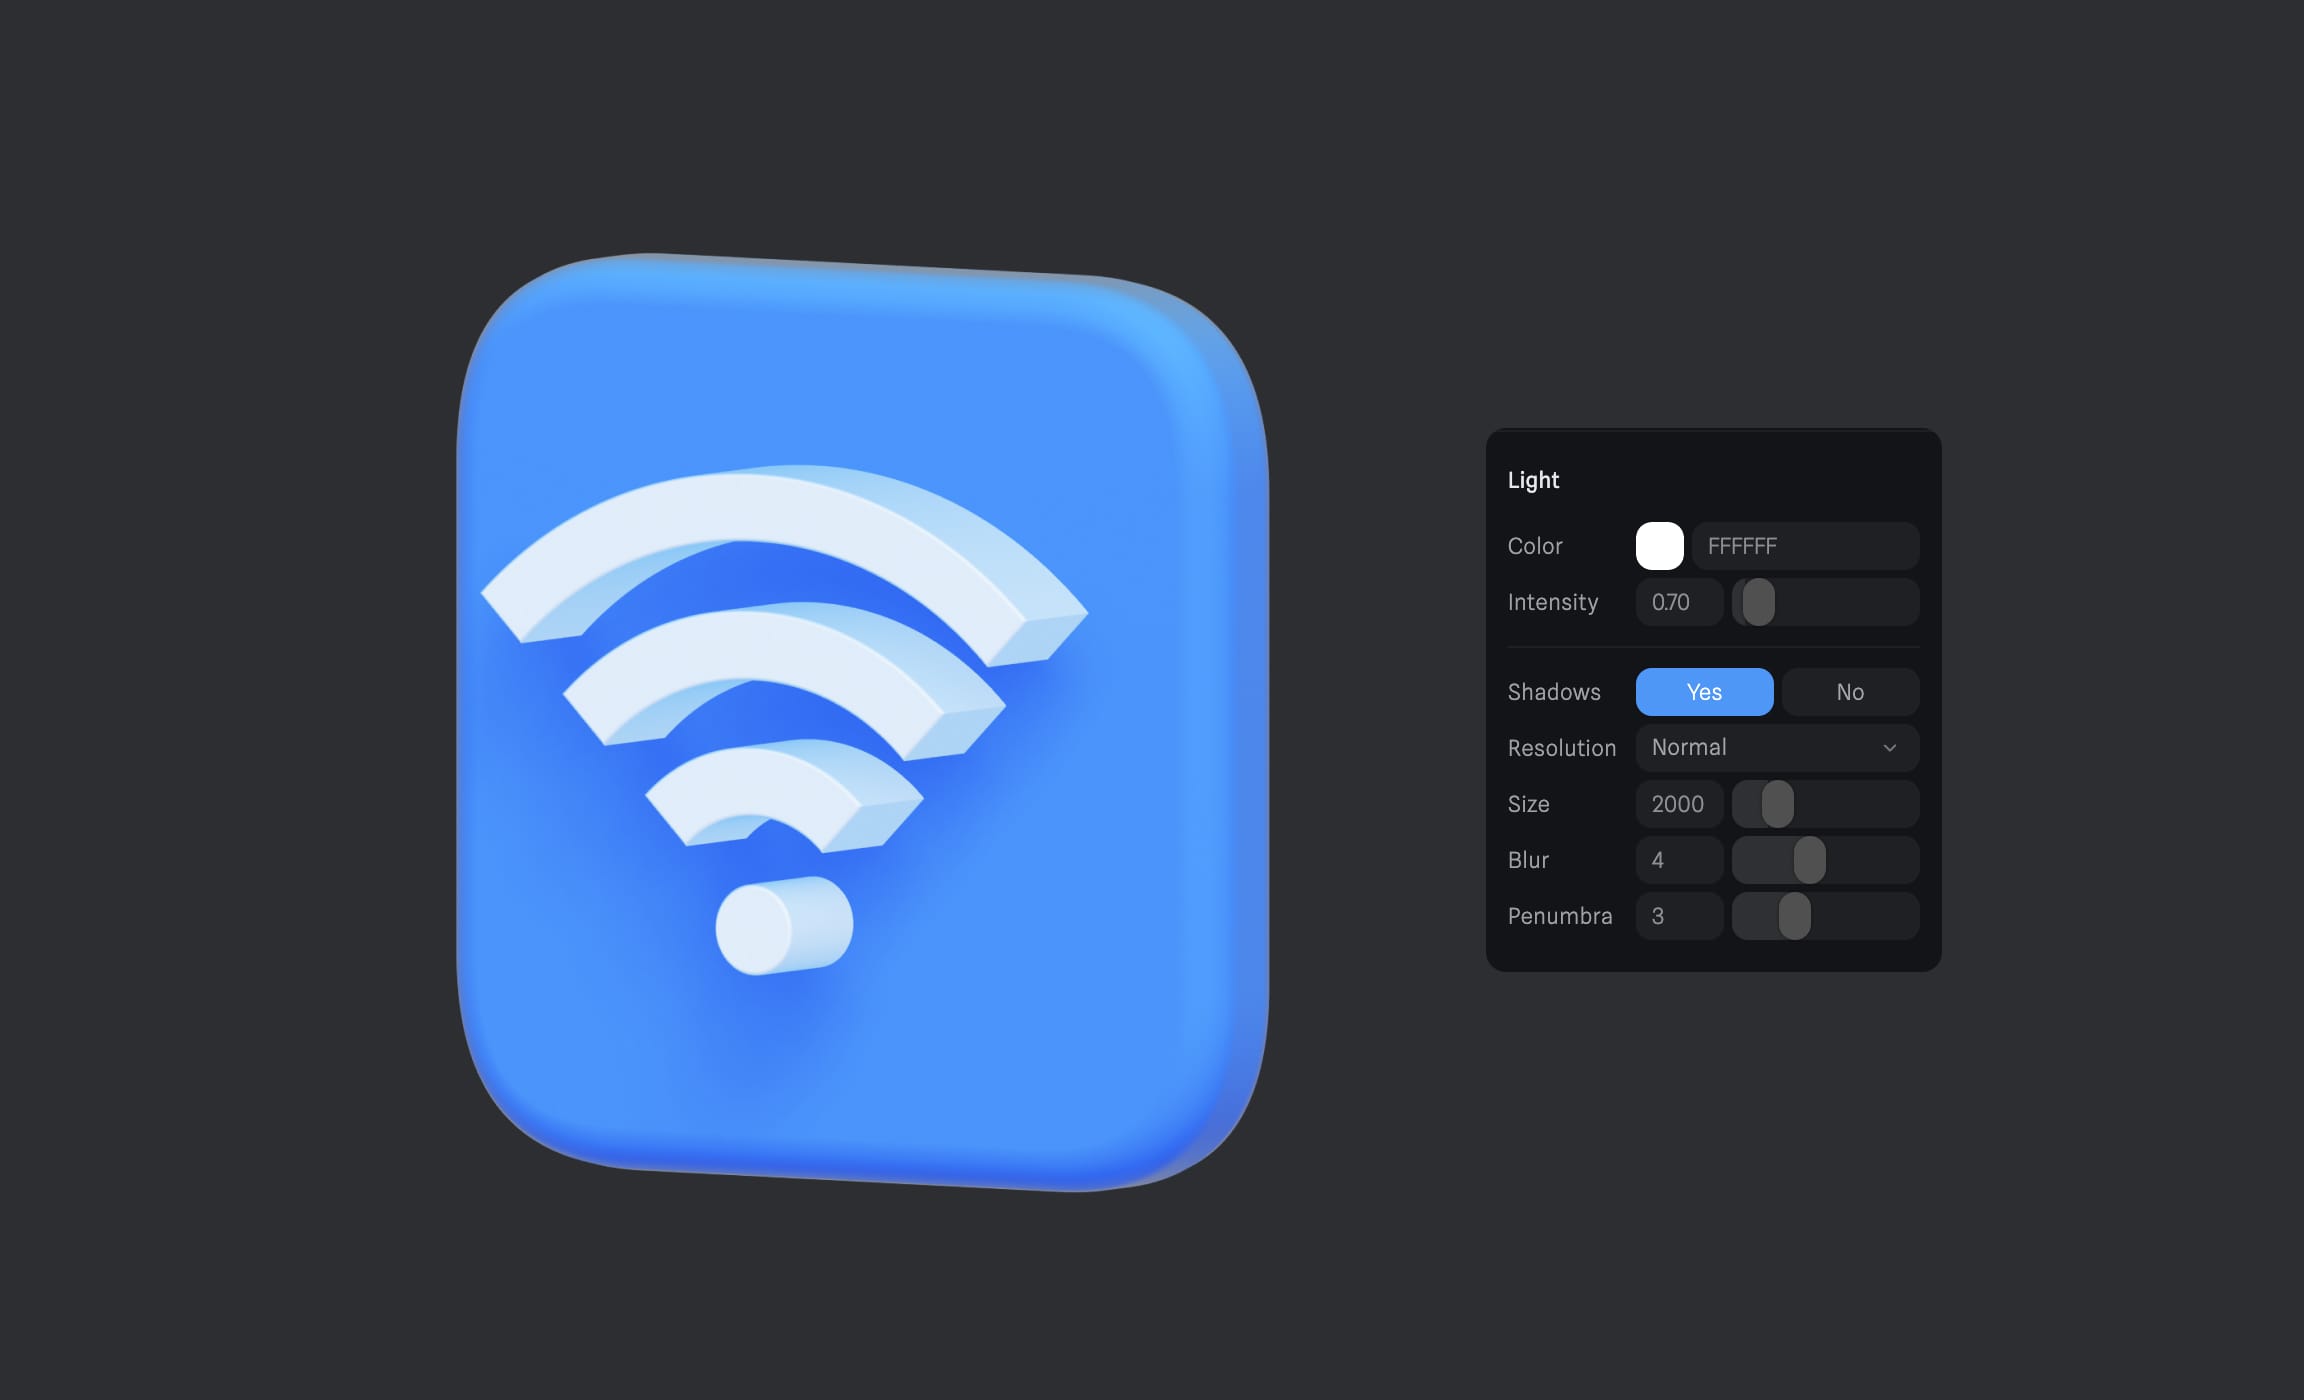
- Go select Directional Light in the left sidebar of your Spline interface.
- In the Light Properties panel, adjust the Blur to 4 and change Penumbra to 3.
![3D Shapes and Materials image 7]()
How to Change Pivot Position
When working with grouped objects in Spline 3D, you might encounter issues where the pivot position is not centered as desired, leading to off-centered rotations. To resolve this issue, follow these steps:
- Begin by ungrouping the layer. Select the group and choose the "ungroup" option to break it down into individual components.
- Next, select all the circles within the ungrouped layer. Navigate to the Boolean modifiers panel and click on "merge geometries." This action will combine all the selected circles into a single unified object.
- After successfully merging the geometries, ungroup the main parent group once again. This will ensure that the individual components are separated.
- Finally, regroup the objects together again. This step will help in recentering the pivot point of the grouped objects, ensuring smoother and more precise rotations.
By following this process of ungrouping, merging, and regrouping, you can effectively resolve any issues related to the off-centered pivot point in your grouped objects within Spline 3D.
 Also in Spline, adjusting the pivot position of "Group" objects is a straightforward process. Follow these steps to move the pivot of an object:
- On the left sidebar, select only the parent of the group. You can do this by holding ⌘ + ⌥ (or Ctrl + Alt on Windows) while clicking the "Group" layer.
- Once the parent group is selected, use the gizmo tool to move the axis position of the pivot to your desired location. This functionality enables you to precisely control the pivot position, thereby facilitating accurate transformations and rotations.
Change a BG Color
After completing our icon, the next step is to select a background color from the Scene panel that suits your preferences.
Previewing Your Design
After naming your file, switch to play mode to preview your 3D icon. This mode allows you to interact with your scene, providing a realistic view of your design.
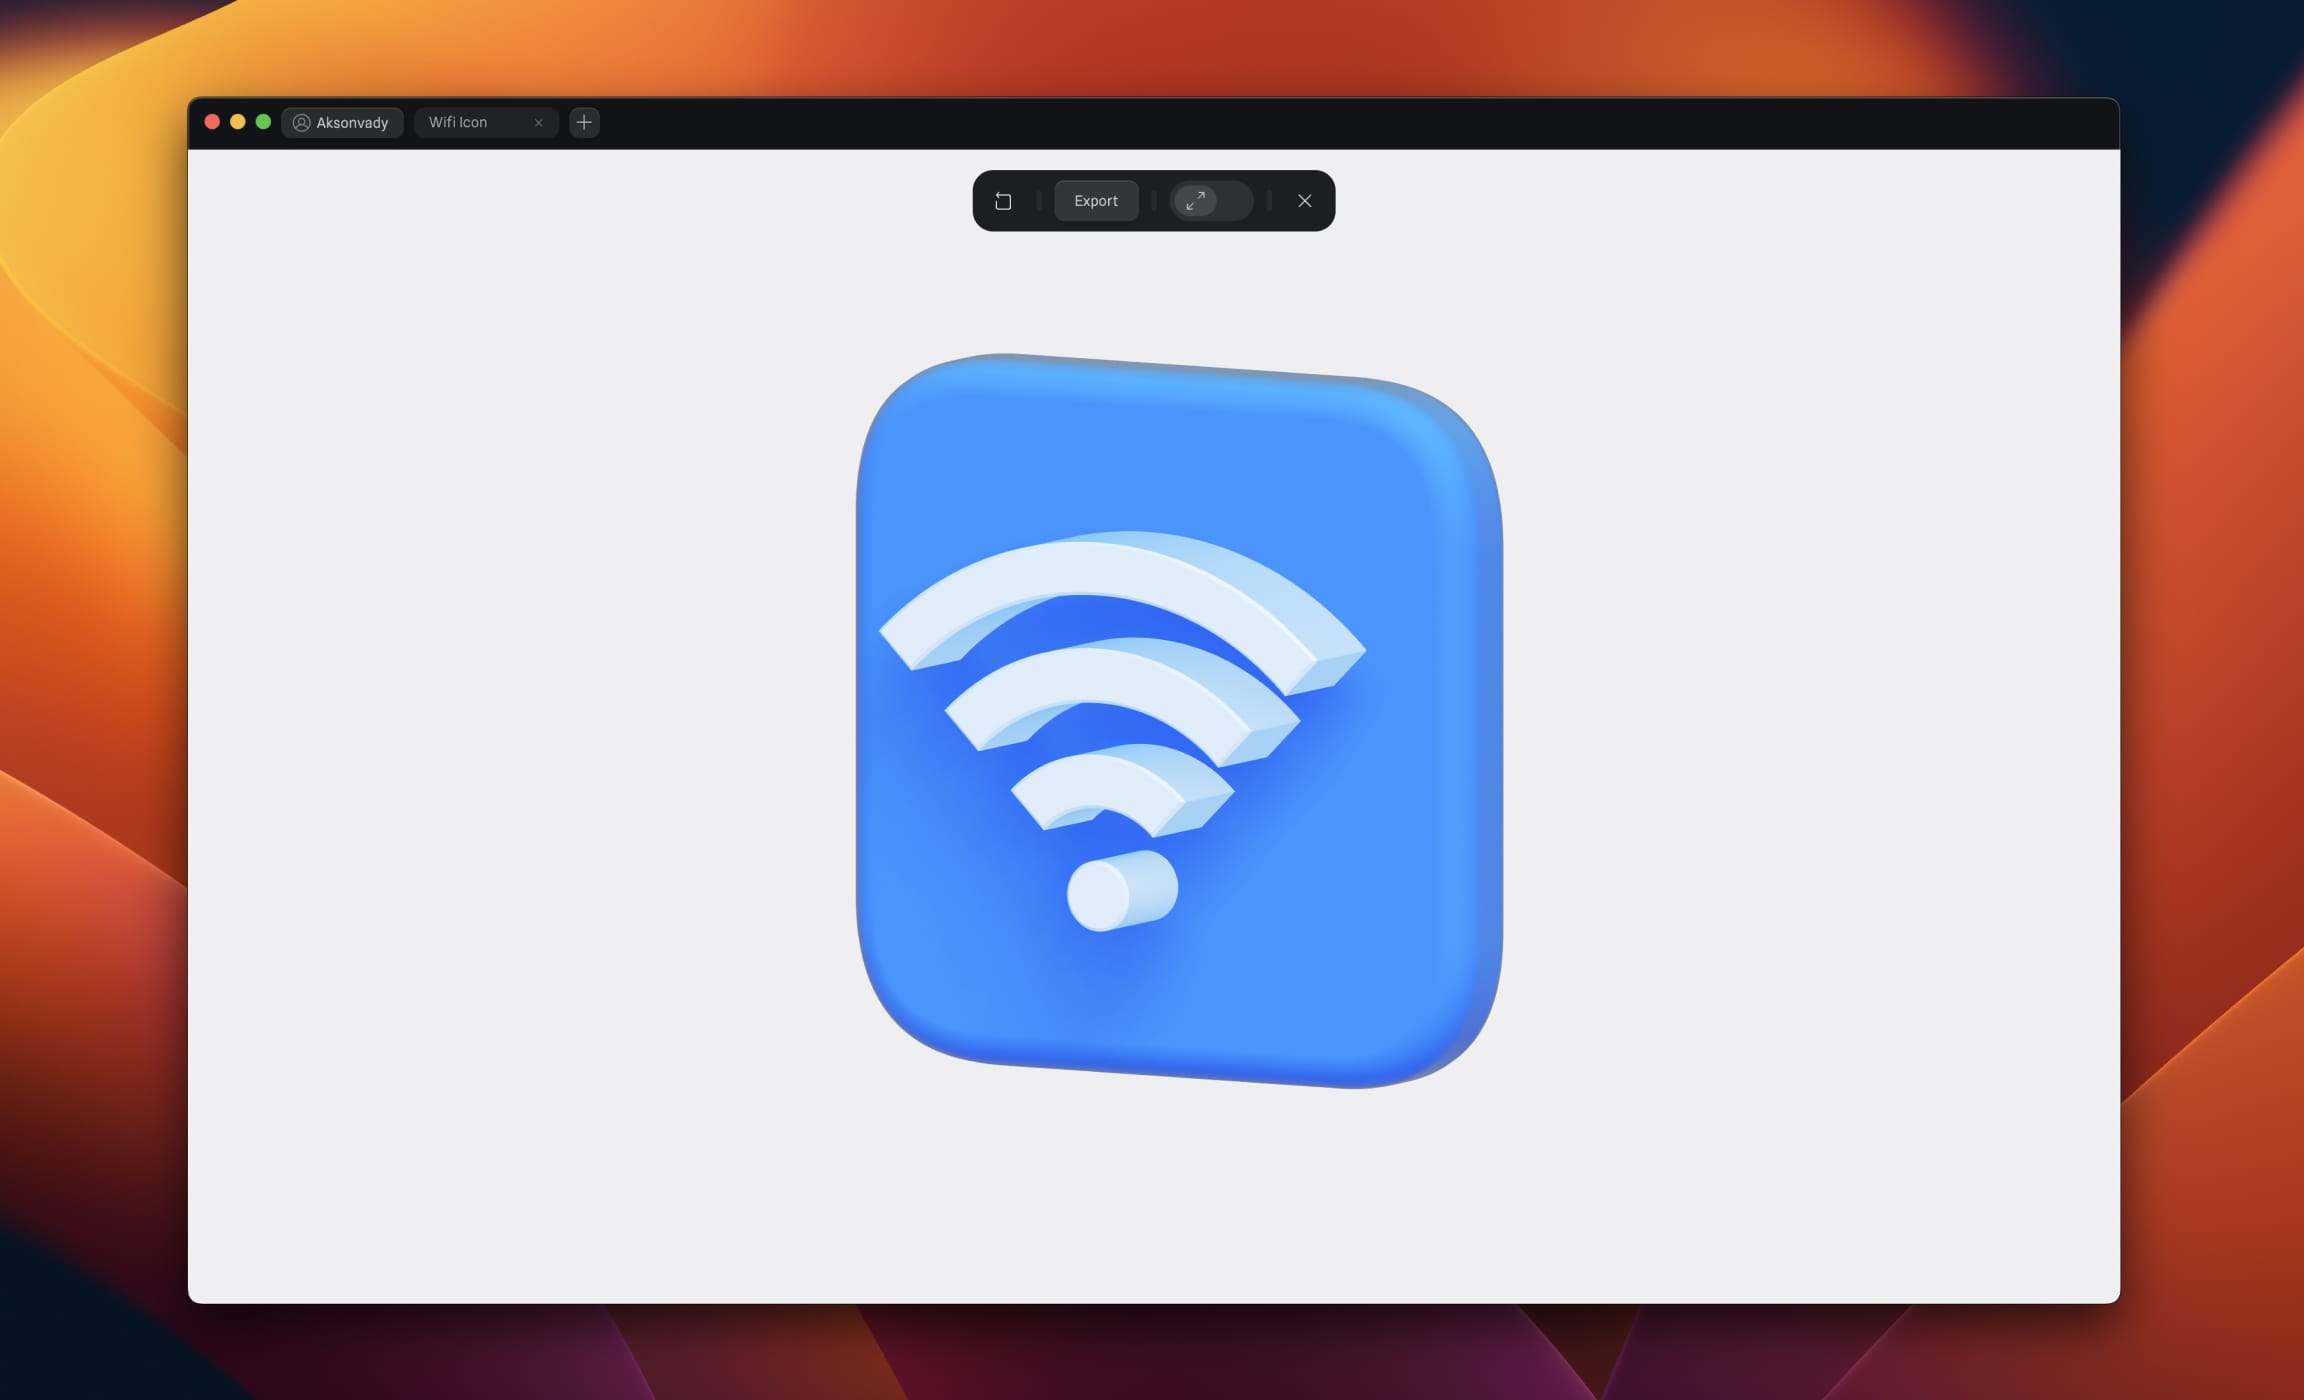
Conclusion
Congratulations! You've successfully created a 3D Wi-Fi icon using Spline. The techniques you've learned today can be applied to all sorts of projects, from app design to data visualization. Keep practicing and exploring the endless possibilities with Spline. Happy designing!
Templates and source code
Download source files
Download the videos and assets to refer and learn offline without interuption.
Design template
Source code for all sections
Video files, ePub and subtitles
Assets
1
Introduction to Spline
Learn 3D design, UI animations, icons, components, variables, screen resizing, scrolling, and optimize and publish 3D assets online
10:24
2
3D Shapes and Materials
Creating a 3D Icon in Spline: a step-by-step guide
9:45
3
Weather Icon and Sculpting
Master the art of 3D design with Spline's user-friendly interface, and learn how to create a stunning weather icon in a few easy steps.
13:29
4
Icon Animation
Learn to build a 3D animated weather icon using Spline's intuitive interface and powerful features
9:27
5
Path Animation
Learn how to create 3D paths with the path tool and to edit them
9:35
6
Waves Animation
Mastering Wave Animation with the Spline 3D Tool
15:33
7
3D Card with Parallax
Creating a 3D Card with Parallax Effect using a glass layer
9:57
8
Button Components
Simplify Your Design Workflow with Spline Components for Reusable and Dynamic Object Creation
11:41
9
Screen Resize Adaptive Layout
Creating adaptive layouts with Screen Resize Events using Breakpoints and Transitions
10:43
10
Tab Bar Animation
Crafting Futuristic UI: Designing a Glass Tab Bar with Crystal Floating Button using Spline
21:23
11
UI Charts and Variables
Exploring Variables Usage in Interactive UI Design
16:54
12
Scroll Interaction and Scenes
Crafting Scroll-Based Interactions and Scenes for Web Design
9:18
13
Export to USDZ and Optimizations
Creating immersive AR experiences on iOS devices using Spline's 3D models
9:28
14
Publish to 3D Site
Easily embed your 3D creations on web pages using Spline's native HTML component, the Spline Viewer
3:48
Meet the instructor
We all try to be consistent with our way of teaching step-by-step, providing source files and prioritizing design in our courses.
Akson Phomhome
UI Designer
Designer at Design+Code.
13 courses - 60 hours

AI Design with Ideogram
Meet Ideogram, an AI-powered image generation tool that takes your ideas and transforms them into stunning visuals. Whether you're a designer, marketer, or just a visual enthusiast, Ideogram simplifies the creative process. In this guide, we’ll walk you through step-by-step instructions to create beautiful logos, social media posts, and more.
1 hrs

Build a SwiftUI app with Claude AI
This comprehensive SwiftUI course combines cutting-edge AI assistance with hands-on development, guiding you through the process of transforming Figma designs into fully functional iOS applications. Leveraging Claude 3.5 Sonnet, you'll learn to efficiently generate and refine SwiftUI code, create reusable components, and implement advanced features like animations and responsive layouts.
9 hrs

Prototype and Code iOS apps in Figma and SwiftUI
Welcome to our course on designing a sleek wallet interface with Figma! You’ll learn to create a visually appealing and functional wallet interface using DesignCode and Apple UI Kits. Master prototyping, swipe gestures, carousel animations, overlays, and reusable components. Plus, explore a Figma plugin to easily transition from design to SwiftUI. By the end, you’ll create dynamic, user-friendly prototypes.
3 hrs

Create 3D UI for iOS and visionOS in Spline
Comprehensive 3D Design Course: From Basics to Advanced Techniques for iOS and visionOS using SwiftUI
3 hrs

3D UI Interactive Web Design with Spline
Learn to create 3D designs and UI interactions such as 3D icons, UI animations, components, variables, screen resize, scrolling interactions, as well as exporting, optimizing, and publishing your 3D assets on websites
3 hrs

Design and Prototype for iOS 17 in Figma
Crafting engaging experiences for iOS 17 and visionOS using the Figma design tool. Learn about Figma's new prototyping features, Dev Mode, variables and auto layout.
6 hrs

Design and Prototype Apps with Midjourney
A comprehensive course on transforming Midjourney concepts into interactive prototypes using essential design techniques and AI tools
8 hrs

Web App Design using Midjourney and Figma
Get UI inspirations from Midjourney and learn UI design, colors, typography as a beginner in Figma
2 hrs

UI Design for iOS 16 in Sketch
A complete guide to designing for iOS 16 with videos, examples and design files
3 hrs

UI Design Android Apps in Figma
Design Android application UIs from scratch using various tricks and techniques in Figma
2 hrs

UI Design Smart Home App in Figma
Design a Smart Home app from scratch using various tricks and techniques in Figma
2 hrs

UI Design Quick Apps in Figma
Design application UIs from scratch using various tricks and techniques in Figma
12 hrs

Figma Handbook
A comprehensive guide to the best tips and tricks in Figma. Not affiliated with or endorsed by Figma, Inc.
6 hrs


