States, Events & Animations
Add to favorites
Animate objects by using state-based animations
Play video

Getting Started
In order to follow this course, you need to download the assets file which includes the template spline file. Here’s the link to download the template. I will also add it in the description below.
Scene
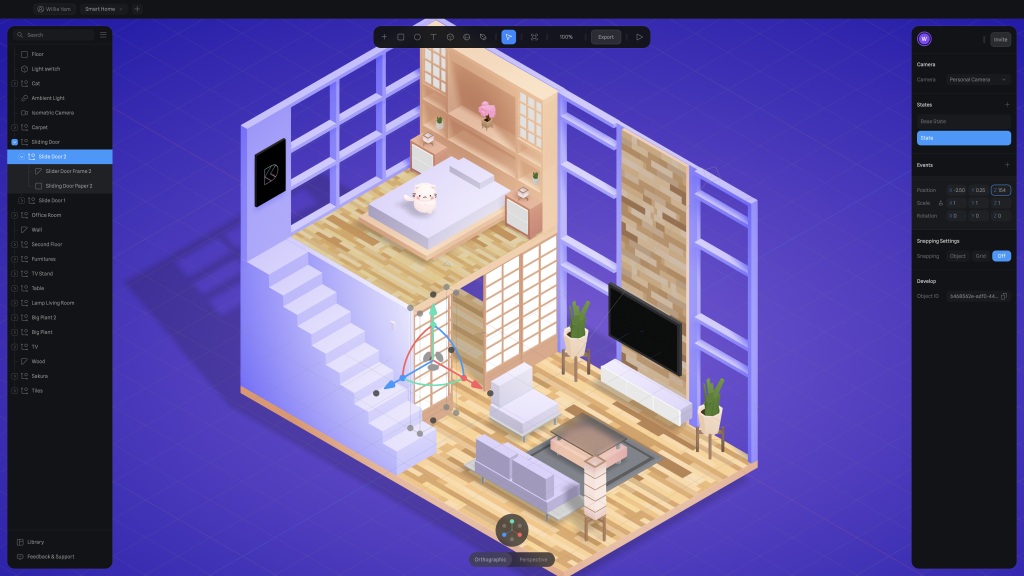
This scene was designed by Aksonvady, one of DesignCode's designers. The camera is showing us inside a house from an isometric angle. We are going to begin by making things interactive as soon as possible.
States
States are essentially your past, present, and future values. This implies that, depending on the circumstances, you can swap between these values. In Spline, all objects has a base state and you can add multiples states to them. The base state is the initial values of your object and each states has different values. You can change the positioning, shape, visibility and shadows of any object.
How to set states?
- Select an object
- On the inspector panel, click on the + button next to States
- Select Base State and set its initial values
- Select State and set values
- Select between the 2 states to compare them
Drawer state
Our first step will be to open the drawers. Let's select the Drawer from the Nightstand 2 and in the inspector, click on the + icon next to States, this will create the Base State and the State. The Base State is our initial values and we want it close so we won’t change these values. Select State and set the Position Z to 33, we can see that the drawer is open. You can even preview manually by switching between these 2 states.
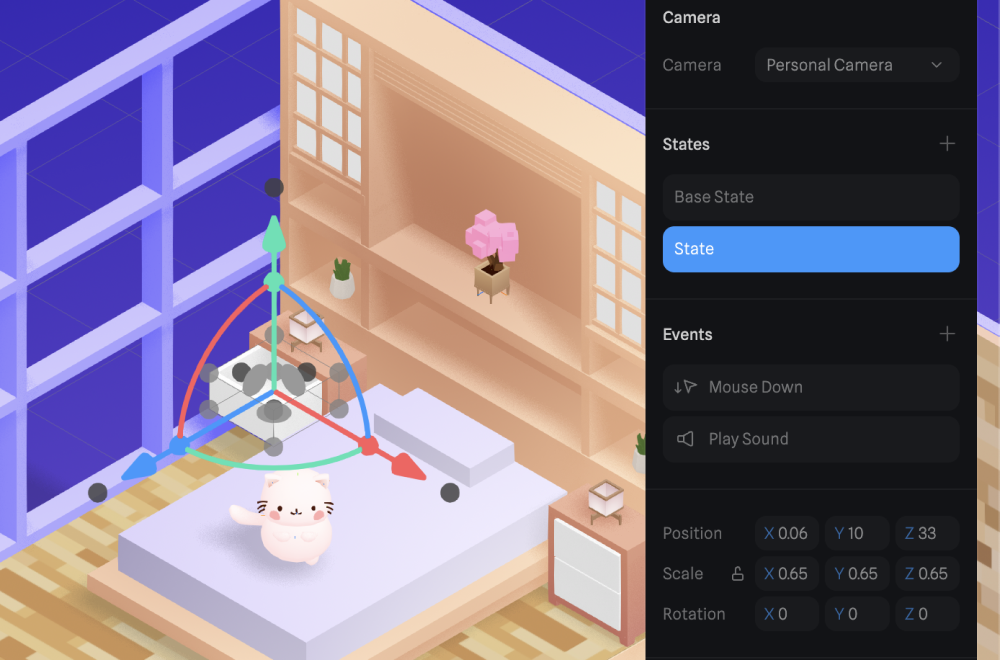
Multiple drawers
Make sure to apply the previous steps to the other 6 drawers:
- Nightstand 2 - Drawer 2, the Position Z to 33
- Nightstand 1 - Drawer 1, the Position Z to 33
- Nightstand 1 - Drawer 2, the Position Z to 33
- TV Stand - Drawer 1, the Position Z to 25
- TV Stand - Drawer 2, the Position Z to 25
- TV Stand - Drawer 3, the Position Z to 25
Use the search bar located on the editor's top-left side if you have any trouble finding the objects.
What are Events?
Events are basically the triggers to your states. It enables your object to move between states with controls or gestures.
How to set event?
- Select an object with states
- On the inspector panel, click on the + button next to Events
- Click Start and set your preferred event from the list
- On the Objects menu, select the target object for the event
- On the State menu, select the target state and set the values of the transition below
Interactions
Then, using these states, we will create interactions. Spline features a robust event-driven interaction system that allows you to interact with 3D elements using mouse events, scroll, keyboard shortcuts and gestures. You can configure your perfect interaction based on the event by setting transitions, durations & states.
Add event
Let's add an event to the first drawer. After selecting the drawer and clicking on the + icon next to Events, you will be able to select an event from a dropdown menu.
List of events
Here’s a list of all the events in Spline:
- Start: Event that triggers when the scene is loaded
- Mouse up: Event that triggers when the mouse is released
- Mouse down: Event that triggers when the mouse is pressed
- Mouse hover: Event that triggers when mouse float the object
- Key up: Event that triggers when a key is released
- Key down: Event that triggers when a key is pressed
- Play sound: Event triggers a sound
- Scroll: Event triggers when scrolled
- Look at: Event that changes the angle of the object to follow the mouse
- Follow: Event that changes the position of the object to follow the mouse
- Game Controls: Enables game controls on an object
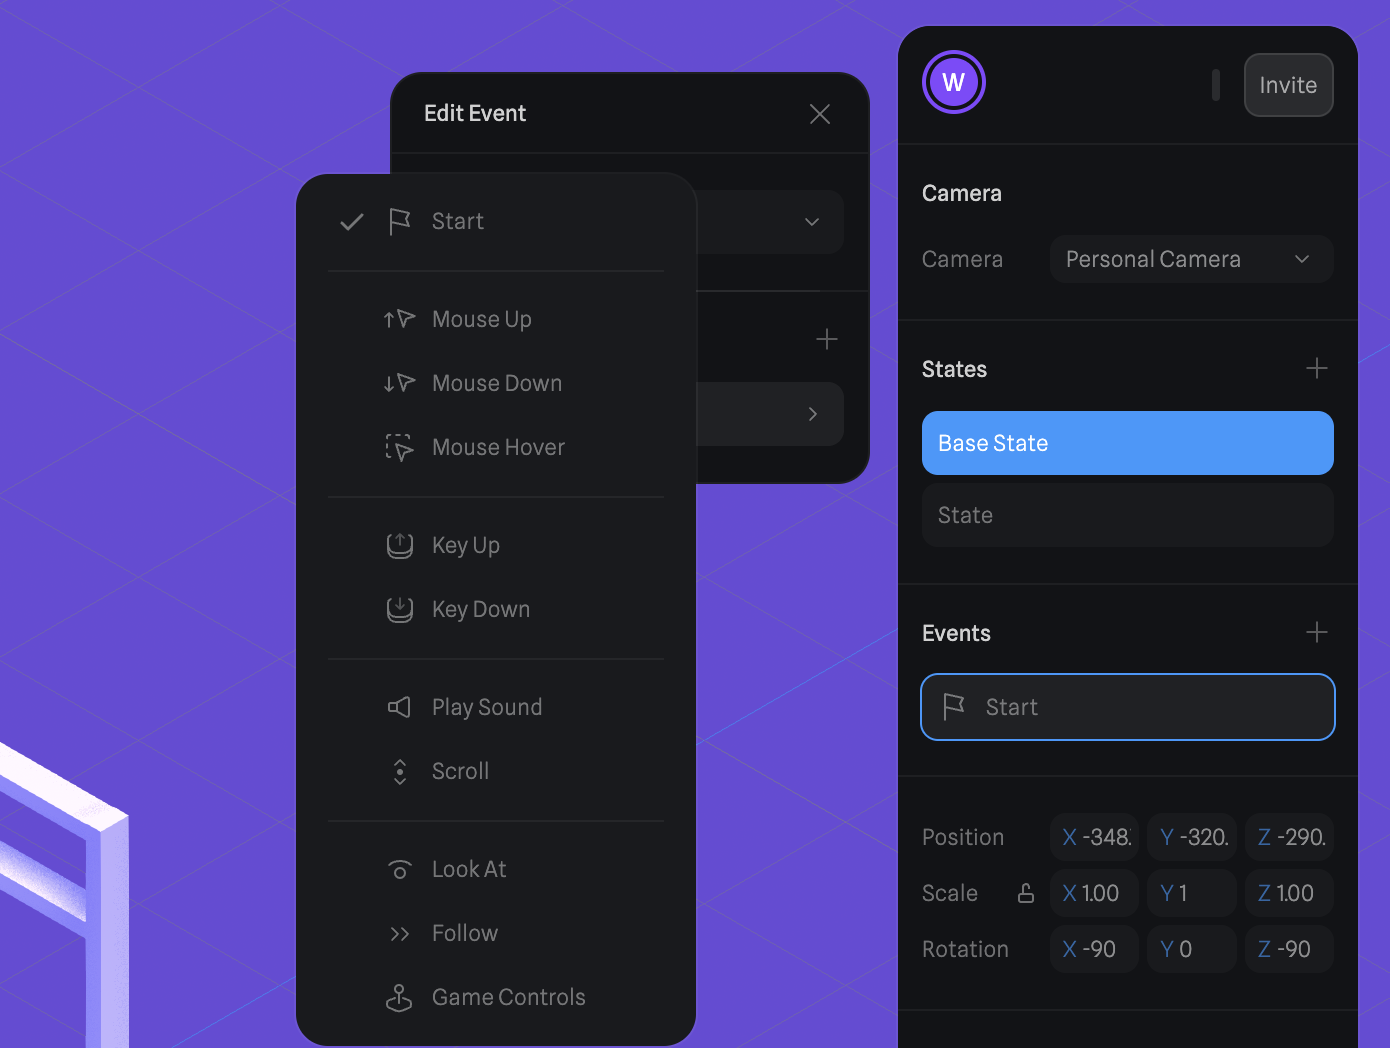
Drawer’s event
In our case, we'll select Mouse down. Make sure the toggle is set to Yes, because we want to be able to open and close the drawer. Below is the Objects section. Select the object, and you will see a dropdown menu with properties.
Event’s Properties
The target is the object affected by the event. Then, Change to is the selected state to transition to which is State. Choose Linear for transition and change the duration to 0.5s. Make sure to add the event to the other drawers.
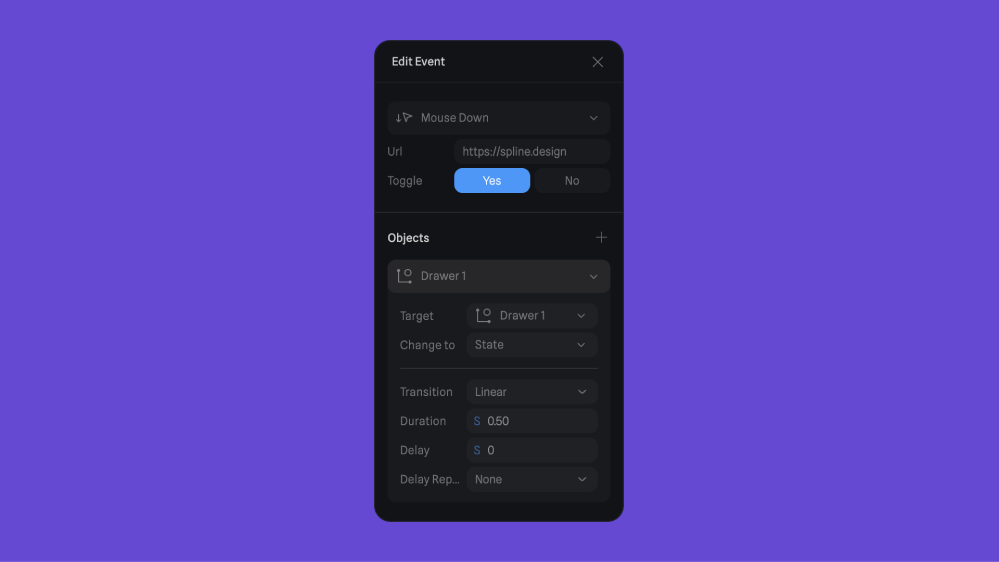
Here’s a list of all the event’s properties in Spline:
- Target: Object that is affected by the event
- Change to: Selected state to transition
- Transition: Different ways to transition between states
- Duration: Amount of time of the transition
- Delay: Delay the event
- Delay replay: Delay the event on repeat
- Cycle: Object should return to its initial values
- Repeat: Repeat the transition infinitely
- Toggle: Toggle animation
Play Mode
The Play Mode allows you to preview your scene. On the top bar, click on the Play icon. Click on any drawer and you will see that it is opening.
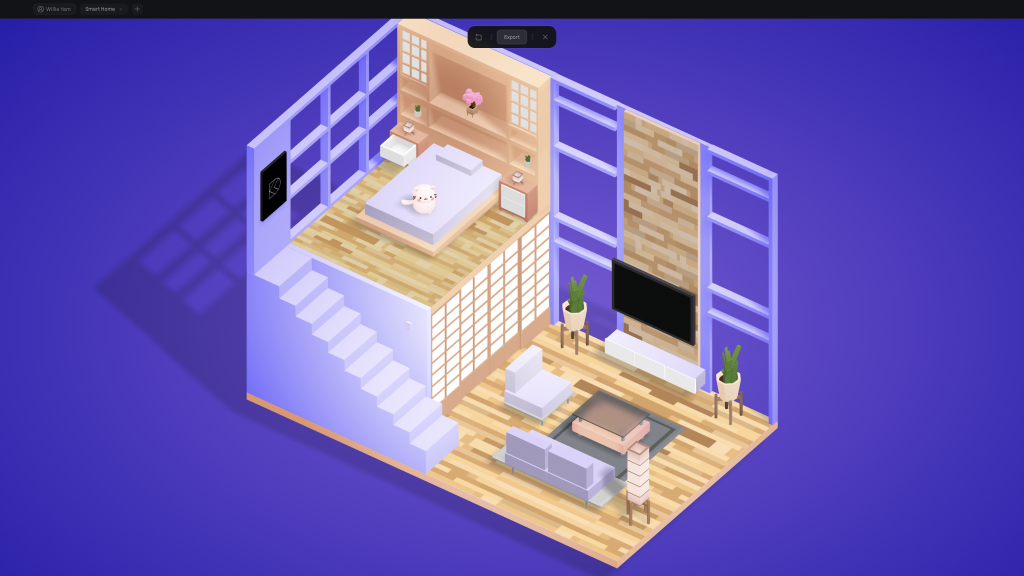
Sliding Door
We will also animate the sliding door. In order to make the door slide, we need to use another kind of gesture: Mouse Hover. Select Slide Door 2 and add a state. Put 154 in the Position Z of the state. Add a Mouse Hover event to the Sliding Door and set the transition to EaseInOut with a duration of 1.
TV
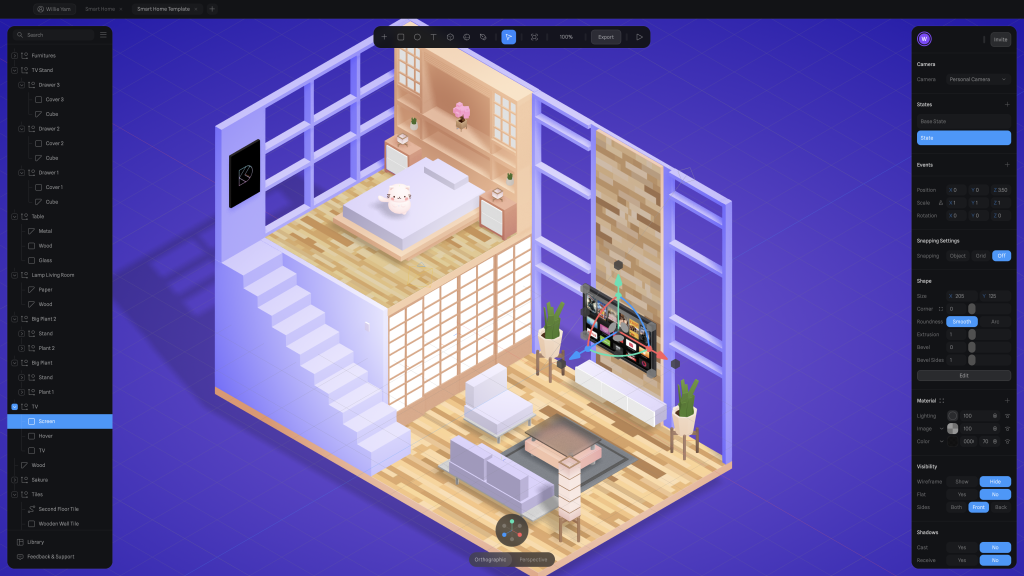
Next, we'll animate the TV. The first thing we have is a screen with an image on it. Upload your own image if you wish. Create a state and set the Image opacity to 100. On the TV, add an event and set the mouse down. Make sure to select the Screen object to be affected by the event.
iMac
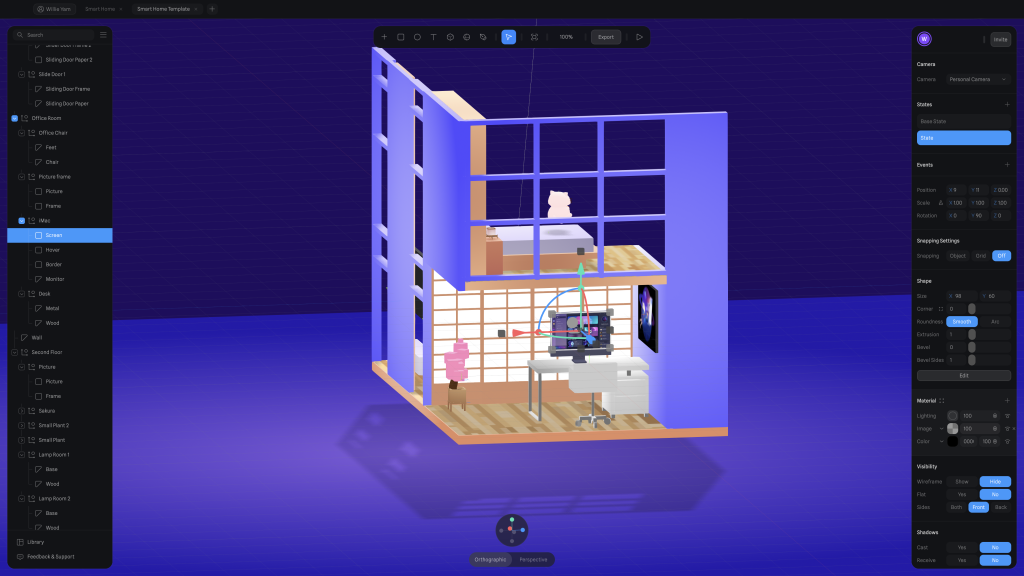
We also have an iMac to animate, which is behind the sliding doors, which you can access by rotating the scene. Similar to the TV, select the screen layer, add a state and set the opacity of the image to 100. On the iMac, add a mouse down event to toggle the screen.
Interactive feedback
After that is completed, our scene will look much nicer, and we'll also add another feature. We are not sure of what is interactive at this time. We will change the colour of the interactive elements using the hover control.
For example, each drawer has a cover, so search for cover on the search bar. Add a state and set another color. Then, add a mouse hover event and set its duration to 0.5s. The HEX value is 918BCE. For the drawers below the TV, set the states on the covers but the event on the drawer.
For the sliding door, select the Sliding Door Paper 2 and we will add a state. Set the opacity to 70%. On the Sliding Door group, select the mouse hover and add an the Sliding Door Paper 2.
For the TV, select the hover layer under TV and set the opacity to 40. On the TV, add a mouse hover event with a duration of 0.3s.
For the iMac, it is similar to the TV. Select the hover layer under iMac and set the opacity to 40. On the iMac, add a mouse down event with a duration of 0.3s.
Templates and source code
Download source files
Download the videos and assets to refer and learn offline without interuption.
Design template
Source code for all sections
Video files, ePub and subtitles
Subtitles
Videos
Assets
1
Intro to Game Controls
Use key inputs, joysticks, buttons, gravity, and collision detection to move your character through your scene
4:26
2
States, Events & Animations
Animate objects by using state-based animations
13:03
3
Movement & Controls
Use game controls to move an object in your scene
5:26
4
Collision Detection
Set a shape to your character to enable collisions
10:15
5
Physics
Make your object dynamic in a 3D environment
4:34
6
3D Camera & Lighting
Customize your camera to make your scene looks stunning
16:10
7
Audio & Sounds
Elevate your scene with beautiful sounds
6:32
8
URL & Embed
Export your 3D scene in web with no code
4:16
9
Export in React Site
Export your design in a React environment
29:31
10
Performance & 3D Vitals
Monitor and optimize your scene using 3D Vitals
4:28
Meet the instructor
We all try to be consistent with our way of teaching step-by-step, providing source files and prioritizing design in our courses.
Willie Yam
Front-end/UI developer at Design+Code
I do UI coding. HTML/CSS/JS/SWIFTUI dev.
10 courses - 37 hours

Design and Prototype an App with Play
Build a completely functional prototype without writing a single line of code from your phone
3 hrs

Create a 3D site with game controls in Spline
Build an interactive 3D scene implemented on a ReactJS site using Figma and Spline
2 hrs

Build a Movie Booking App in SwiftUI
Learn how to create an iOS app based on a beautiful UI design from Figma with interesting animations and interactions, create a custom tab bar and use navigation views to build a whole flow
1 hrs

Build Quick Apps with SwiftUI
Apply your Swift and SwiftUI knowledge by building real, quick and various applications from scratch
11 hrs

CSS Handbook
A comprehensive series of tutorials that encompass styled-components, CSS, and all layout and UI developments
1 hrs

Advanced React Hooks
Learn how to build a website with Typescript, Hooks, Contentful and Gatsby Cloud
5 hrs

Unity for Designers
If you want to make a game and don't know where to start, you are in the right place. I will teach you how to use Unity, code in C# and share essential tips and tricks to make your first game.
5 hrs

Create a Javascript Game
Learn how to create a web game using Phaser 3, a popular javascript game engine. Draw a map using an editor, implement the player, make the player move, apply physics, collisions, and implement the enemies.
2 hrs

Build an ARKit 2 App
Introduction to ARKit and learn how to make your own playground. You will be able to add models or even your own designs into the app and play with them
4 hrs

Create a SpriteKit Game
Overview of SpriteKit a powerful 2D sprite-based framework for games development from Apple and learn how to create your very own platform
3 hrs
