Build a SwiftUI app for iOS 15
Add to favorites
Design and code a SwiftUI 3 app with custom layouts, animations and gestures using Xcode 13, Concurrency, Searchable and a whole lot more
Play video
Build a SwiftUI app for iOS 15
1
Build a SwiftUI app for iOS 15
19:22
2
Xcode 13 Visual Editor
15:15
3
Layout Code and Preview
15:14
4
Material and Foreground Style
10:42
5
Shape, Stroke and Blend Mode
13:16
6
Reusable Style and Color Scheme
23:45
7
List Style and Navigation View
7:39
8
SF Symbols 3
13:20
9
Navigation Link and URL
15:07
10
States and Swipe Actions
9:26
11
Structure and Toggle
10:02
12
Graphics in Canvas
14:41
13
SVG to Path in Canvas
8:50
14
TimelineView Animation in Canvas
12:10
15
onAppear and withAnimation
7:17
16
Custom Tab Bar
14:47
17
Tab Bar Model and Looping Data
7:32
18
Tab Bar Selection
8:24
19
Tab Bar Animation
11:49
20
GeometryReader and PreferenceKey
12:17
21
Project Structure and AppStorage
8:18
What's New in SwiftUI 3
This year, we can take on more challenging apps thanks to SwiftUI's maturity, with new features like concurrency with async / await, SF Symbols 3 with new styles, Markdown support using Text, button styles, swipe actions, blur materials, drawing graphics with canvas and much more. Apple is committed to SwiftUI and used it to build apps like Photos, Maps, Shortcuts, Weather, Photos, Find My and system interfaces like Apple Pay.
SF Symbols 3
With 3,100 free icons now, SF Symbols 3 is a huge time-saver for both designers and developers. You can customize more than ever before with the new rendering modes: Hierarchical and Palette on top of the existing Monochrome and Multicolor. Additionally, it's now easier to add variants like fill and circle by using modifiers while keeping icon names as short as possible.

SF Symbols are now simpler to use and variants can be customized using a symbolVariant modifier. If not specified, fill and outline will be platform specific.
Image(systemName: "person")
		.symbolVariant(.circle.fill)
You can change the rendering mode by using the symbolRenderingMode modifier.
.symbolRenderingMode(.palette)Finally, using the new foregroundStyle, you can set up to 3 colors for your symbol depending on the rendering mode.
.foregroundStyle(.blue, .blue.opacity(0.3), .red)Blur Material
Material sheets, also known as background blur, is an excellent way to make your text more readable. If you have a multi-layered design with background + card + content, the material is a great alternative to just using opacity. iOS and macOS uses it for their sidebar, tab bar, modals, control center and even apps like Weather. The good news is that it's now available with a single modifier.
.background(.regularMaterial)
Graphics in Canvas
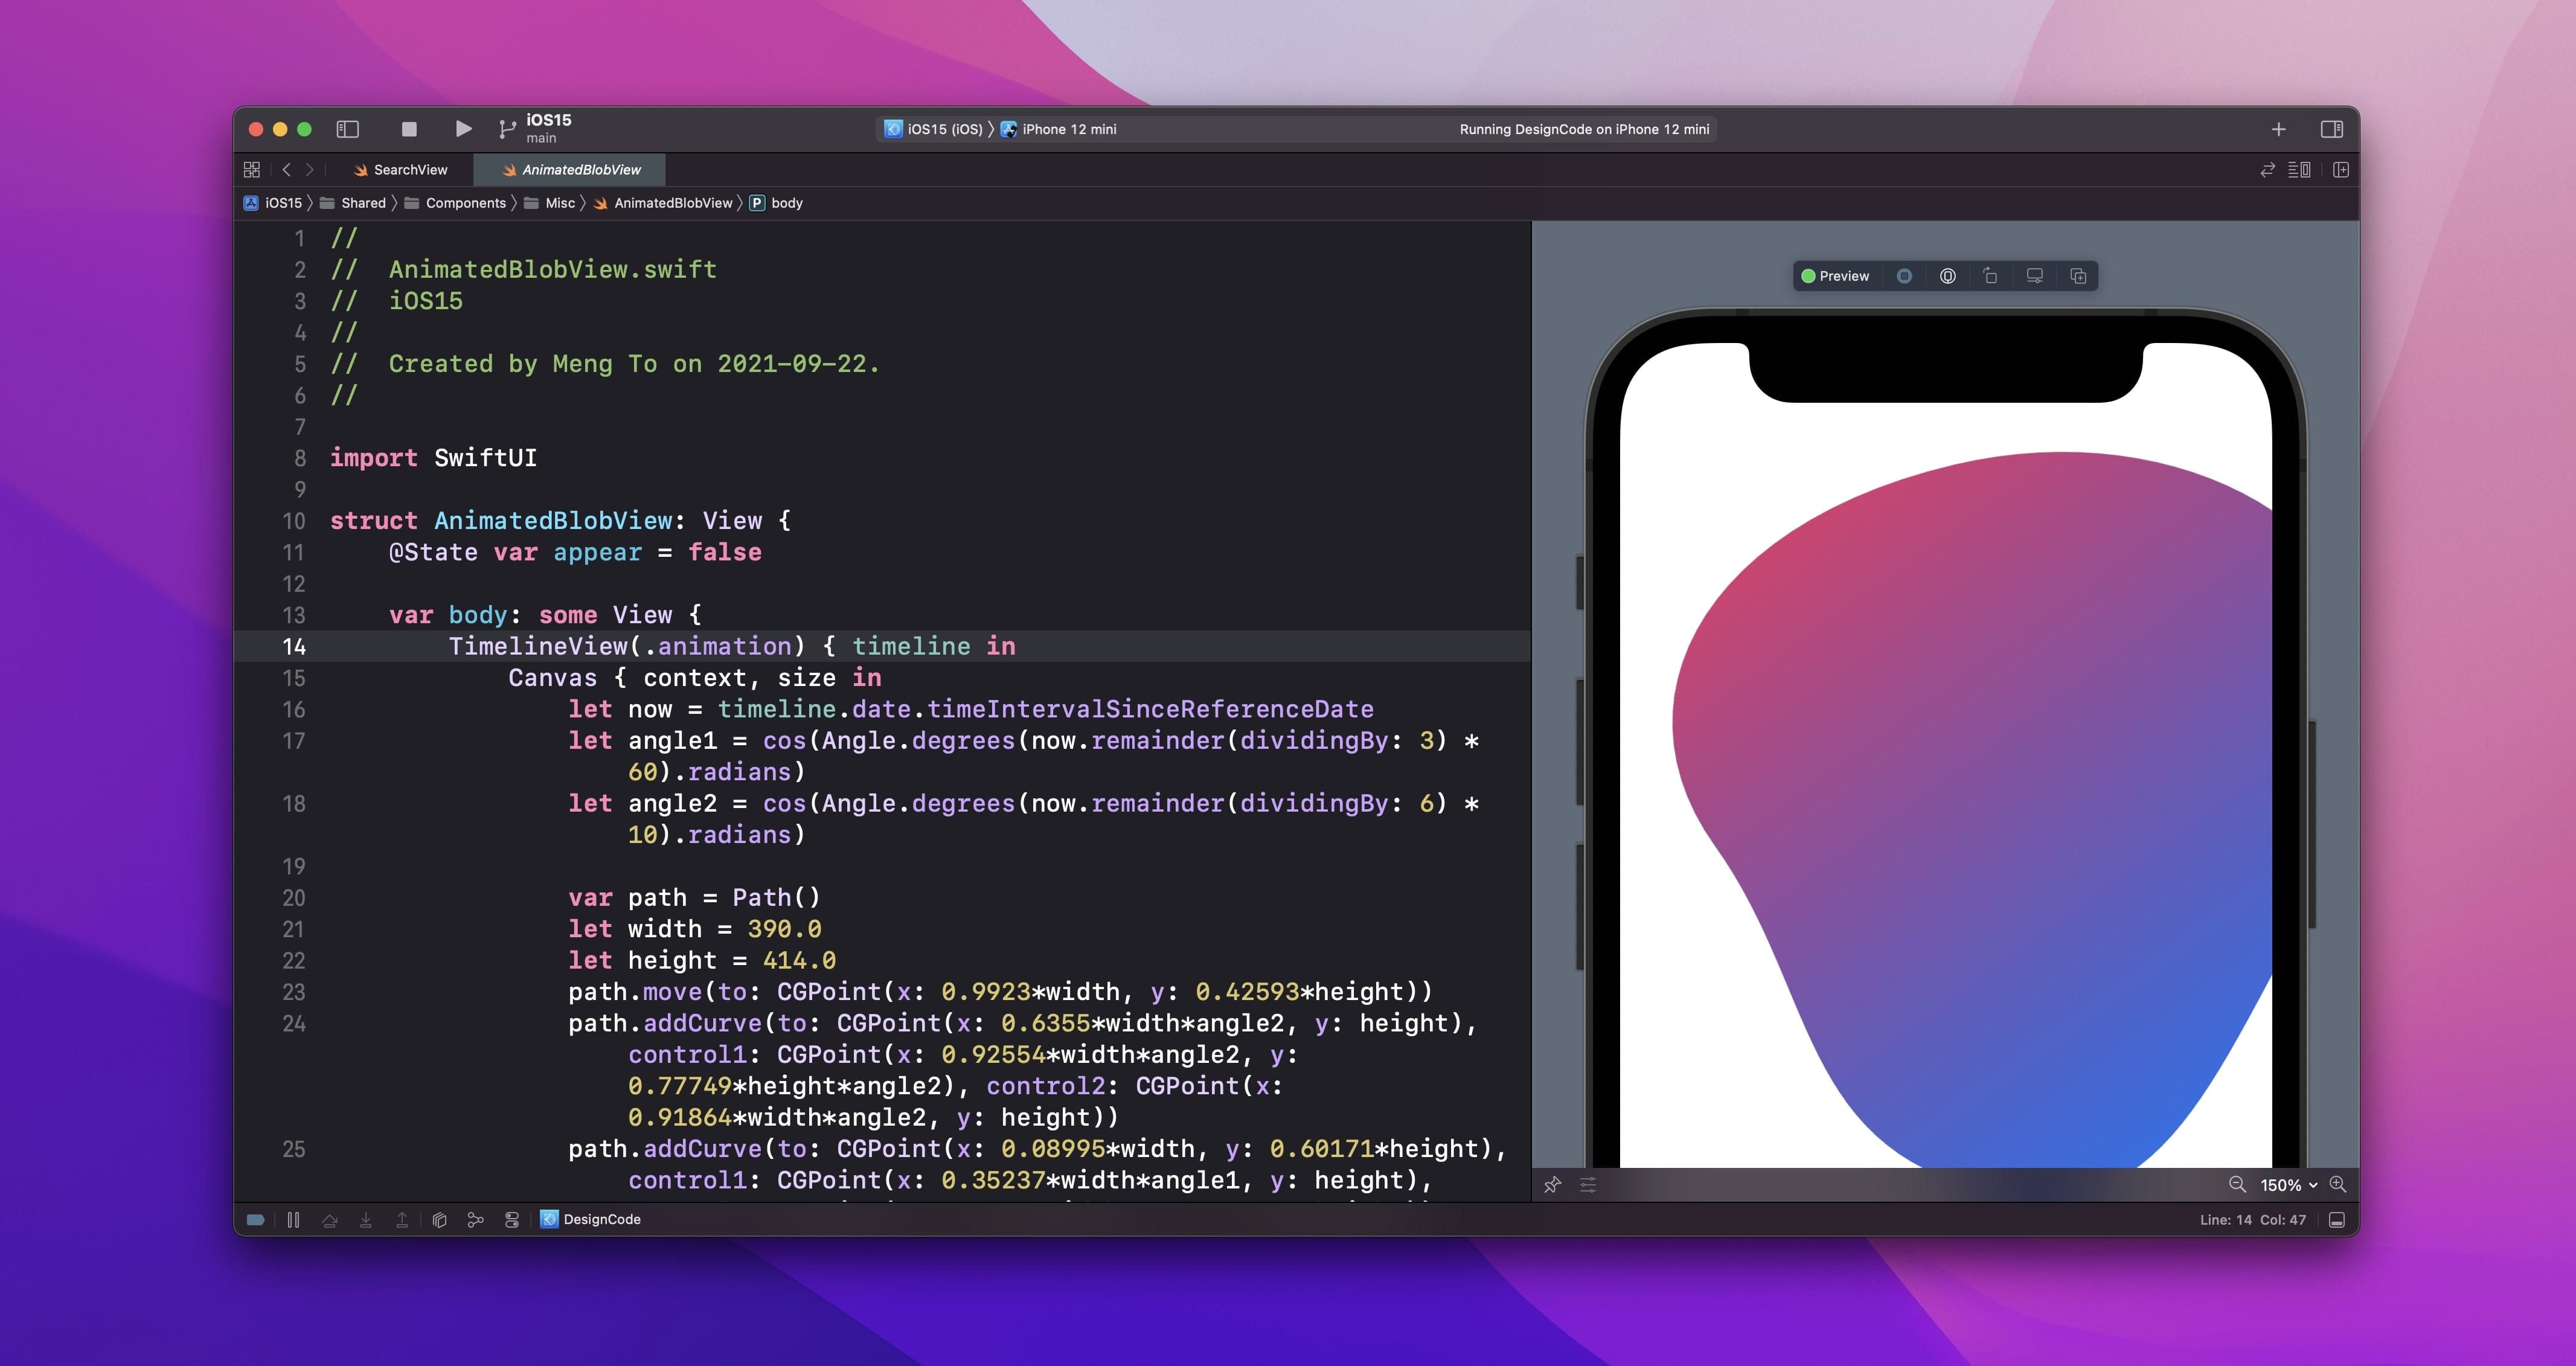
When you're drawing vector graphics that don't need tracking or validation, Canvas is a great option. You can create performant animations by using the TimelineView. In this project, we'll learn how to draw icons from SF Symbols 3, turn SVG code to Path and animate a blob in a loop. It's really fun!
Concurrency
Working with functions that need to wait for tasks to complete such as an API call is now much easier with async / await. Before, you had to use completion handlers which can make the code difficult to read and debug. With concurrency, your code will be shorter, safer and you will have access to the new AsyncImage and Pull to Refresh features that leverage on the new API.
AsyncImage
AsyncImage allows you to load an image from a URL without relying on a third-party library. It offers great features like placeholder while loading and phases for error handling. On top of that, you can easily apply transitions and animations.
Let's load an image from Lorem Picsum with placeholder that shows a loading indicator.
AsyncImage(url: URL(string: "https://picsum.photos/200")) {
		image.resizable()
} placeholder: {
		ProgressView()
}
You can also load in phases such as empty, success, failure and default. Additionally, you can customize the transition and animation timing.
AsyncImage(url: URL(string: "https://picsum.photos/200"), transaction: .init(animation: .easeOut)) { phase in
    switch phase {
    case .empty:
        Color.white
    case .success(let image):
        image.resizable().transition(.scale)
    case .failure(_):
        Color.gray
    @unknown default:
        Color.gray
    }
}
Async / Await
We can create an async function that gets data from an API without using completion handlers. Before decoding the JSON data, we have to wait for the API call to complete. Also, we're using do / catch to handle errors.
func fetchAddress() async {
    do {
        let url = URL(string: "https://random-data-api.com/api/address/random_address")!
        let (data, _) = try await URLSession.shared.data(from: url)
        address = try JSONDecoder().decode(Address.self, from: data)
    } catch {
        print("Error fetching")
    }
}
We can call the async function using the new task modifier.
.task {
    await fetchAddress()
}
Pull to Refresh
If you need to refresh the data, you can use the new refreshable modifier, which automatically creates the Pull to Refresh mechanism on a List.
.refreshable {
    await fetchAddress()
}
Markdown Support
Nowadays, a lot of content is written using Markdown. It supports links, images, and basic text styling like headings, bold, italic, bullet points, etc. It's a friendlier alternative to HTML, which can be daunting to implement. Best of all, SwiftUI 3 now allows you to support Markdown by simply using the Text.
Text("By clicking on **Sign up**, you agree to our [Terms of service](https://designcode.io/terms)")Safe Area Inset
You can now place content on top of a Scrollable View. This is especially great for setting the scroll area when you have a custom tab bar or nav bar.
.safeAreaInset(edge: .bottom) {
    VStack {}.frame(height: 44)
}
Preview Orientation
The live preview is no longer limited to portrait mode. You can now add a modifier to show your design in landscape as well.

.previewInterfaceOrientation(.vertical)
.previewInterfaceOrientation(.horizontal)
Accessibility
Apple has always prioritized accessibility in their platforms. This year, they've improved it massively for SwiftUI.
Accessibility Inspector
The new Accessibility inspector panels will make it easy to spot the elements and its properties.

Accessibility Labels and Buttons
While labels will automatically give the description for VoiceOver, images will default to the local image name. For async images, you're out of luck. That's why you should add an accessibilityLabel modifier when necessary.
Button(action: {}) {
	// Image
}
.accessibilityLabel("Account")
Sometimes, your element won't be picked up, so you'll need to be explicit.
.accessibilityElement()For collection items like list rows and cards, you should also wrap everything inside a Button. Make sure to set the buttonStyle to plain. Otherwise, you'll gain some unwanted tint color and alignment.
.buttonStyle(.plain)If you absolutely want to use onTapGesture and want to avoid Button, you can set the container and combine the inner elements.
.accessibilityElement(children: .combine)Use Button instead of onTapGesture
I know It is tempting to use onTapGesture on labels and images, but you will not only lose the tap feedback but also might get an inconsistent tappable area regardless of the frame or padding you apply. As a result, it's best to wrap your visual elements inside a Button.
// Don't
Image(systemName: "magnifyingglass")
    .font(.system(size: 17, weight: .bold))
    .frame(width: 36, height: 36)
		.onTapGesture { show.toggle() }

// Do
Button {
    showSheet.toggle()
} label: {
    Image(systemName: "magnifyingglass")
        .font(.system(size: 17, weight: .bold))
        .frame(width: 36, height: 36)
}
Accessibility Hidden
Some elements like background layers don't need to be picked up by VoiceOver, so you can hide them.
.accessibility(hidden: true)Searchable
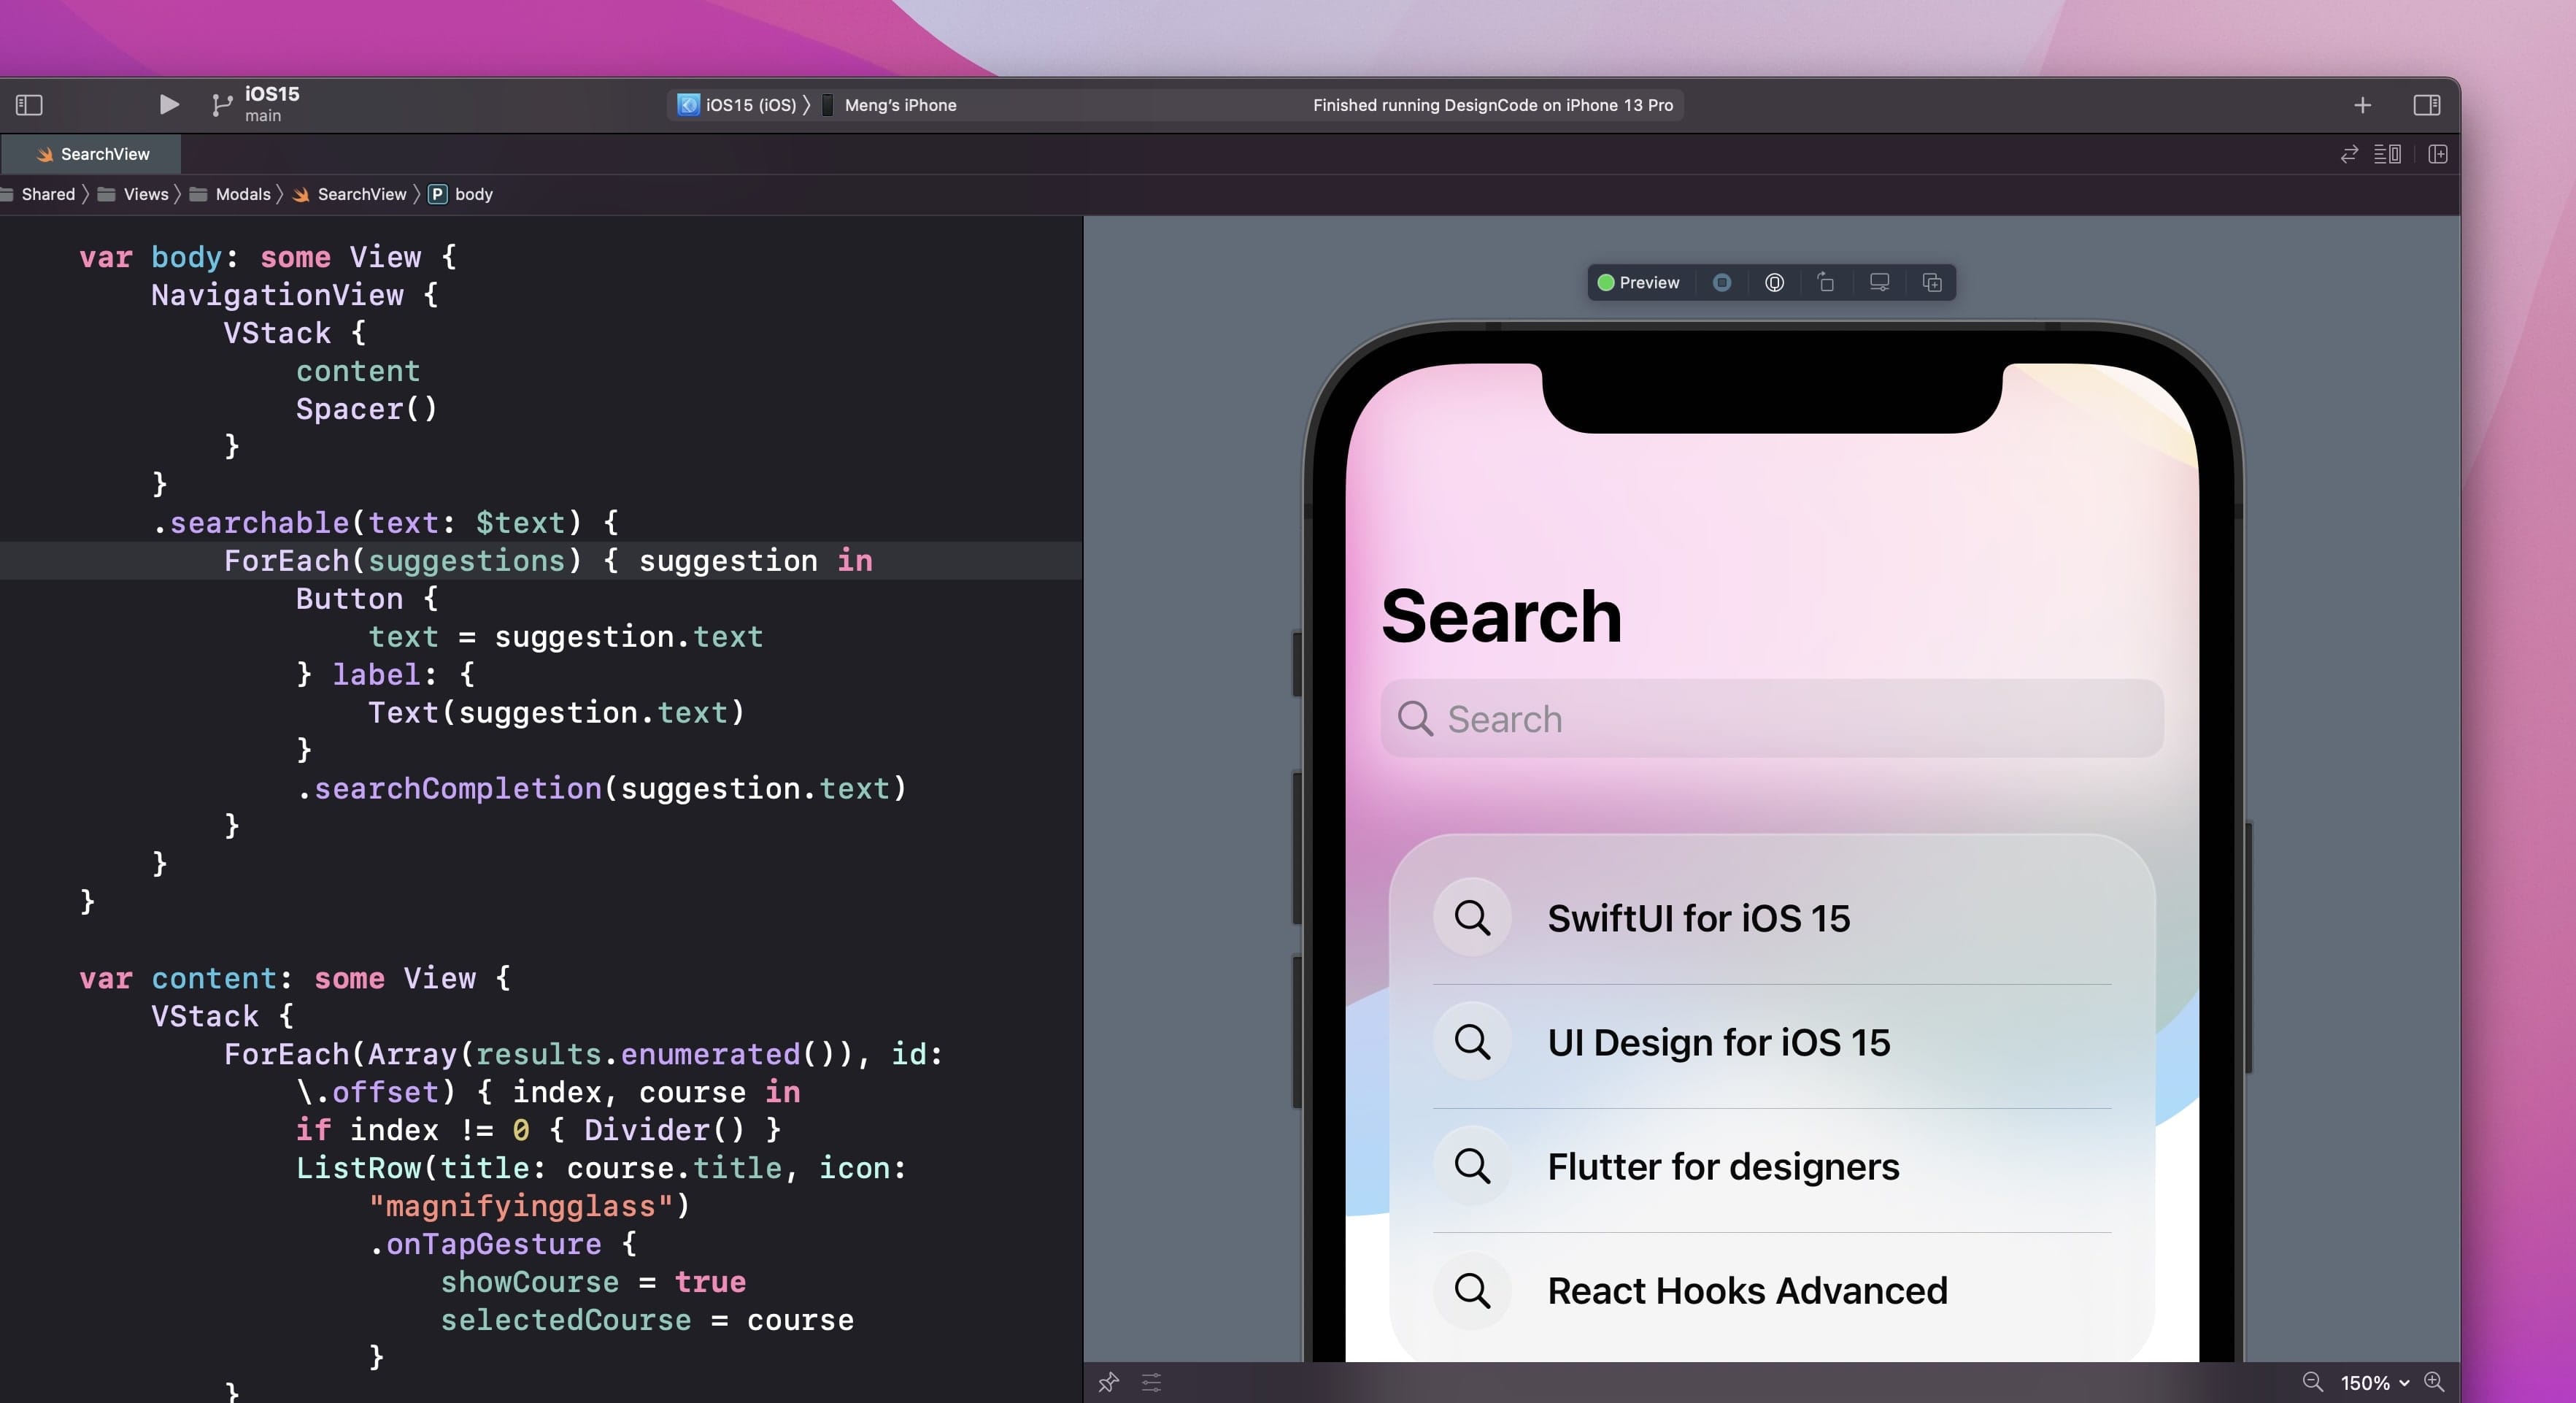
It's never been easier to create a search experience with text field focus and suggestions. In this course, we'll learn to customize the looks while building a search experience with data and search completion.
.searchable(text: $text) {
    ForEach(suggestions) { suggestion in
        Button {
            text = suggestion.text
        } label: {
            Text(suggestion.text)
        }
        .searchCompletion(suggestion.text)
    }
}
Swipe Actions

With a few lines of code, you can add a fairly complex swipe interaction that can pin, delete or favorite items in a List.
.swipeActions(edge: .leading) {
    Button {
        withAnimation {
            isPinned.toggle()
        }
    } label: {
        if isPinned {
            Label("Unpin", systemImage: "pin.slash")
        } else {
            Label("Pin", systemImage: "pin")
        }
    }
}
This Course
First, we won't use a single third-party library for creating trivial things such as translucent material sheets. Second, we're going to build a fully tab bar and navigation bar. There will be great lessons for beginners and experts alike, especially if you want to use SwiftUI for both prototyping and building real apps.
Requirements
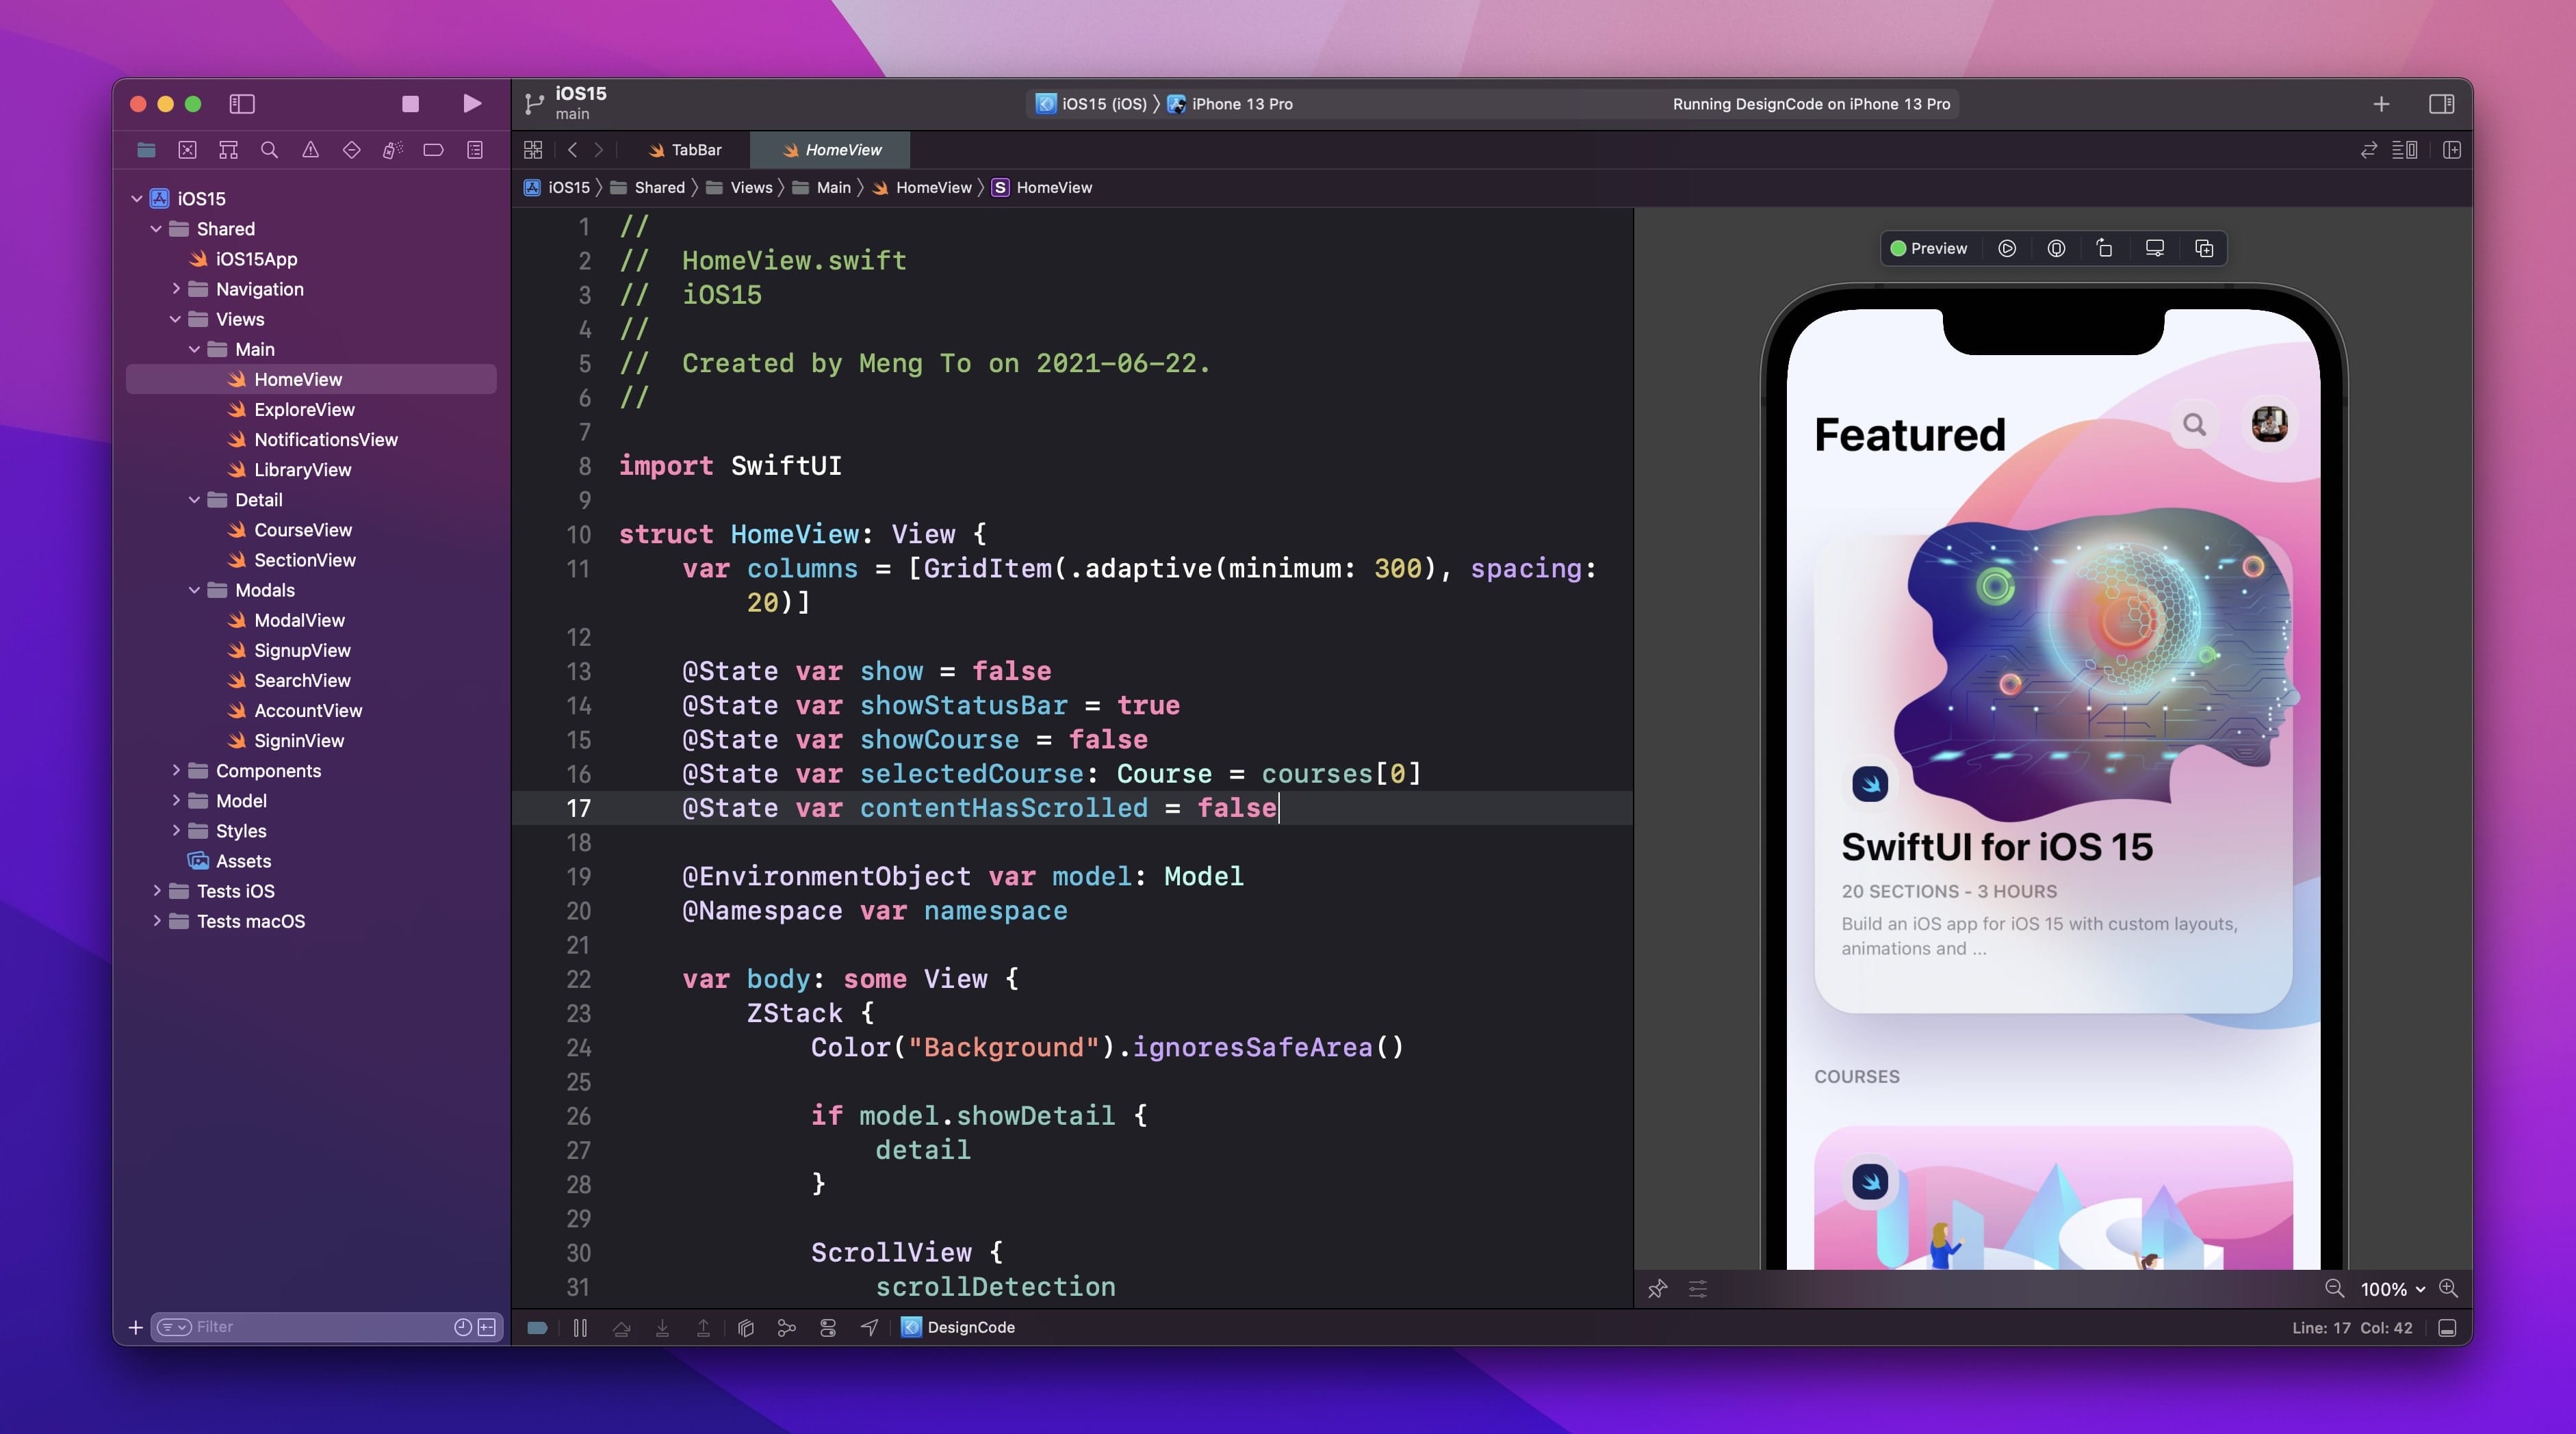
Compared to many frameworks, SwiftUI is easy to learn and has a ton of resources made by Apple and the community. Since my teaching style is friendly, focused on visuals and we'll code together step-by-step from a designer's perspective, you can learn with virtually zero experience. However, it is recommended that you are familiar with a computer and have light experience with HTML and CSS.
Developing an app for iOS 15 requires a Mac with Big Sur or later, and Xcode 13.
If you've never touched SwiftUI before, it is recommended to take my SwiftUI for iOS 13 course beforehand as it will go more in-depth with the basics. Beginners can take this course, but minimum experience with HTML and CSS (or coding equivalent) recommended.
Learn Design While Coding
Most coding courses consider design as an afterthought. They use stock UIs and don't teach how to properly create custom layouts. They don't dive deep into design techniques such as typography, colors, animations, shadows, outlines, blur, etc. Whether you are prototyping or building an app that needs to stand out, alone or with a solid design and engineering team, learning advanced layout techniques will help you reach that extra mile that will push you ahead of the competition.
While implementing the design, I will explain my decisions and show you techniques that I personally use as a designer.
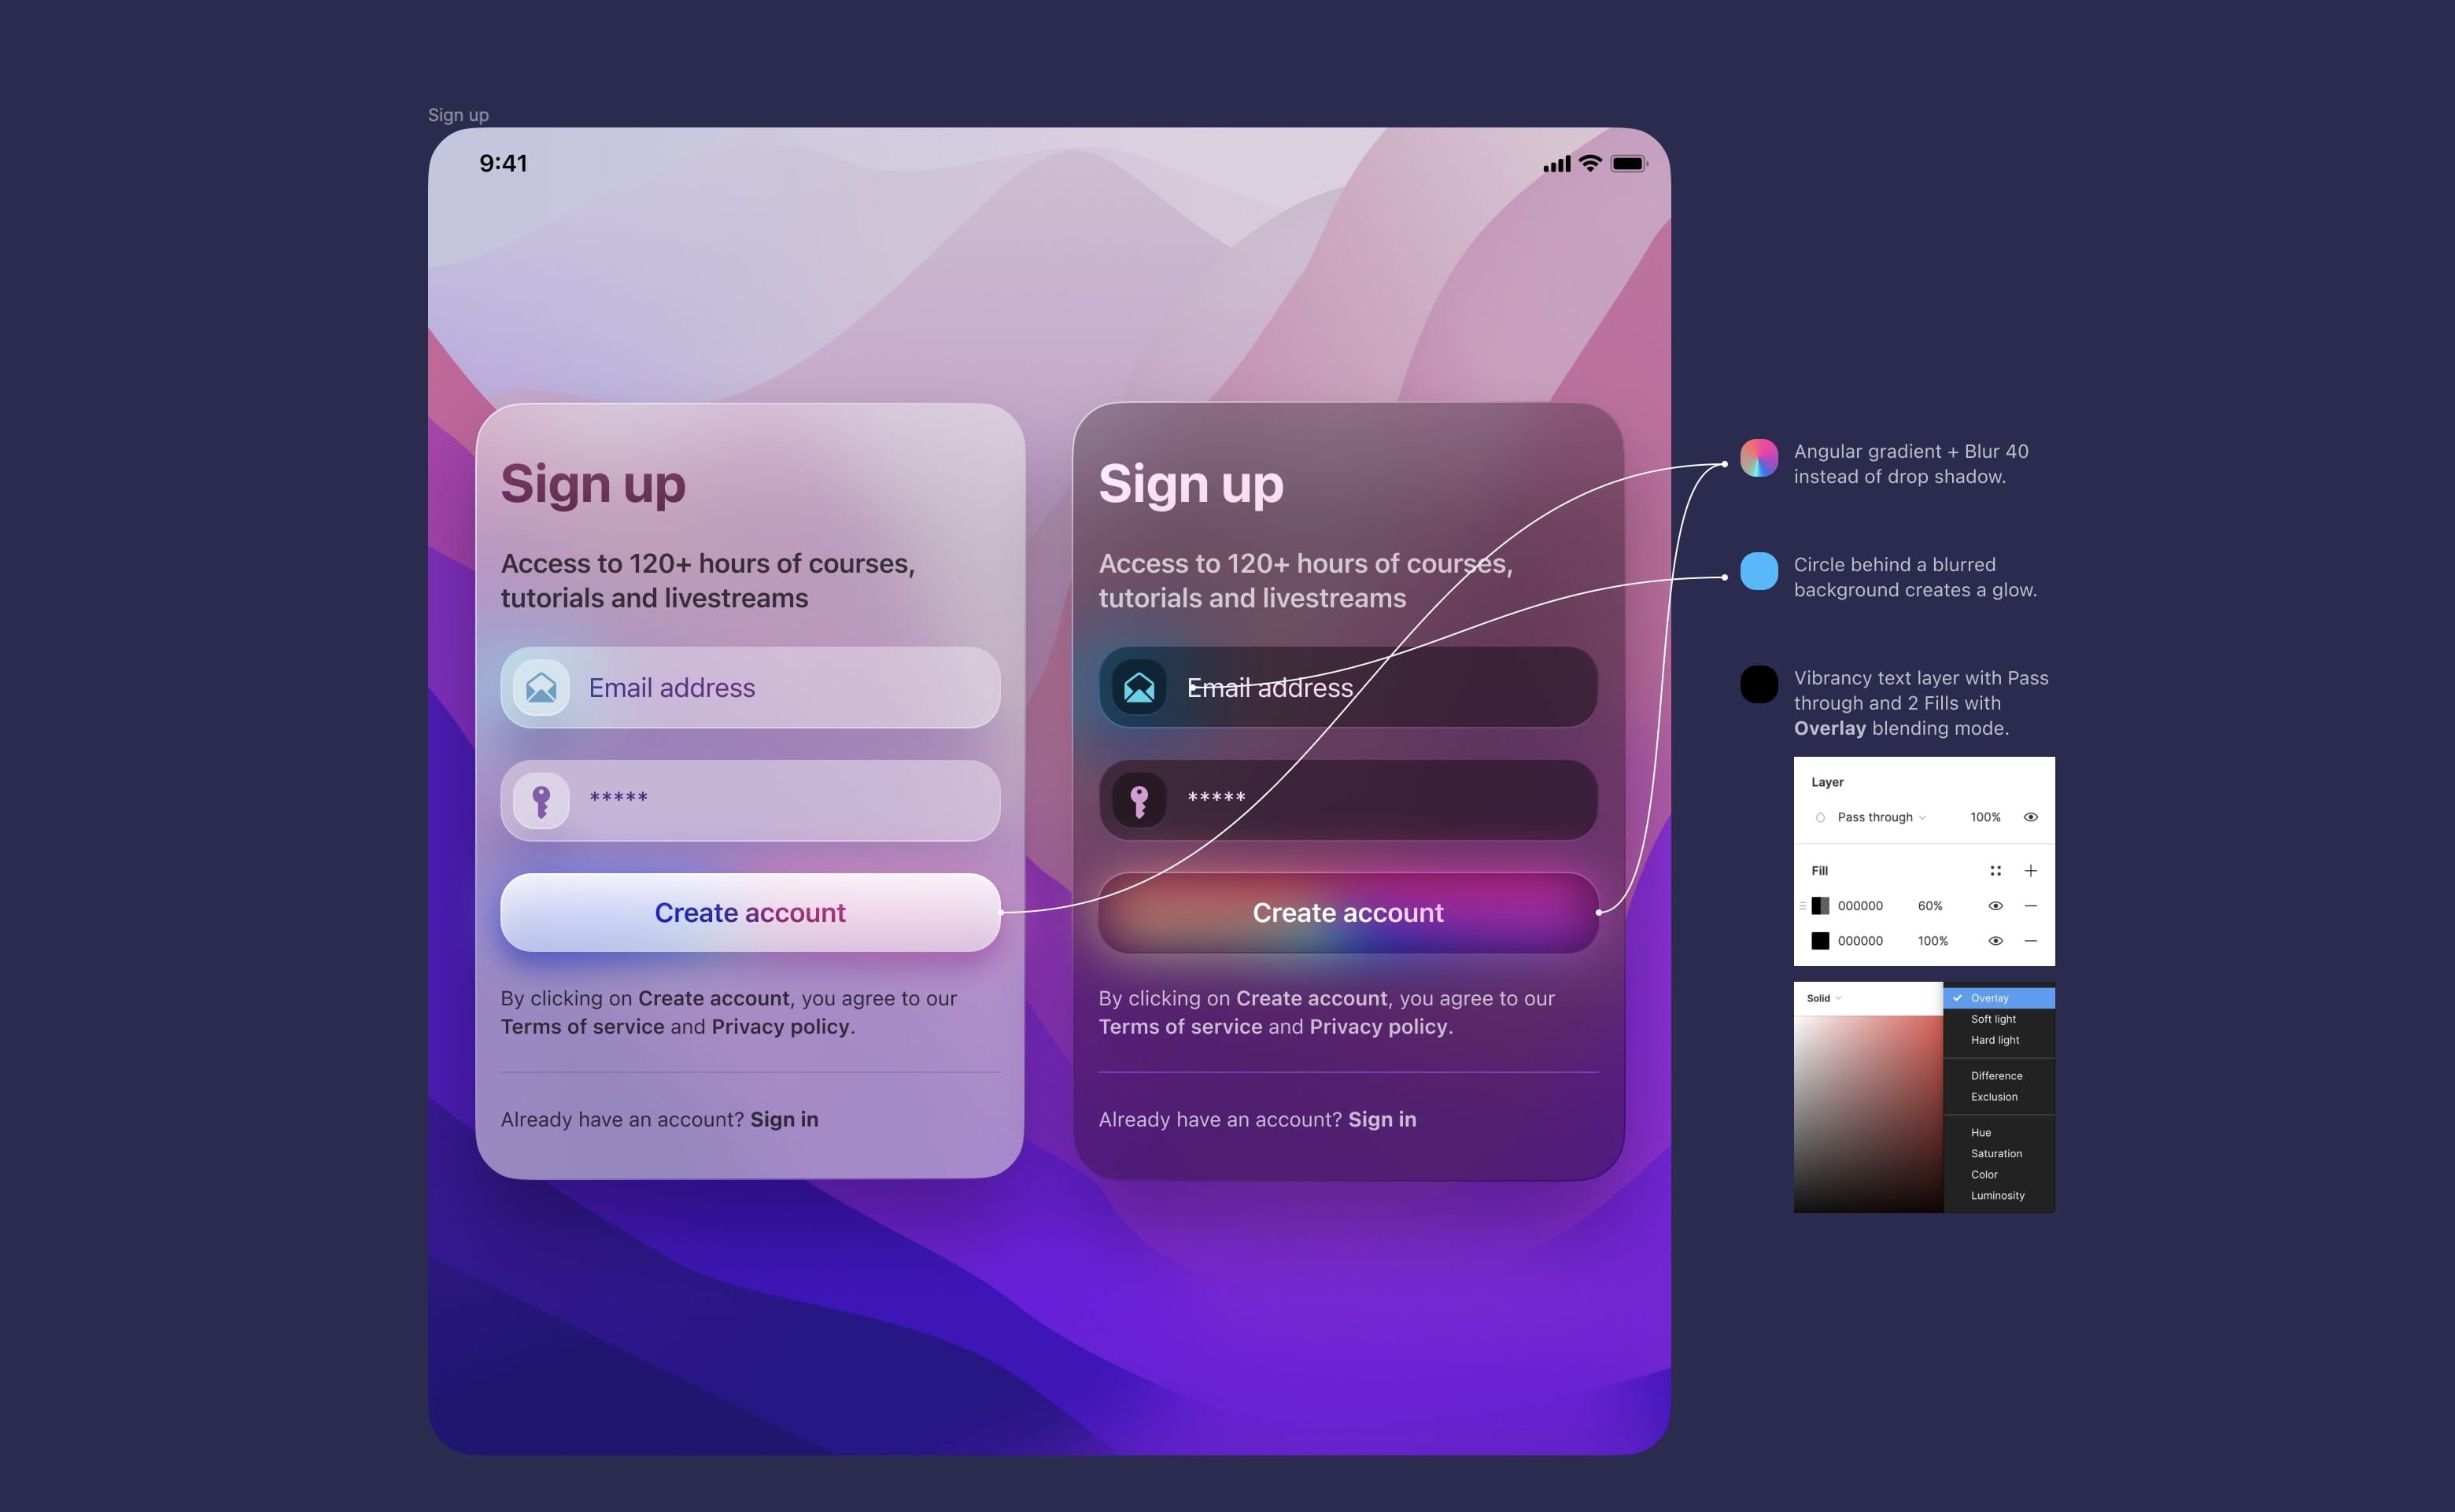
All the design source files will be shared, layered and with components, so you can inspect and try to replicate in your own projects.

Basic Layout and Styling
We'll start the course by getting familiar with Xcode 13's layout, importing assets a design tool and creating a basic layout with Text, Stacks, Images, Spacers and its modifiers without writing code. That's right, by using Xcode's Inspector and Library, you can drag and drop UI elements and edit the properties. It's perfect for beginners and designers. As you get used to the syntax of SwiftUI, you'll want to edit your code directly instead of using the Inspector. Just like CSS, knowing the code is far more efficient and powerful, but that can come later.
Then, we'll learn how to use SF Symbols 3 and effects such as Colors, Materials, Blur and Transform. You'll pick up more advanced techniques like maxWidth, alignment, overlay, offset, etc.
Animations, Transitions and Gestures
Unlike most courses, a big focus on this course is about giving life to your user interface with animations that enhance and not over-the-top. Transitions are easily done by using states and applying withAnimation when the states change.
@State var show = false.offset(y: show ? 10 : 0)
.onTapGesture {
withAnimation { show.toggle() }
}Custom Tab Bar
One of the things I wanted to teach in this course is how to create a fully custom user interface and all the challenges that come with creating a custom tab bar and navigation bar. Understanding this can not only help with building an app that stand out but also a great way to prototyping techniques on a real platform that developers use.

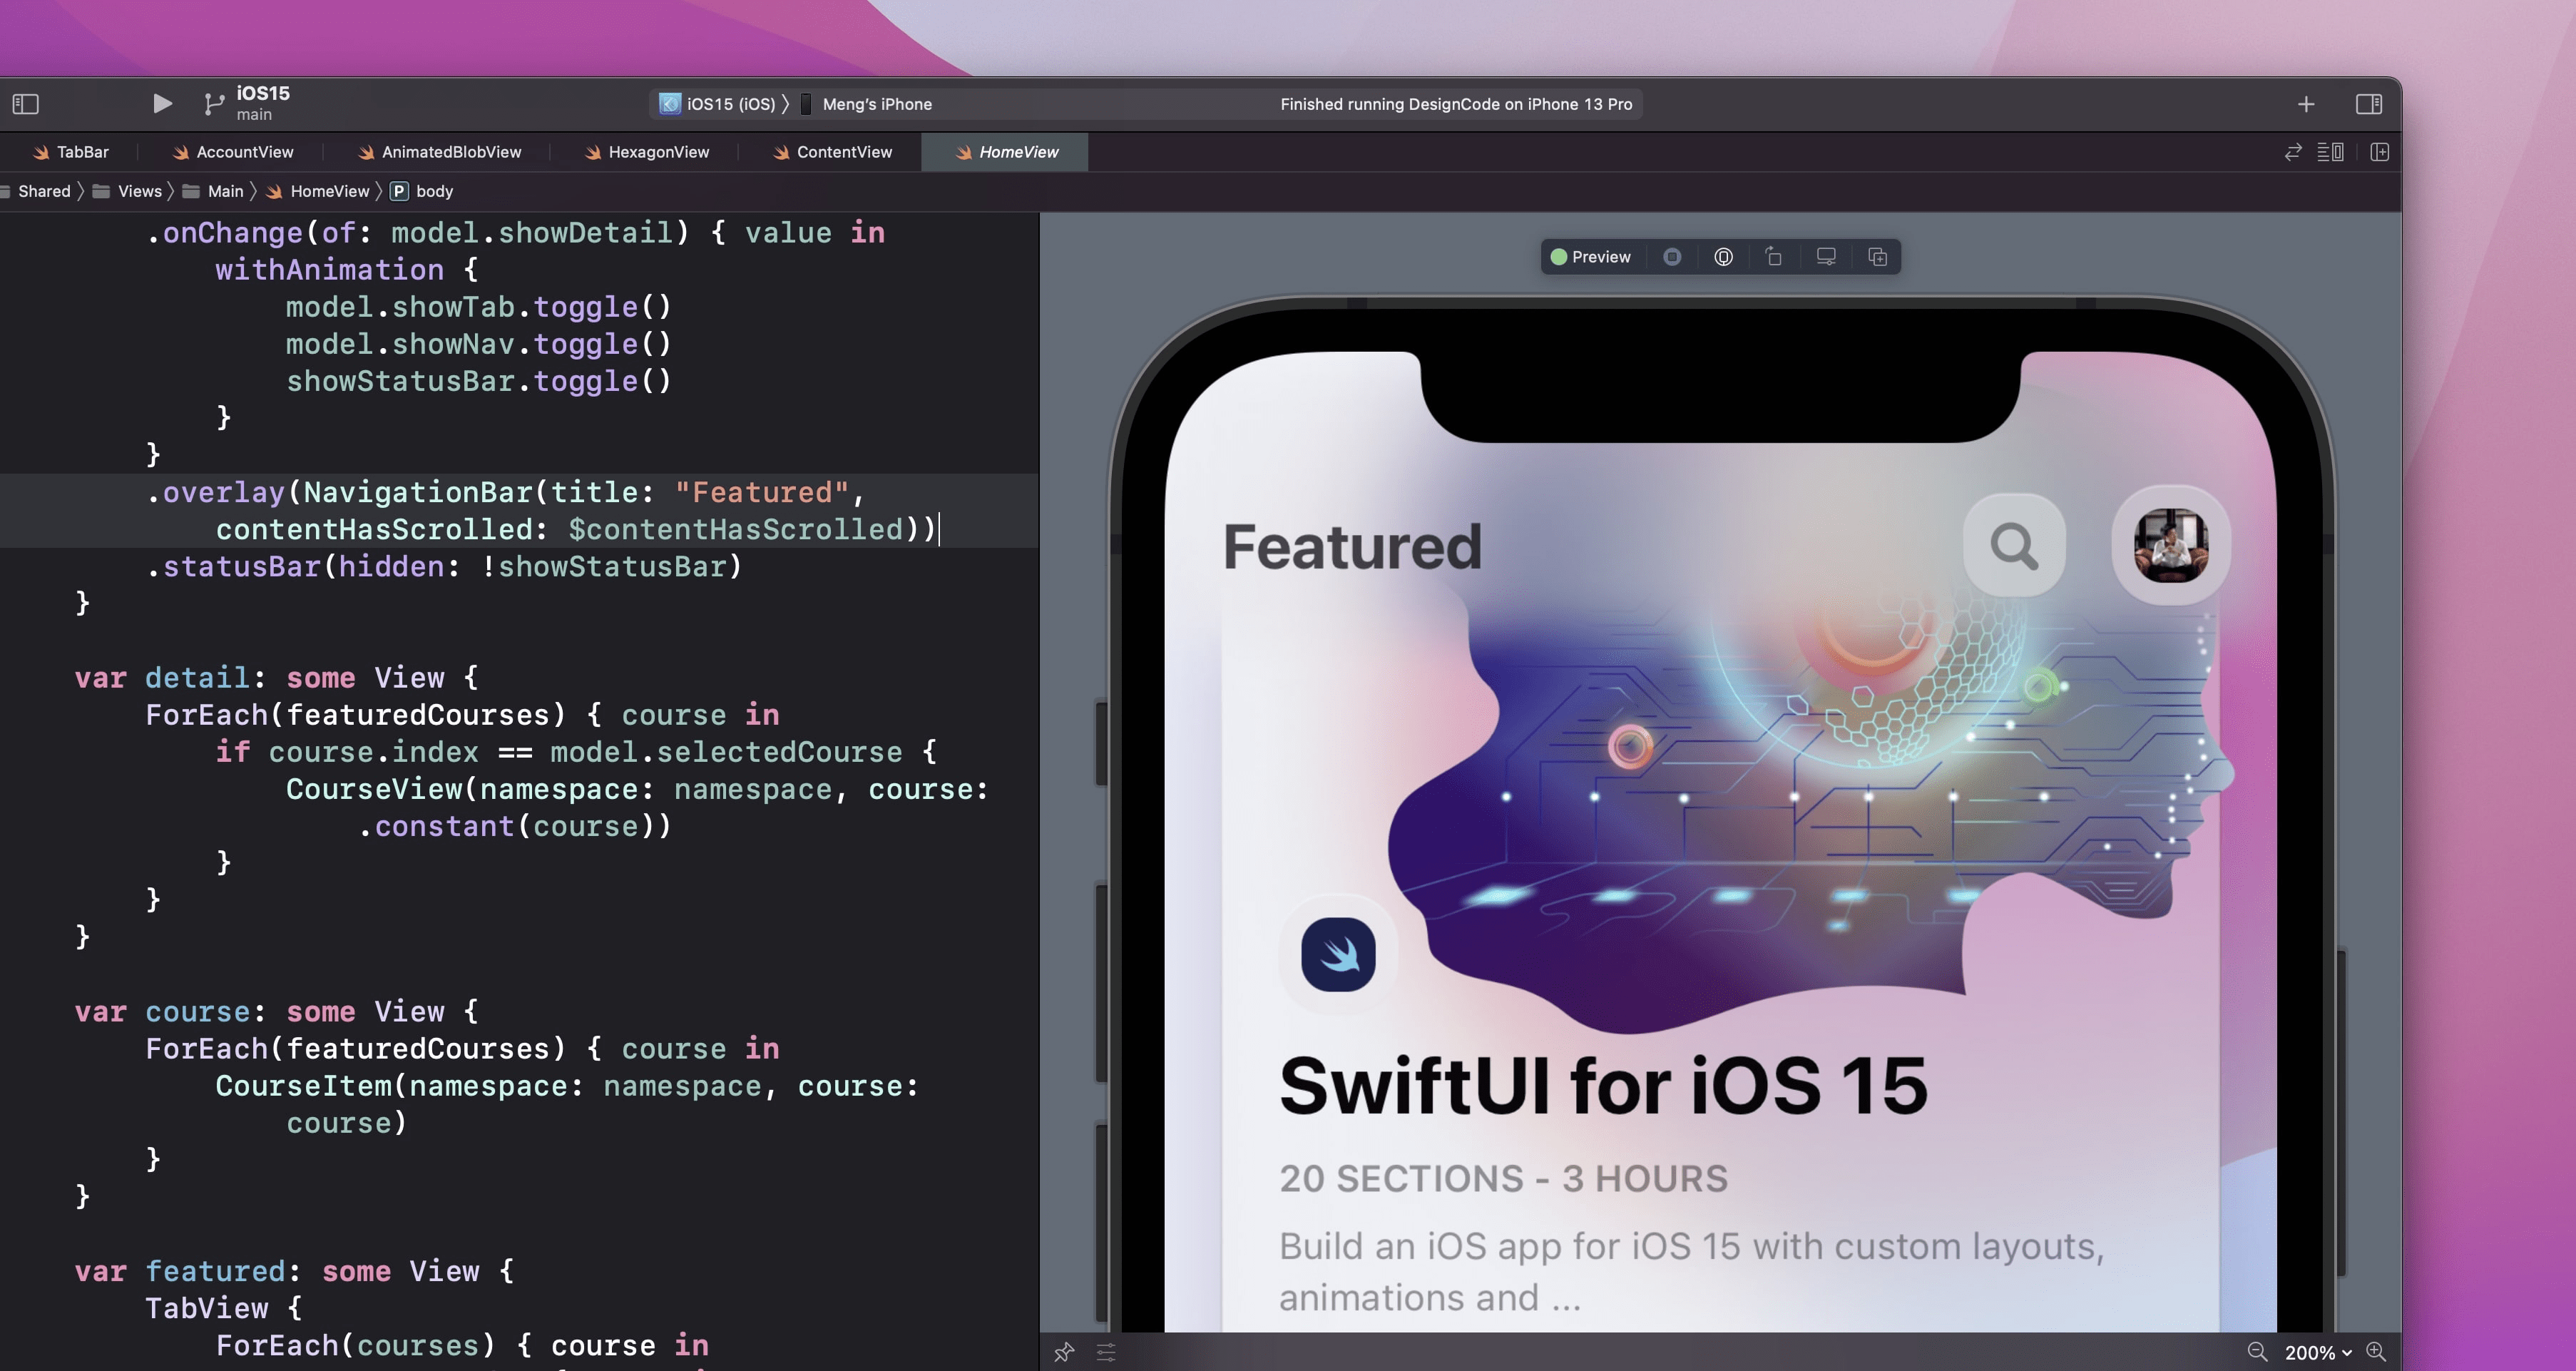
Custom Navigation Bar
When you have a custom tab bar, it makes sense to pair it with a custom navigation bar. While it is recommended to use the built-in Navigation View and Tab View for best adaptability across platforms and accessibility, learning how to build and style your own will take your skills to the next level. Popular apps like Instagram, TikTok, Clubhouse actually build their very own bars. For designers, this is fantastic for prototyping since you will have less contraints and are not forced to use the stock user interface for everything.
Adaptive Layouts
Even if you don't plan on supporting all platforms, it is important to have a solid foundation for adaptive layouts. Like this, you'll be prepared for all sorts of resolutions and layout switch. You'll learn when it is appropriate to use Spacer, maxWidth, GeometryReader, Environment, Size Classes and detecting devices.

Custom Modifiers
When you repeat the same modifiers or collection of styles over and over, it is a good idea to start your custom modifiers. A huge advantage with this technique is that you can isolate the styles, just like a component, and apply conditions based on resolutions and devices. Also, when you apply changes, it'll apply everywhere at once.
struct BackgroundStyle: ViewModifier {
    var cornerRadius: CGFloat = 20
    var opacity: Double = 0.6
    @AppStorage("isLiteMode") var isLiteMode = true

    func body(content: Content) -> some View {
        content
            .backgroundColor(opacity: opacity)
            .cornerRadius(cornerRadius)
            .shadow(color: Color("Shadow").opacity(isLiteMode ? 0 : 0.3), radius: 20, x: 0, y: 10)
    }
}
Omitting Types
You can now omit the value types, making the code shorter and easier to read. This might not seem like a big deal at first, but it's actually a huge improvement in term of syntax for better auto-completion and readability.
// Before
withAnimation(Animation.easeOut.delay(0.2))

// Now
withAnimation(.easeOut.delay(0.2))
// Before
.shadow(color: Color.black.opacity(0.2), radius: 20, x: 0, y: 10)
// Now
.shadow(color: .black.opacity(0.2), radius: 20, x: 0, y: 10)Objects can also be expressed as properties. Like this, there is less confusion between the two.
// Before
.background(LinearGradient(gradient: Gradient(colors: [Color.red, Color.blue]), startPoint: .leading, endPoint: .trailing))

// Now
.background(.linearGradient(colors: [.red, .blue], startPoint: .top, endPoint: .bottom))
Swift Playgrounds for iPad
For the first time, you can build entire apps and deploy to the App Store using the iPad exclusively. Playgrounds is a great way for beginners to learn Swift without requiring an expensive Mac machine. You can't have a simpler setup — you just need to download from the App Store and you have access to a bunch of beginner-friendly template apps where you can start toying with the code.

Note: Swift Playgrounds 4 will be available in late Fall 2021.
What you'll build
In this course, we'll build an iOS 15 app from scratch focusing on custom layout techniques, animations and interactions. We'll build our own custom Tab Bar, Navigation Bar and interactions. While SwiftUI hasn't changed significantly over the past 3 years, the framework is far more comprehensive, with more concise code for state management, animation and now fully supporting effects like blur material.
Download SF Fonts
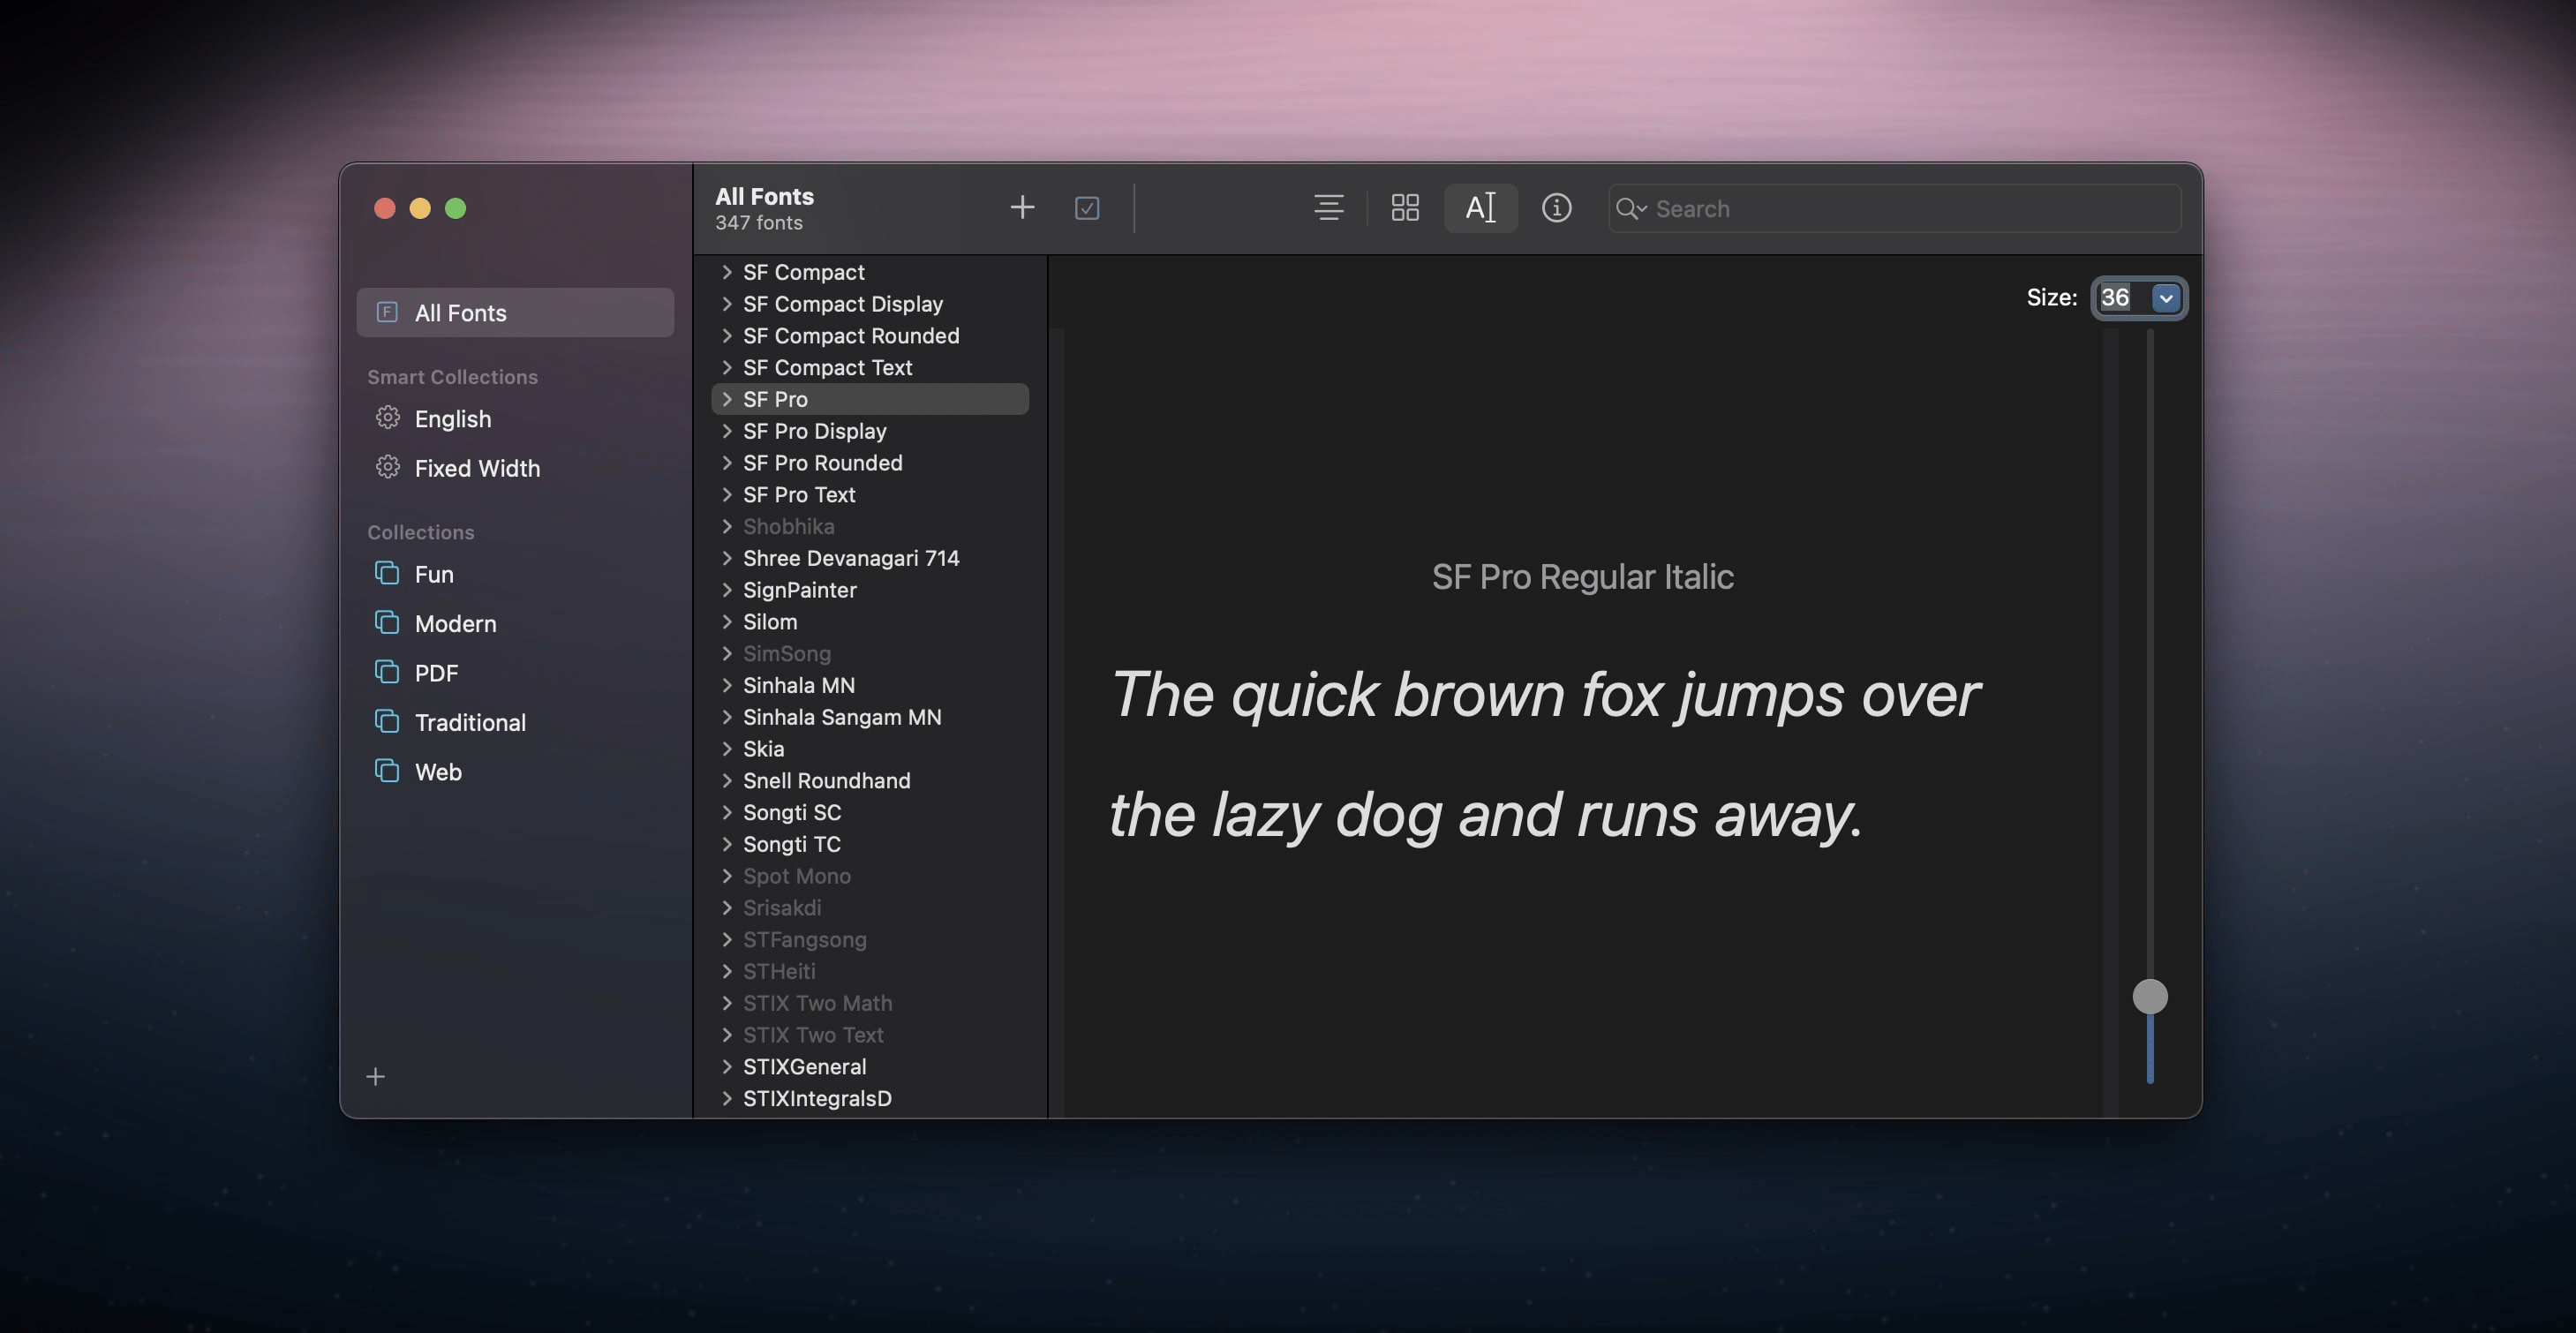
If you're designing for iOS, it is essential to download the SF Fonts from Apple. There are 4 fonts:
- SF Pro is the main font that is consistent across Apple's platforms, specifically for iOS, iPadOS and tvOS.
- SF Compact is for watchOS design, optimized to be readable at smaller sizes.
- SF Mono (optional) for evenly-spaced characters, which is useful for showing code.
- New York is a serif typeface, typically for more traditional designs such as Books and News.
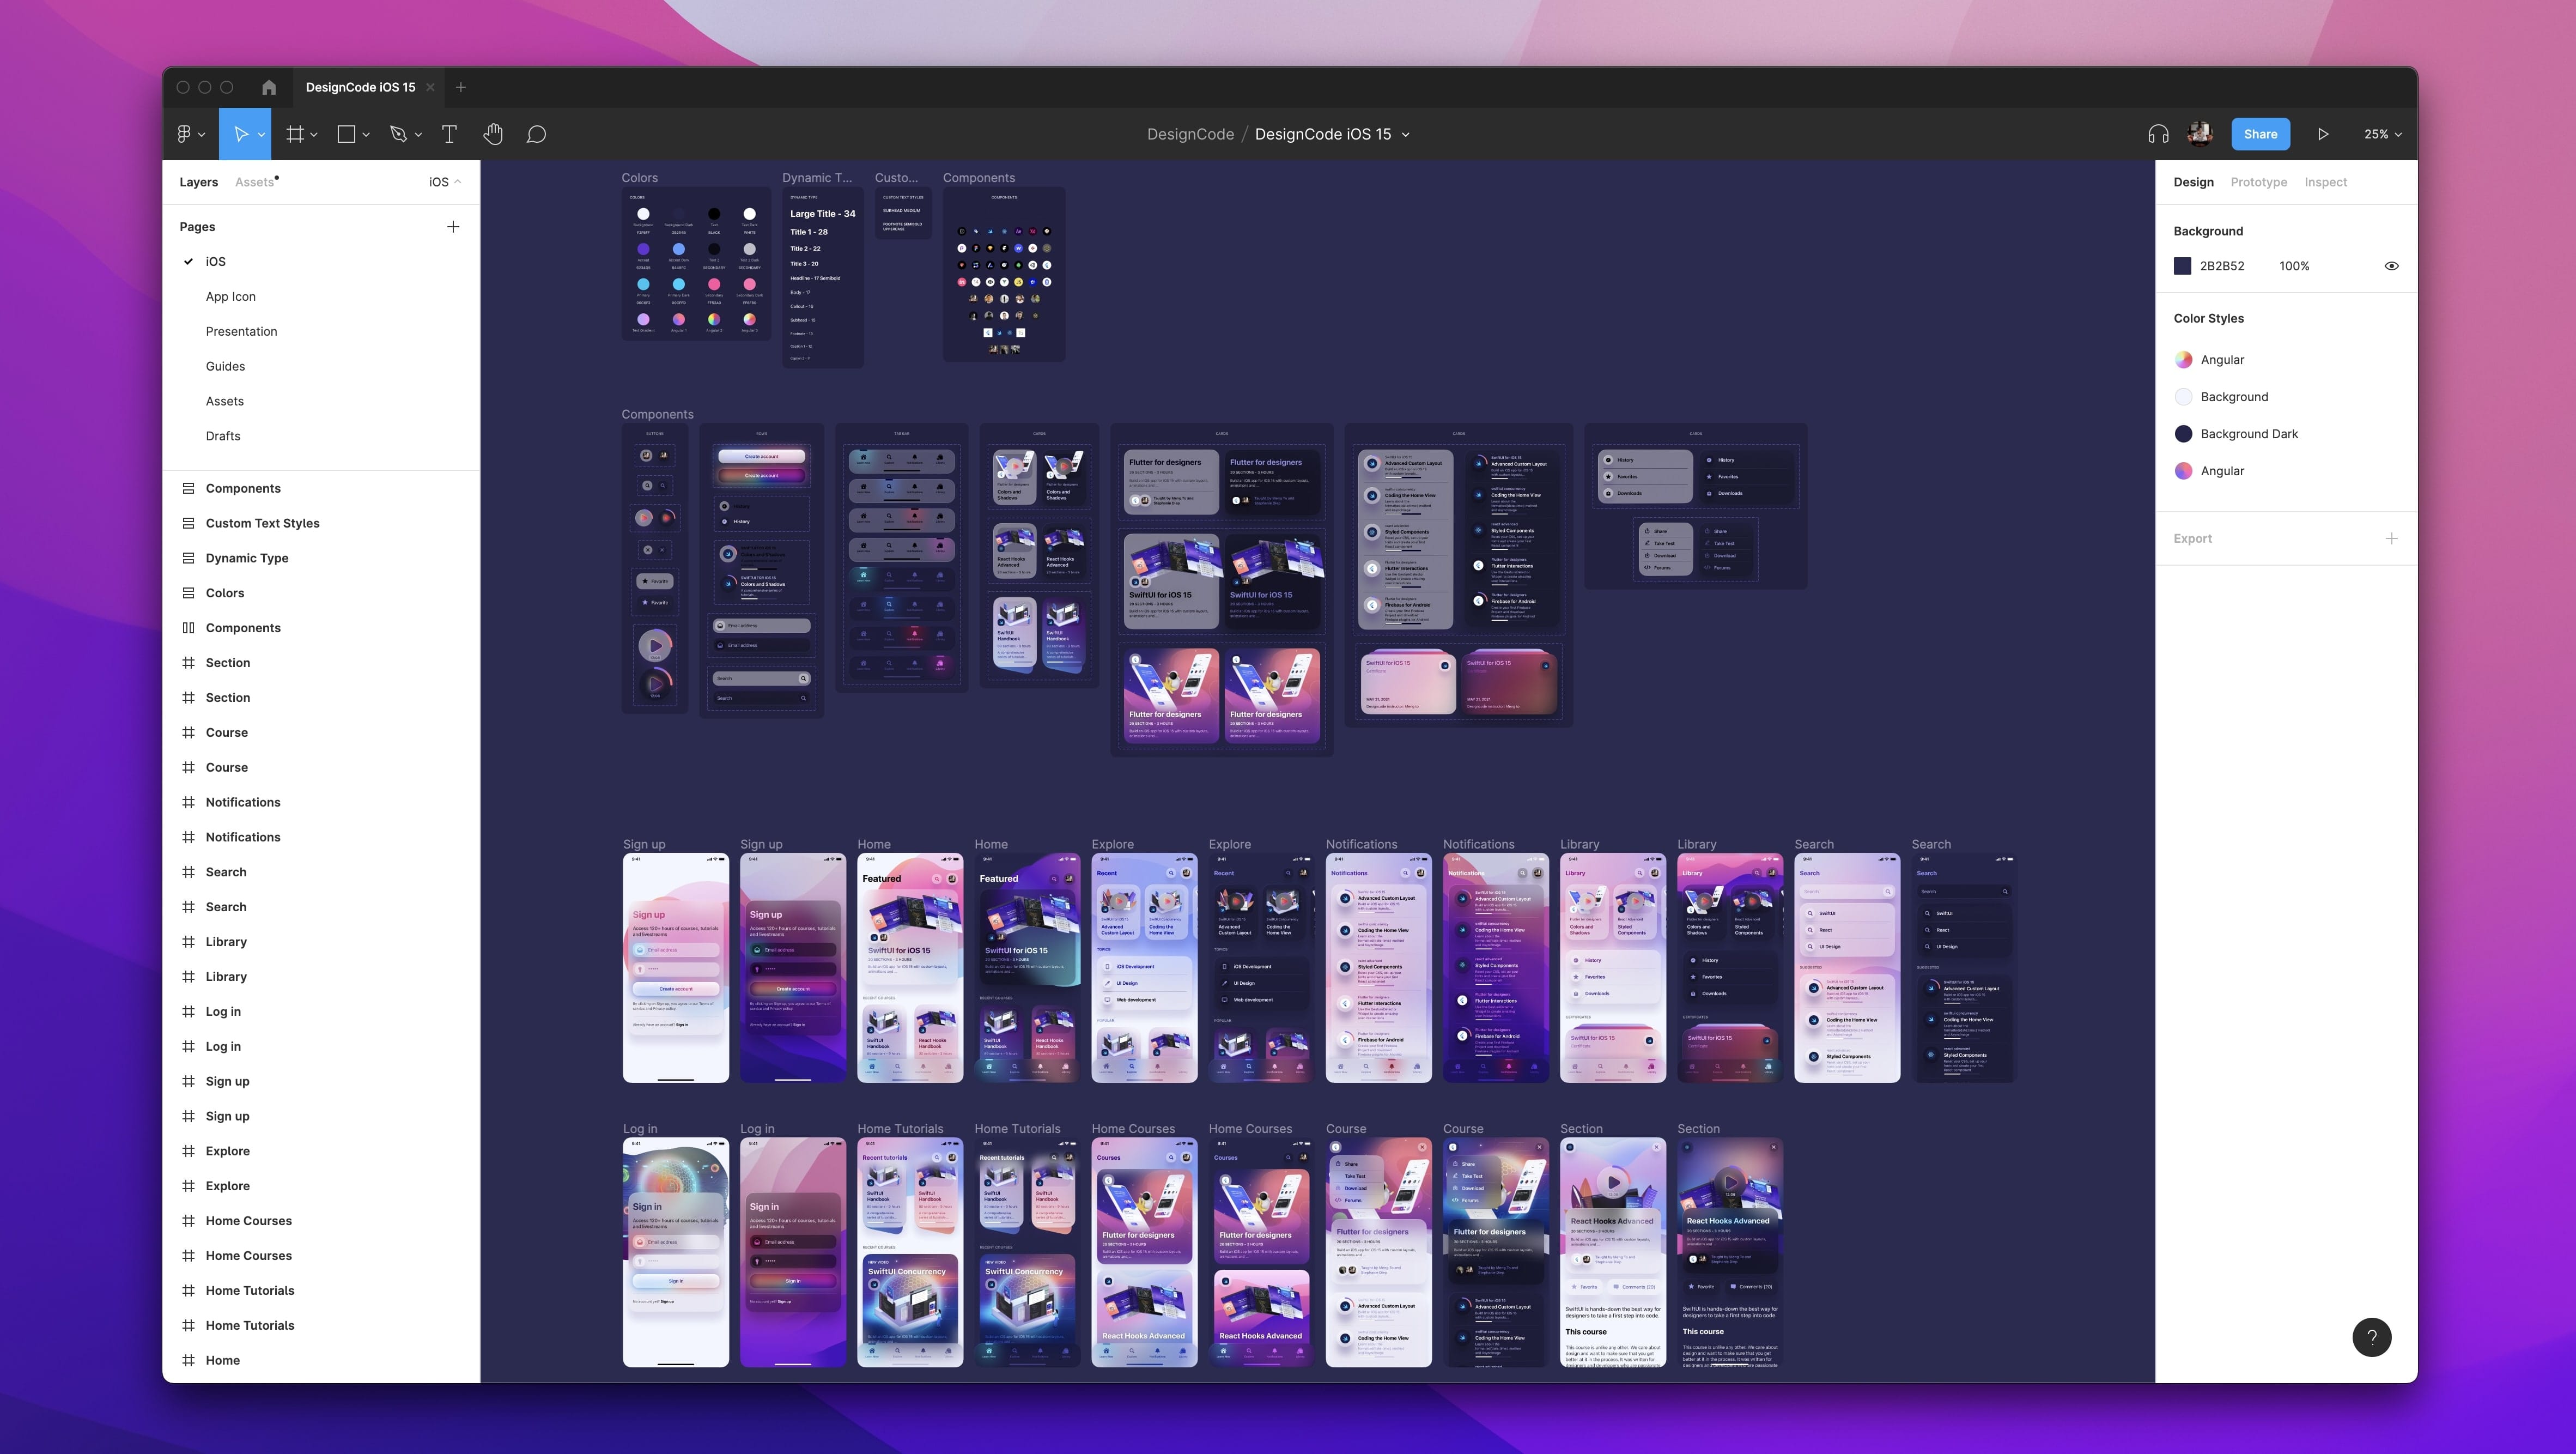
Figma Template
As I was building this app, I followed the design that I made in Figma. From the Figma file, you'll be able to inspect the typography, sizes, colors and assets. All the components are neatly organized and each screen has been adapted to both light and dark modes.
Download Xcode 13
Xcode is the development tool that we'll use to create our iOS app. You can download it and install it directly from the App Store. Unless you're a seasoned developer, I don't recommend using the beta version and stick to the public releases.

Create a New Xcode Project
Once Xcode is installed, open the app and you'll see a welcome screen. Click on Create a New Xcode Project.
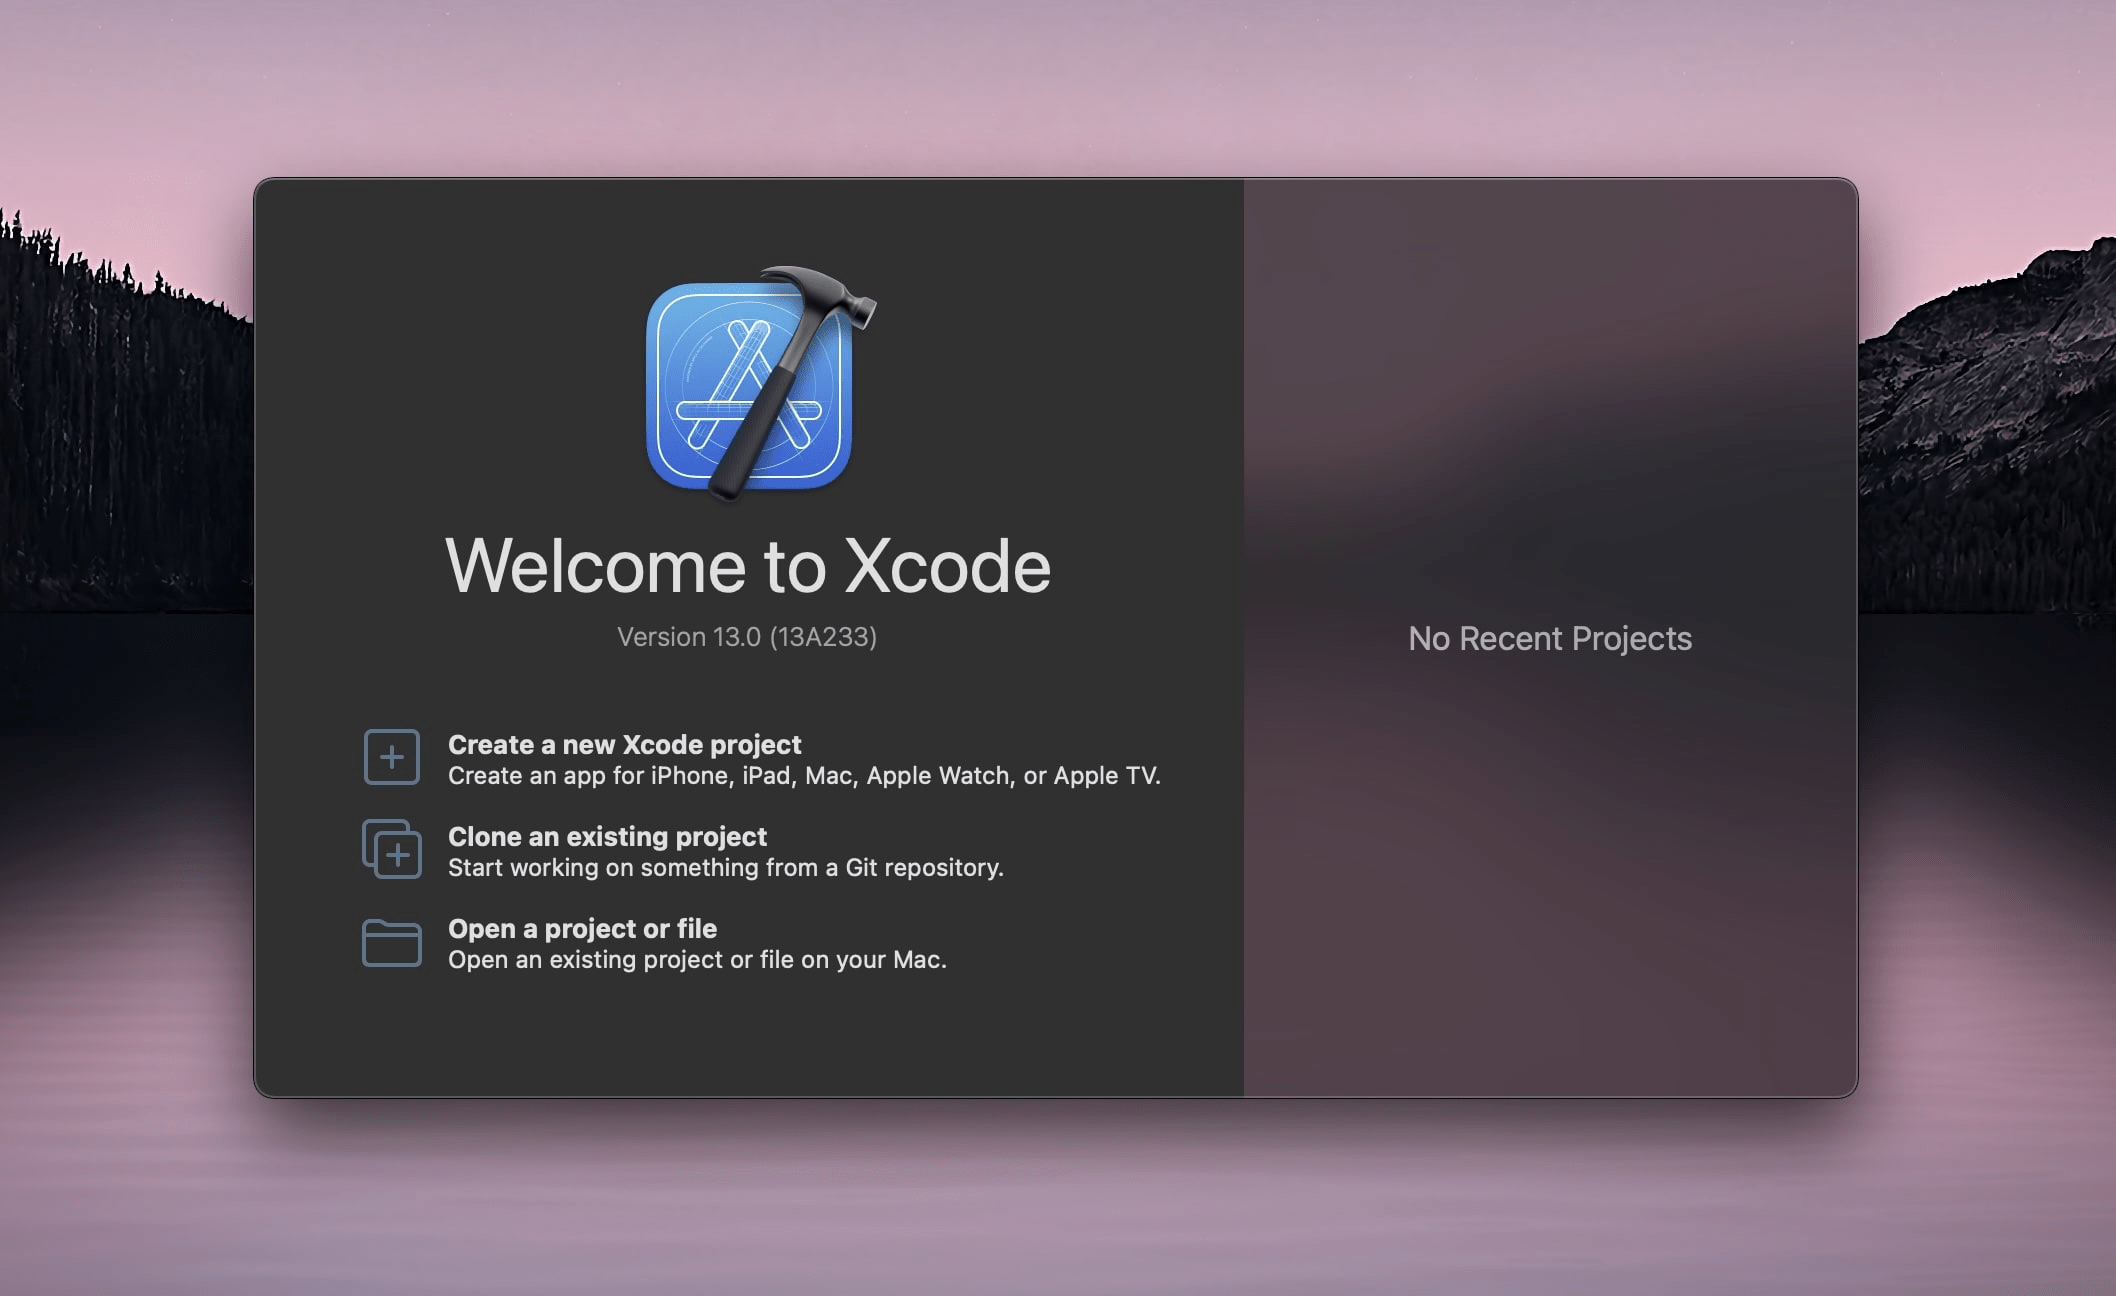
In this course, we'll learn to create custom UI components such as the Tab Bar, Nav Bar and Modals on top of the stock UI. As a result, we'll focus on iOS to keep things simple. Select App inside the iOS tab, then click Next.

Time to fill the project details:
- Product Name: this is the name of your app. E.G. News, Reminders, Mail. You don't need to include App at the end.
- Team: this is useful if you wish to test on your device or publish to the App Store. If you have a developer account with Apple, you can set here, but otherwise you can do this later in Preferences under Accounts Tab with your Apple account. You can set None for now.
- Bundle Identifier: this is your domain name in reverse. It's a unique ID for all your apps. E.G. com.twitter, com.instagram, com.figma.
- Make sure to select SwiftUI as the interface and language to Swift.

Finally, click Next. Select a place to save your Xcode project, such as Downloads.
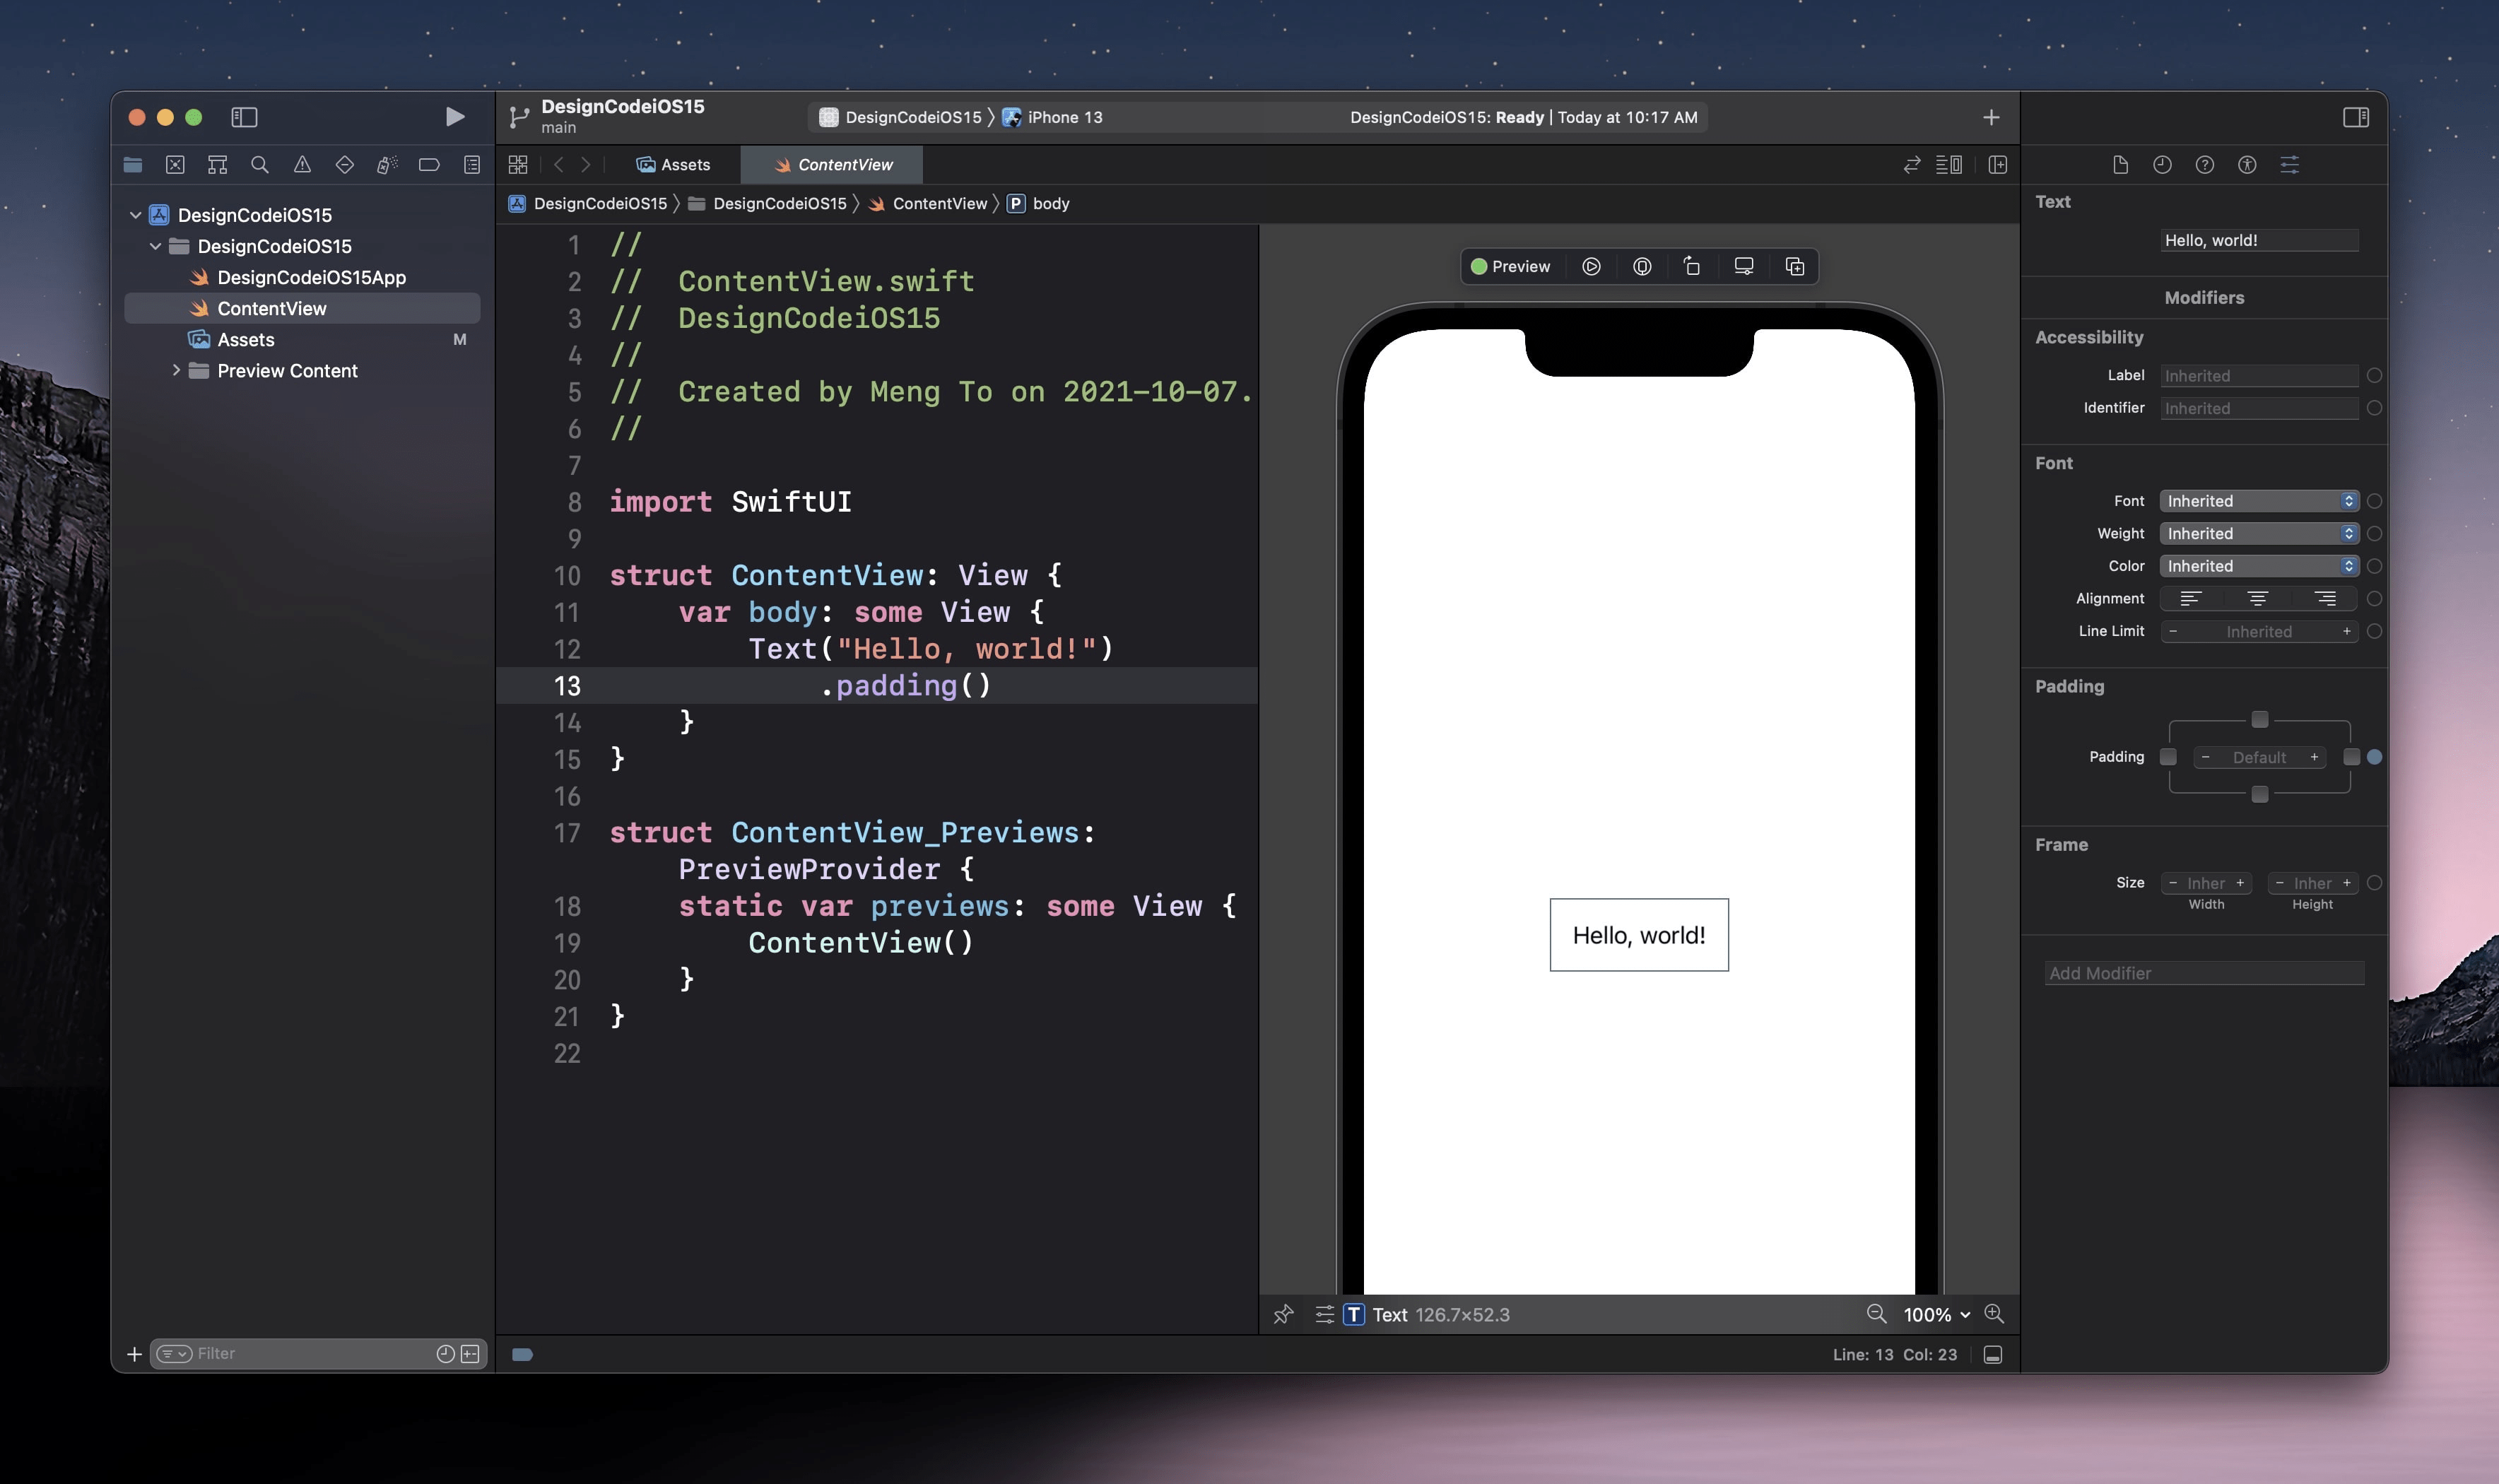
Congratulations, you've just created your Xcode Project! The first time you land, you'll see a fully open project with the project files on the left, the code editor in the middle with the Preview next to it and the Inspector in the right. Click on Resume in the top right to start seeing a Preview of your code.
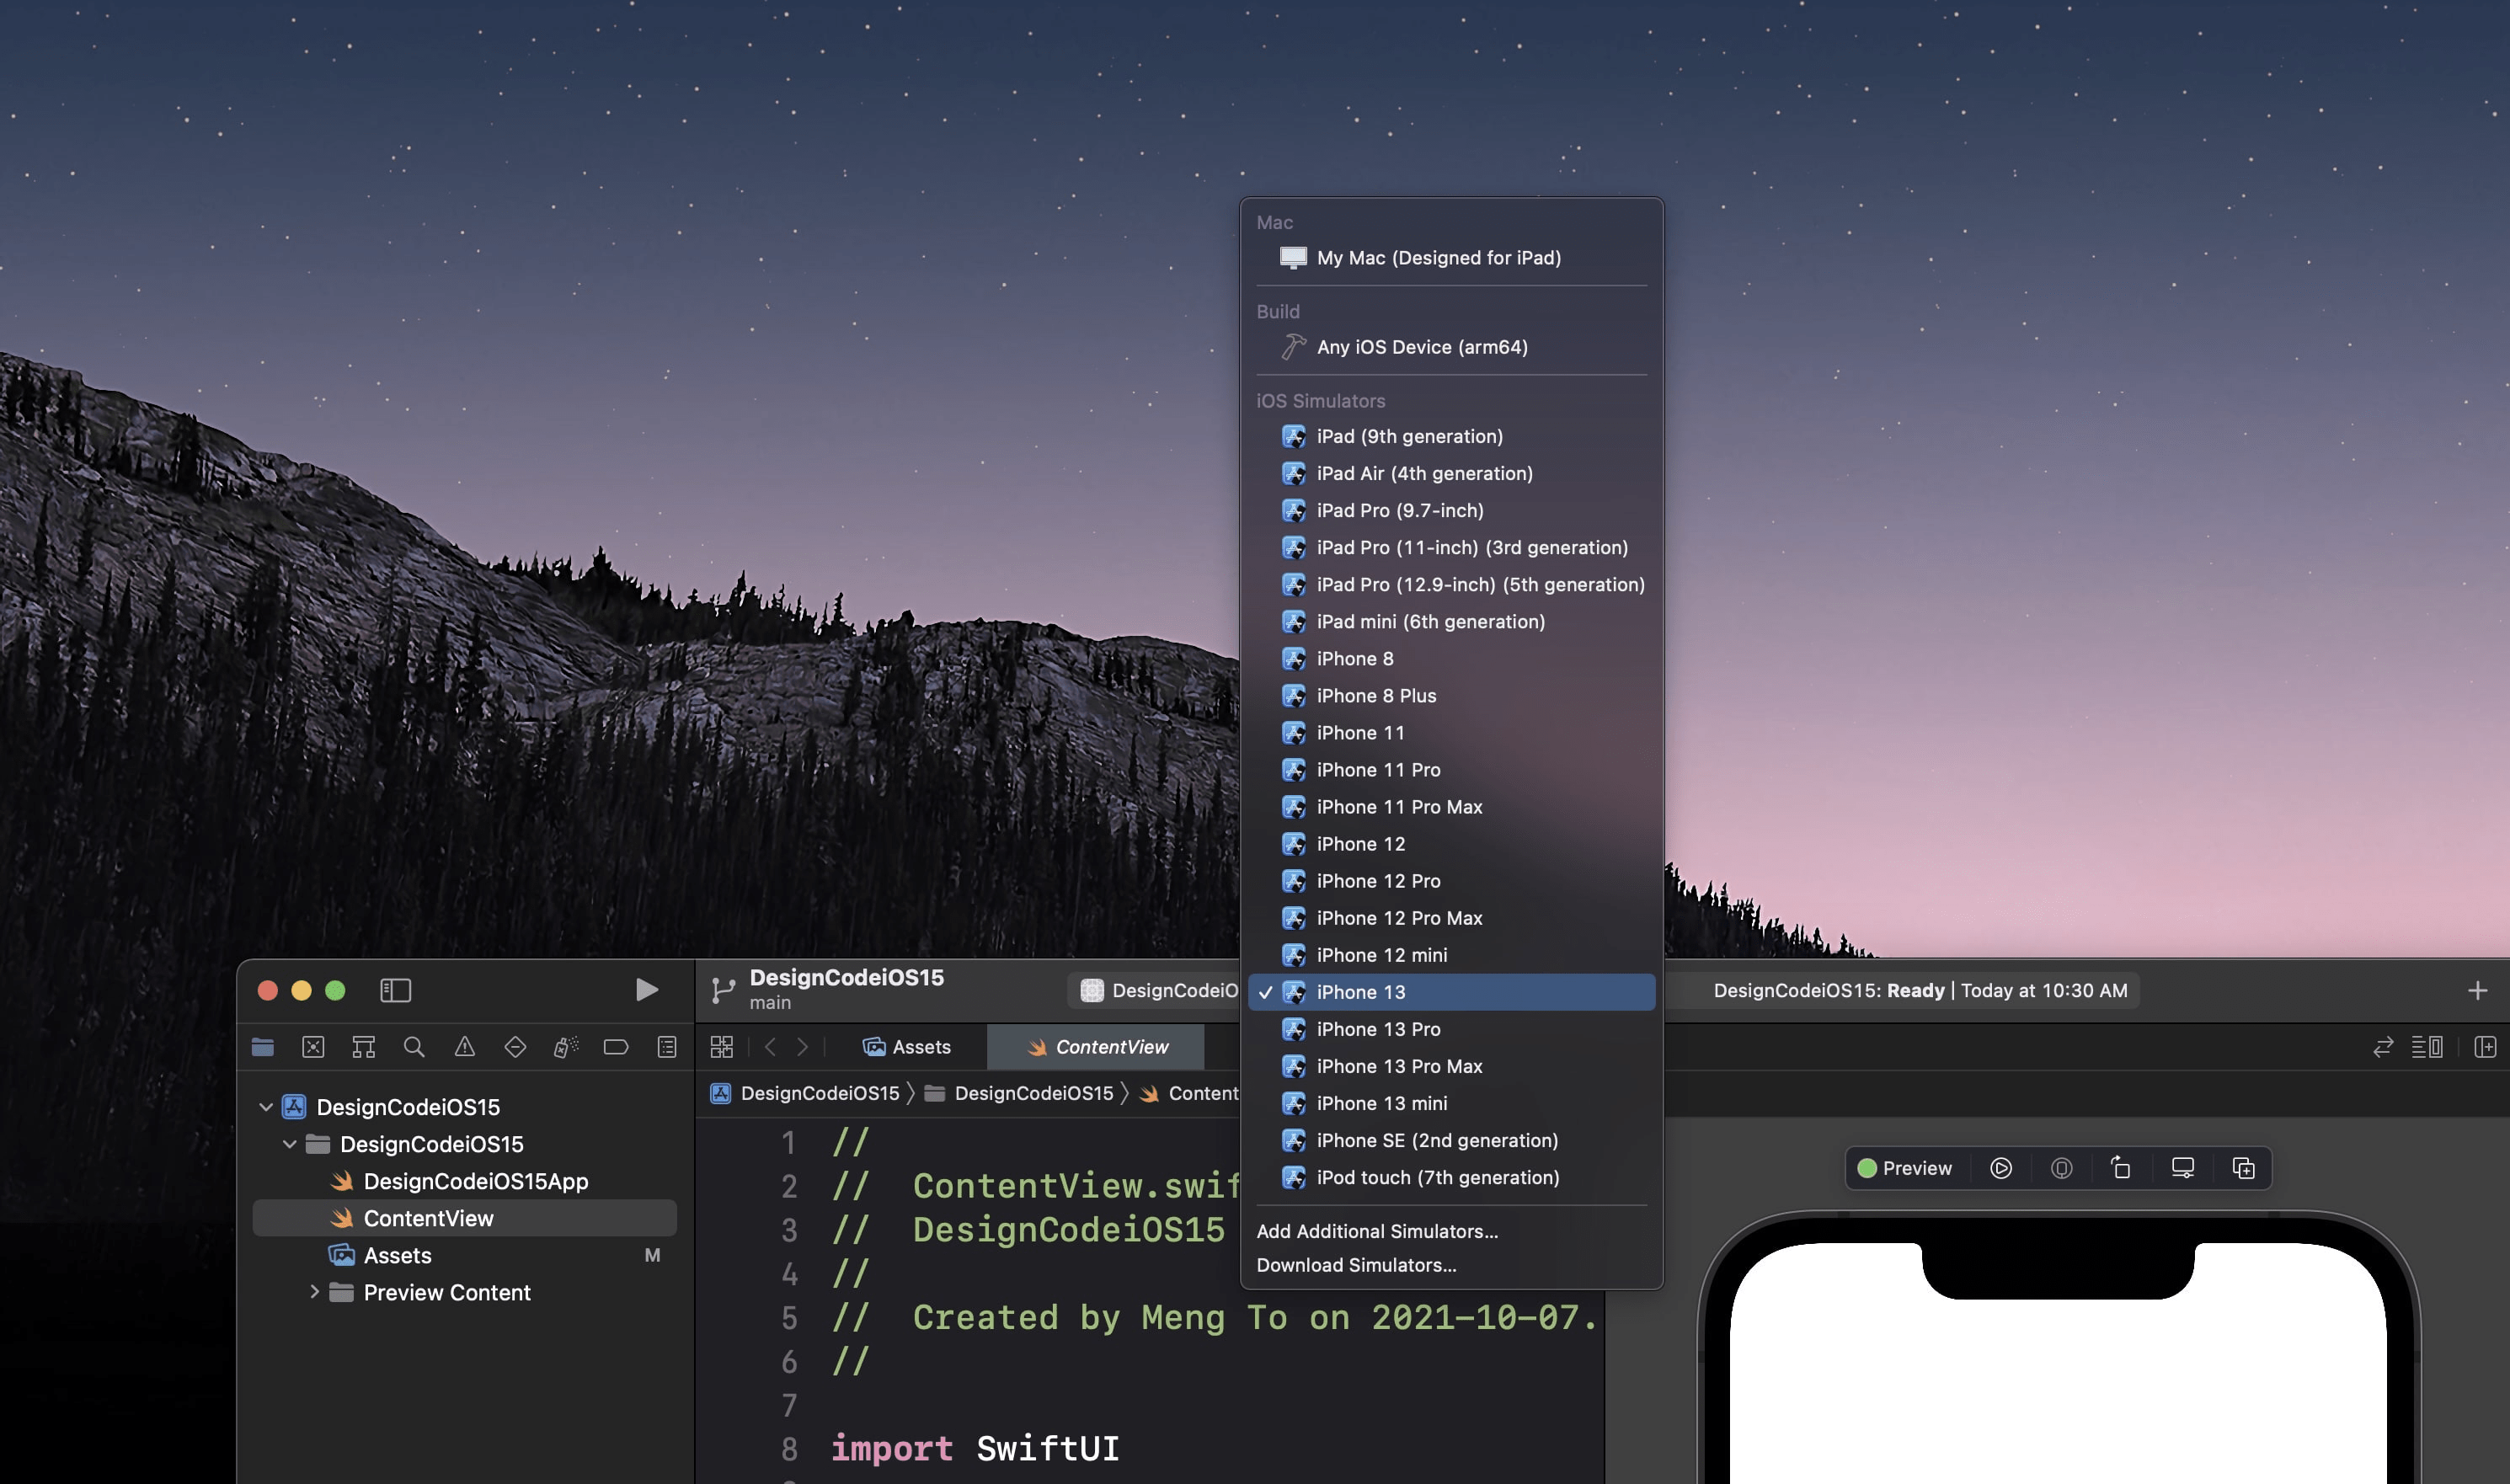
Make sure to have your a device selected in top bar. A good default is the iPhone 13.
Xcode Layout
Before we start, it is helpful to know your way around Xcode. These are the essential parts of working with SwiftUI inside Xcode 13.

Navigator
The Navigator is where you'll navigate all the files, commits, issues for your project. By default, you'll have the Project Navigator tab selected. That's where you'll spend most of your time on, so it's important that you know how to get back to it, especially when Xcode sometimes auto-switches to other tabs when showing issues.
Inspectors
Whenever you have something selected in your code or assets, the inspector will give options based on that. The Attributes Inspector tab is the default and most relevant tab most of the time.
Resume Preview
At first, you'll need to click on Resume to start previewing your code. The changes made in your code will be shown in real-time inside your Preview. By default, it's static and you can see the outlines of the selected elements in your code (Texts, Images, Stacks, etc). You can also click on Play to start interacting with your app in the Preview.
Play in Simulator
In the top left, there is a giant Play button. This allows you to run your app on an iOS simulator which gives you all the extra options that the Preview won't give you, such as Home Apps, Save Screen, Slow Animations, Status Bar and a whole lot more.
Keyboard Shortcuts
- Toggle Navigator (⌘ + 0): you can hide the Navigator to maximize your code editor.
- Toggle Inspectors (⌘ + option + 0): the Inspectors are useful for editing your UI without writing code, but later on, you'll mostly do everything in code as it's faster and more efficient. That's why it's useful to hide the Inspectors when they're not needed.
- Resume Preview ( ⌘ + option + P ): the Preview needs to be resumed at start, or when there is a more structural code change outside of your body UI. This shortcut will help save those precious seconds.
- Run ( ⌘ + R ): run your app in the iOS Simulator. When running, you will have access to the logs, issues and performance graphs.
- Stop ( ⌘ + . ): stop running the app. The app will remain in the Simulator, but you'll no longer get logs, issues, etc in real-time.
- Build (⌘ + B): Xcode checks your code in real-time for errors and warnings. This prevents coding in the blind or tracing back too many steps. When the errors don't seem to disappear after a fix, a quick way to check if your code is fine is to Build.
- Clean ( ⌘ + Shift + K ): a useful command when Xcode starts acting or doesn't seem to sync well with the changes you make. After a clean, it is recommended to Build again. If Xcode keeps acting, a good ol' Quit and Reopen can help, or as a last resort, a computer restart.
- Library ( ⌘ + shift + L ): a quick way to add views, modifiers, images and colours is to use the Library. It's also a great way to explore all UI elements and modifiers that are possible in SwiftUI.

Project Settings and Deployment Target
The first thing you'd want to change is the Display Name, which will show under your App Icon. This can differ from your Project Name.

Second, make sure that your deployment target is set to iOS 15. Otherwise, you'd need to create additional conditions that use the new iOS 15 features. This may be set by default eventually, but if it's not, you should change it.
Import Assets
Assets can be downloaded at the bottom portion of any page of this course. To import assets, go to Assets in the left Navigator and drag and drop all the files and folders from the downloaded Assets folder. If you wish to learn how to import the App Icon, Color Sets and Image assets manually, follow the optional steps below.

Export App Icons (optional)
The first thing you want to set up is the App Icon. A trick in Figma is to create a component and export for each icon resolution. Select iPhone, iPad and App Icon Beta, then export the images. You can also find the App Icon assets in the Images folder provided.
![]()
Import to Xcode (optional)
In Xcode, go to the Assets from the left Navigator. Select AppIcon and start drag in the iPhone, iPad and App Store (App Icon Beta) files one by one. A trick is to disable iPad first and import all the iPhone assets at once, then App Store, and finally the iPad assets one by one with iPad enabled.

Accent Color (optional)
Setting your custom colours in Xcode is the best way to set your colour styles for your design. It allows you to customize for Dark Mode and use HEX values. Starting with your Accent Color, set Appearances to Any, Dark. Then select each color and set content to sRGB or Display P3 and Input Method to 8-bit Hexadecimal. Now you can paste the HEX value from your design tool. Do the same for the Dark.
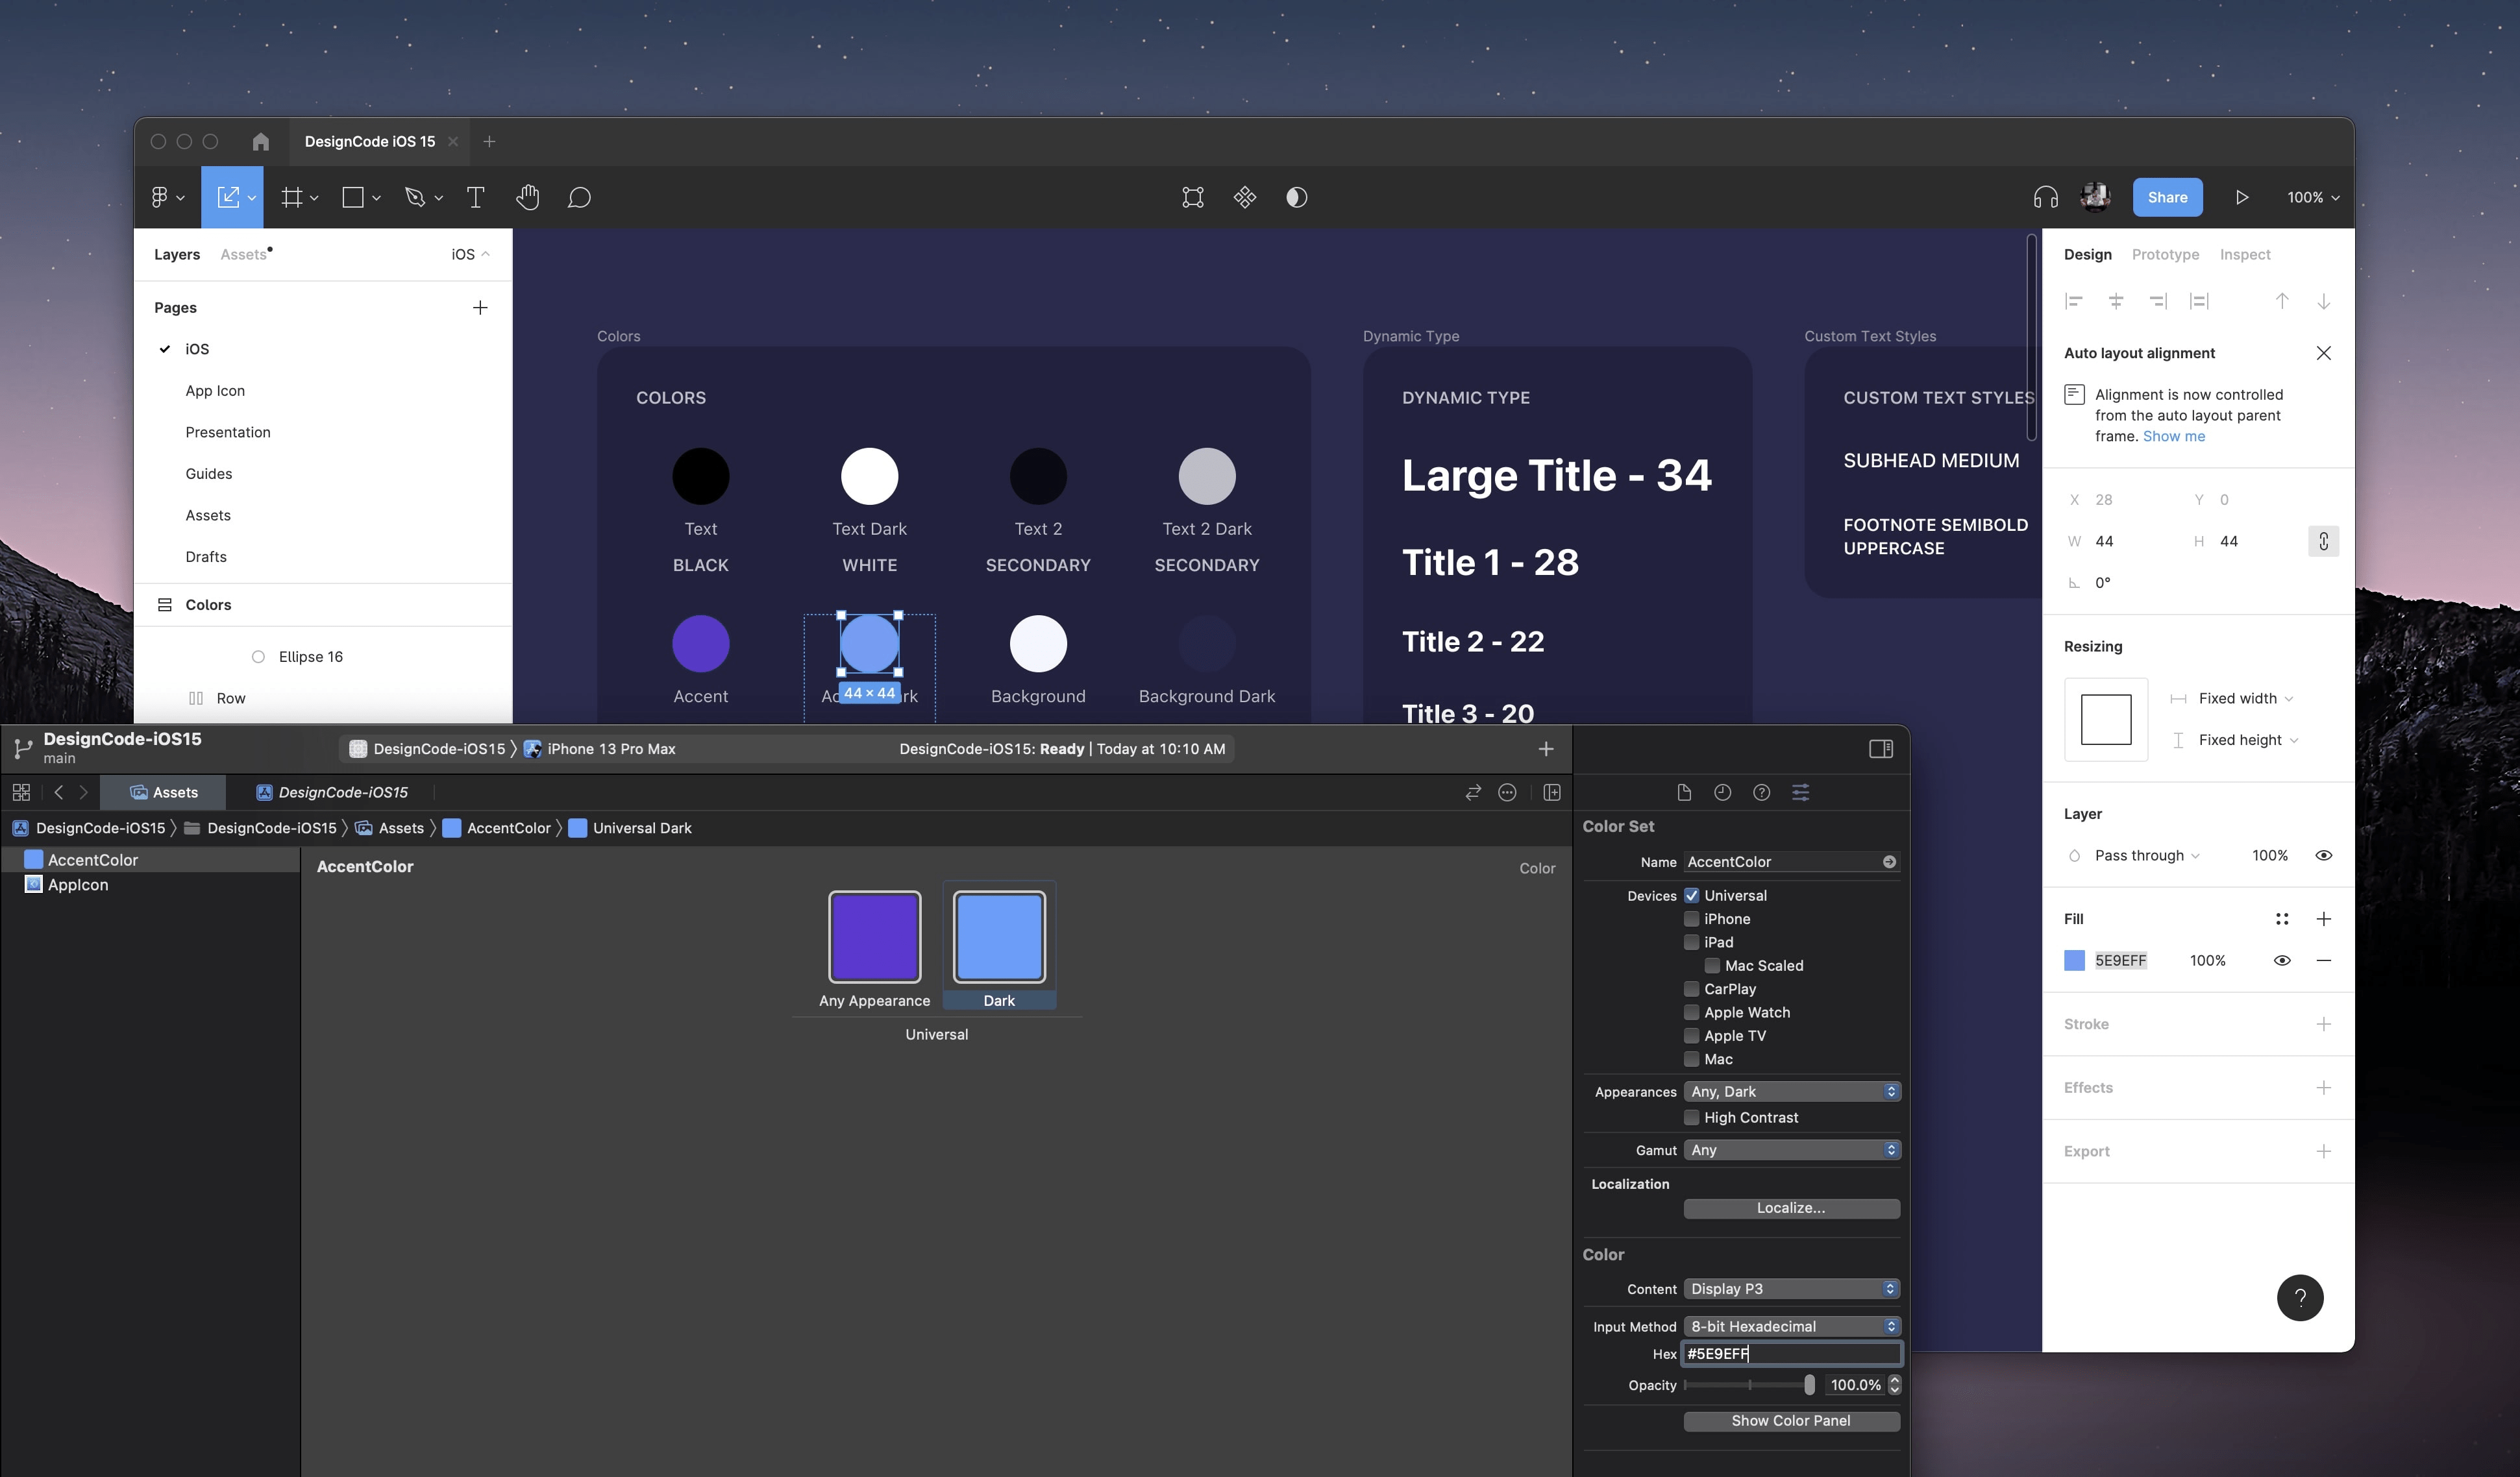
Custom Color Sets (optional)
Right-click AccentColor and select New Color Set. Rename it to Background and set your desired colors. Repeat the steps for Shadow. Finally, you can group the Color Sets by selecting Background and Shadow and clicking on New Folder from Selection.

Image Assets (optional)
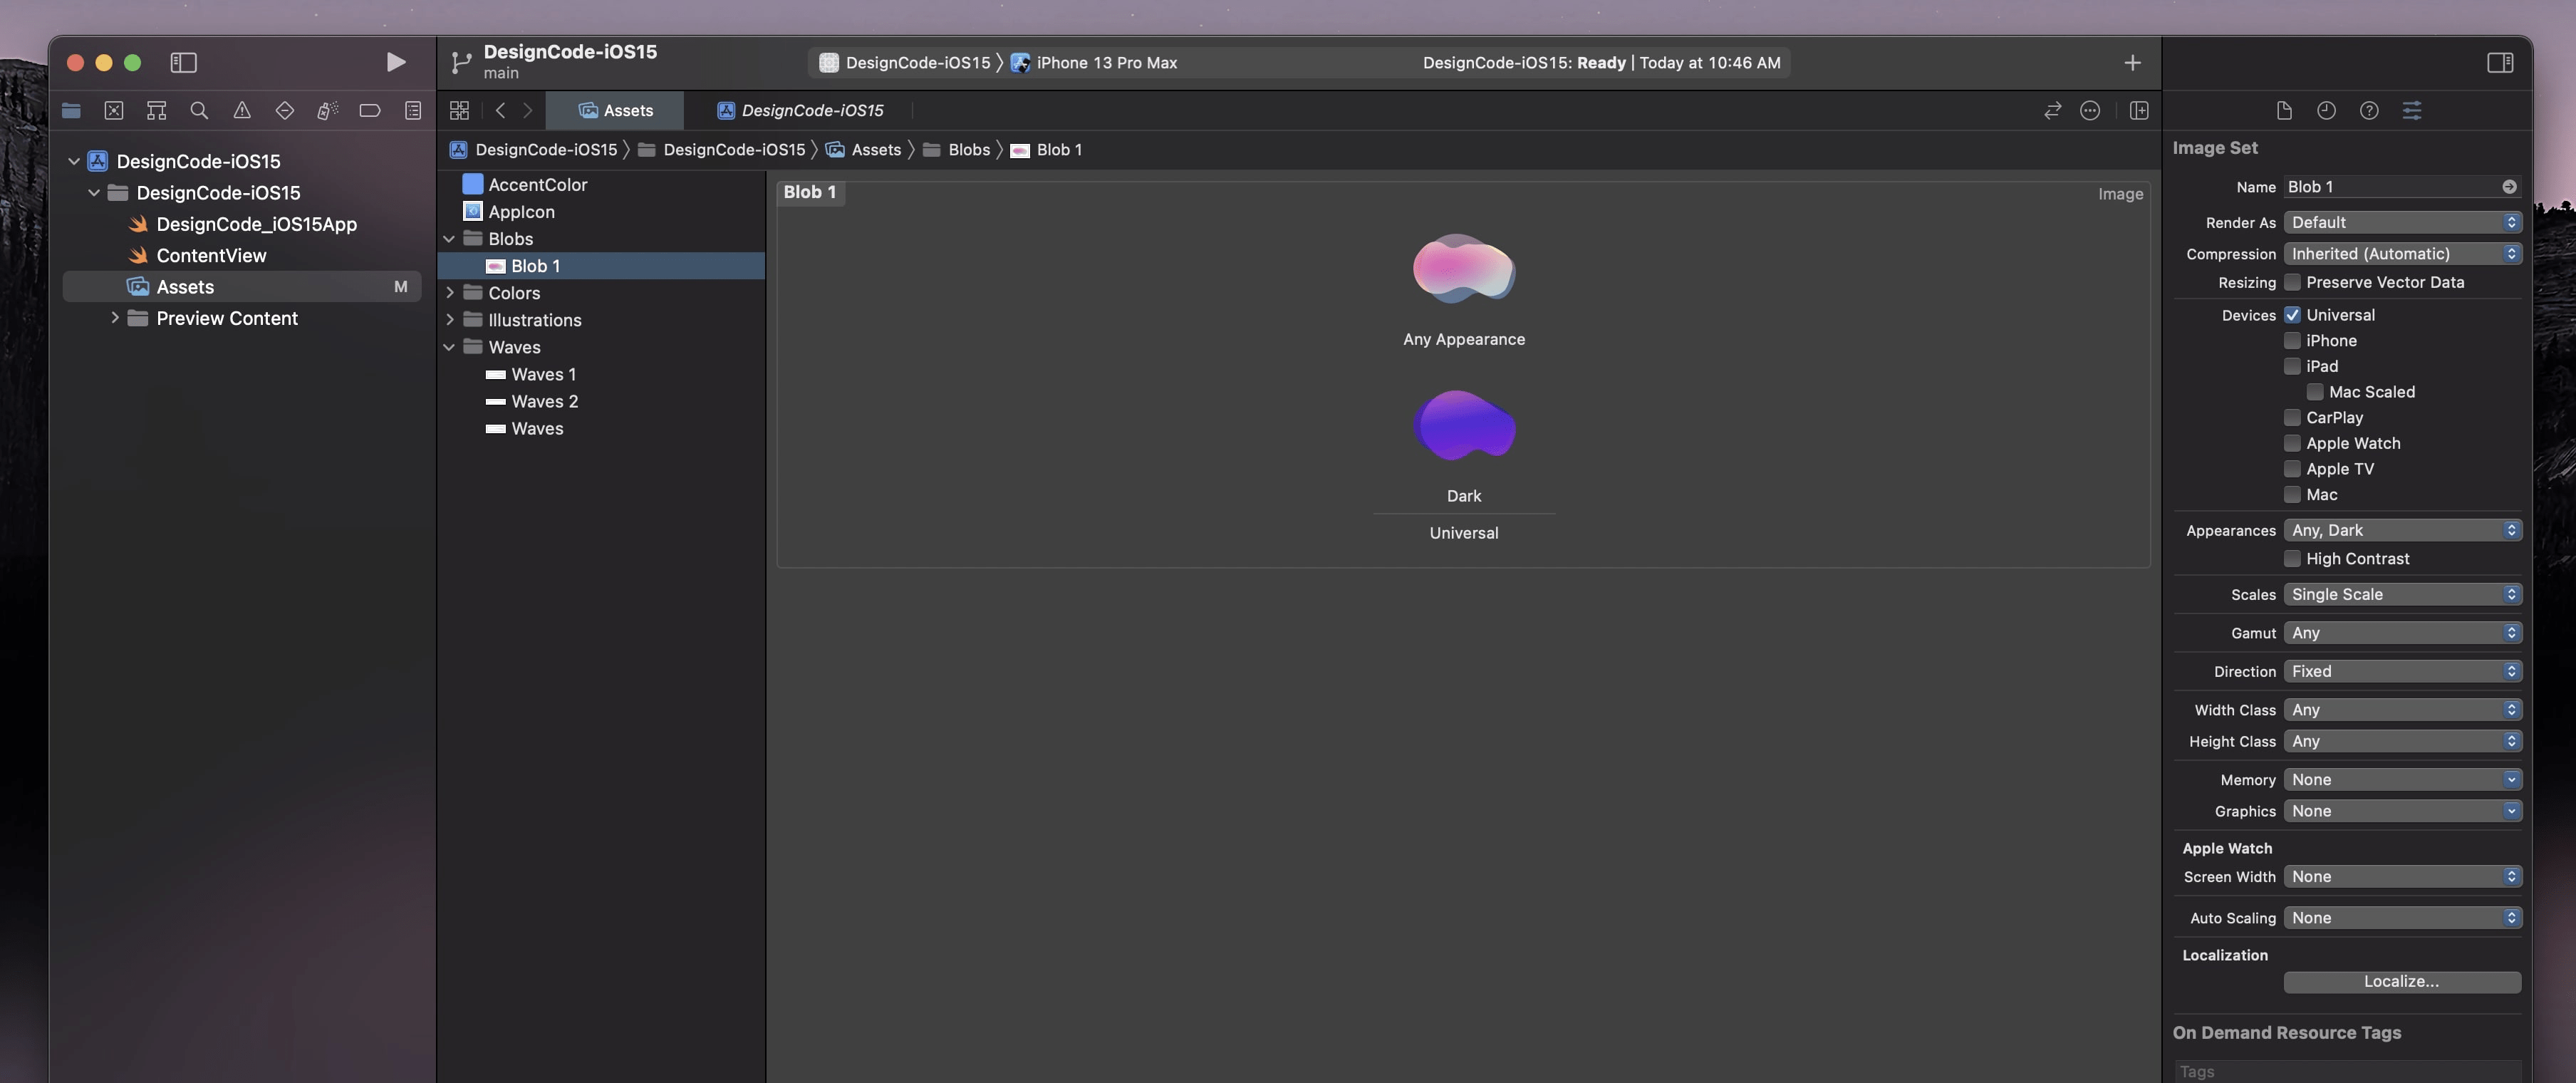
For image assets, you can just drag and drop the folders from Finder to Xcode. For Dark Mode support such as Blobs and Waves, set the Appearances to Any, Dark and Scales to Single Scale. Then, Drag the Dark Mode asset to the missing Dark version.
Ready to Start!
Now that our project is set up, we're ready to start developing! Put on your developer hat (if there is such a thing) and head to the next section to begin your SwiftUI journey. It's going to be fun and full of pains and rewards. Don't worry, for the painful part, I'll be there to support you. In the meantime, at the bottom of each section, I'll try to include useful videos and articles on related topics.
More resources to get started on SwiftUI
- You can watch SwiftUI WWDC videos using the Developer app from Apple. You can do a search on SwiftUI and watch the topics that interest you.
- Download the Fruta app to explore and learn how Apple made their sample app using the new techniques introduced in WWDC 2021.
- SwiftUI by example by Paul Hudson is an excellent place to find short tutorials on key techniques for SwiftUI. Anytime you get errors or want to learn more about a topic, you'll want to do a Google search.
- Jordan Singer from Recreate shares a lot of source code for popular apps recreated in SwiftUI.
- Our SwiftUI Handbook contains more than 100 tutorials with videos and sample code.
- One of the best way to learn iOS design and design apps is to download the templates and libraries provided by Apple: https://developer.apple.com/design/resources/
Templates and source code
Download source files
Download the videos and assets to refer and learn offline without interuption.
Design template
Source code for all sections
Video files, ePub and subtitles
Videos
Subtitles
Assets
1
Build a SwiftUI app for iOS 15
Design and code a SwiftUI 3 app with custom layouts, animations and gestures using Xcode 13, Concurrency, Searchable and a whole lot more
19:22
2
Xcode 13 Visual Editor
Build a simple layout with Dynamic Type, Stacks, Images and Colors using Xcode 13's inspectors without writing a single line of code.
15:15
3
Layout Code and Preview
Powerful layout techniques using SwiftUI and the new Preview options
15:14
4
Material and Foreground Style
Add a frosted glass effect and vibrancy to your background and text using Material and Foreground Style
10:42
5
Shape, Stroke and Blend Mode
How to create shapes, smooth corners, mask layers, stroke options and blending modes
13:16
6
Reusable Style and Color Scheme
Create styles from a design system, make them customizable and adaptive to dark mode
23:45
7
List Style and Navigation View
Create a simple Navigation View Layout and explore the new List styles in iOS 15
7:39
8
SF Symbols 3
How to use Apple's icon library with SwiftUI and customize the symbol variant, rendering mode, size and colors
13:20
9
Navigation Link and URL
Add an in-app navigation link to your list items and learn to open the links to Safari
15:07
10
States and Swipe Actions
Create a swipe interaction for list items and learn how to manage your states
9:26
11
Structure and Toggle
Make your code cleaner by dividing into reusable sections
10:02
12
Graphics in Canvas
Use the new Canvas API in SwiftUI to draw a Path, Text, Image or SF Symbol. Learn how to style the resulting drawing.
14:41
13
SVG to Path in Canvas
Turn your SVG code into Swift path code so that we can use your vectors in SwiftUI and Canvas
8:50
14
TimelineView Animation in Canvas
Use a schedule to set an animation to your Canvas paths
12:10
15
onAppear and withAnimation
Start your animation during a state change and apply the timing and looping
7:17
16
Custom Tab Bar
Create a fully customizable tab bar with a similar logic and structure as the built-in tab bar
14:47
17
Tab Bar Model and Looping Data
Learn how to create a data model for your custom tab bar and loop through the items
7:32
18
Tab Bar Selection
Set an enum for predefined tab items and switch to the appropriate screen when a tab is selected
8:24
19
Tab Bar Animation
Animate a circle underneath the tab bar and use Spacer to distribute your tab items evenly
11:49
20
GeometryReader and PreferenceKey
Get the size of the tab items and store the value in a state using PreferenceKey
12:17
21
Project Structure and AppStorage
Learn how to organize your Swift files and use AppStorage to sync states across the app
8:18
Meet the instructor
We all try to be consistent with our way of teaching step-by-step, providing source files and prioritizing design in our courses.
Meng To
I design, code and write
Meng To is the author of Design+Code. Meng started off his career as a self-taught designer from Montreal and eventually traveled around the world for 2 years as his US VISA was denied. During his travels, he wrote a book which now has 35,000 readers.
40 courses - 191 hours

Master AI Prompting for Stunning UI
Learn how to leverage AI tools like Aura for creating beautiful designs, working with templates, and experimenting with advanced prompts. A concise guide for designers and developers to level up their skills.
7 hrs

Build SwiftUI apps for iOS 18 with Cursor and Xcode
In this course, we'll explore the exciting new features of SwiftUI 6 and Xcode 16 for building iOS 18 apps. From mesh gradients and text animations to ripple effects, you'll learn how to create polished, highly custom apps using the latest workflows. We'll also dive into using Cursor and Claude AI for AI-driven coding, helping you start strong and customize your apps.
5 hrs

Create your Dream Apps with Cursor and Claude AI
Learn to build your dream web apps from the ground up using Cursor, Claude AI, and a suite of powerful AI tools. This course covers everything you need, including React for frontend development, Firebase for backend integration, and Stripe for handling payments. You’ll also dive into advanced AI tools like Claude Artifacts, Galileo AI, v0.dev for UI, Ideogram for design generation, and Cursor Composer for full-scale development.
6 hrs

Build a React Site from Figma to Codux
In this course, you'll learn to build a website from scratch using Codux, starting with a Figma template. You’ll master responsive design, collaborate with developers on a real React project, export CSS from Figma using Locofy, set up breakpoints with media queries, add CSS animations, improve SEO, create multiple pages with React Router, and publish your site. By following best practices, you’ll bridge design and development, improve your web design skills.
2 hrs

Create 3D UI for iOS and visionOS in Spline
Comprehensive 3D Design Course: From Basics to Advanced Techniques for iOS and visionOS using SwiftUI
3 hrs

Master No-Code Web Design with Framer
In this free Framer course, you'll learn to create modern, user-friendly interfaces. Start with dark mode and glass designs, then move from Figma to Framer, using vectors and auto layout for responsive websites. Add animations, interactive buttons, and custom components with code. Finally, you'll craft a design system suitable for teamwork or solo projects, all in a straightforward and practical approach.
4 hrs

Build SwiftUI Apps for iOS 17
In this course, we’ll be exploring the fresh and exciting features of SwiftUI 5! As we craft a variety of iOS apps from the ground up, we'll delve deep into the treasure trove that is SwiftUI's user interface, interactions, and animations.
4 hrs

Build Beautiful Apps with GPT-4 and Midjourney
Design and develop apps using GPT-4 and Midjourney with prompts for SwiftUI, React, CSS, app concepts, icons, and copywriting
4 hrs

Build SwiftUI apps for iOS 16
Create animated and interactive apps using new iOS 16 techniques using SwiftUI 4 and Xcode 14
5 hrs

Build a 3D Site Without Code with Framer
Design and publish a responsive site with 3D animation without writing a single line of code
3 hrs

Create 3D Site with Spline and React
Design and code a landing page with an interactive 3D asset using Spline and CodeSandbox
1 hrs

Build an Animated App with Rive and SwiftUI
Design and code an iOS app with Rive animated assets, icon animations, custom layouts and interactions
3 hrs

Build a SwiftUI app for iOS 15 Part 3
Design and code a SwiftUI 3 app with custom layouts, animations and gestures using Xcode 13, SF Symbols 3, Canvas, Concurrency, Searchable and a whole lot more
4 hrs

Build a SwiftUI app for iOS 15 Part 2
Design and code a SwiftUI 3 app with custom layouts, animations and gestures using Xcode 13, SF Symbols 3, Canvas, Concurrency, Searchable and a whole lot more
3 hrs

Build a SwiftUI app for iOS 15
Design and code a SwiftUI 3 app with custom layouts, animations and gestures using Xcode 13, SF Symbols 3, Canvas, Concurrency, Searchable and a whole lot more
4 hrs

React Livestreams
Learn how we can use React Hooks to build web apps using libraries, tools, apis and frameworks
4 hrs

Design Founder Livestreams
A journey on how we built DesignCode covering product design, management, analytics, revenue and a good dose of learning from our successes and failures
2 hrs

SwiftUI Advanced Handbook
An extensive series of tutorials covering advanced topics related to SwiftUI, with a main focus on backend and logic to take your SwiftUI skills to the next level
4 hrs
iOS Design Handbook
A complete guide to designing for iOS 14 with videos, examples and design files
2 hrs

SwiftUI Handbook
A comprehensive series of tutorials covering Xcode, SwiftUI and all the layout and development techniques
7 hrs

Build a web app with React Hooks
Learn how we built the new Design+Code site with React Hooks using Gatsby, Netlify, and advanced CSS techniques with Styled Components.
4 hrs

UI Design Handbook
A comprehensive guide to the best tips and tricks for UI design. Free tutorials for learning user interface design.
2 hrs

Figma Handbook
A comprehensive guide to the best tips and tricks in Figma. Not affiliated with or endorsed by Figma, Inc.
6 hrs

SwiftUI for iOS 14
Build a multi-platform app from scratch using the new techniques in iOS 14. We'll use the Sidebar and Lazy Grids to make the layout adaptive for iOS, iPadOS, macOS Big Sur and we'll learn the new Matched Geometry Effect to create beautiful transitions between screens without the complexity. This course is beginner-friendly and is taught step-by-step in a video format.
3 hrs

SwiftUI Livestreams
This is a compilation of the SwiftUI live streams hosted by Meng. Over there he talks and teaches how to use design systems, typography, navigation, iOS 14 Design, prototyping, animation and Developer Handoff.
19 hrs

UI Design Livestreams
This is a compilation of the UI live streams hosted by Meng. Over there he talks and teaches how to use design systems, typography, navigation, iOS 14 Design, prototyping, animation and Developer Handoff.
26 hrs

UI Design for Developers
In this course we'll learn how to use design systems, set up break points, typography, spacing, navigation, size rules for adapting to the iPad, mobile and web versions, and different techniques that translate well from design to code.
3 hrs

Build an app with SwiftUI Part 3
This course was written for designers and developers who are passionate about design and about building real apps for iOS, iPadOS, macOS, tvOS and watchOS. SwiftUI works across all of those platforms. While the code is not a one-size-fits-all, the controls and techniques involved can apply to all platforms. It is beginner-friendly, but it is also packed with design tricks and cool workflows about building the best UIs and interactions.
4 hrs

Build an app with SwiftUI Part 2
This course was written for designers and developers who are passionate about design and about building real apps for iOS, iPadOS, macOS, tvOS and watchOS. SwiftUI works across all of those platforms. While the code is not a one-size-fits-all, the controls and techniques involved can apply to all platforms. It is beginner-friendly, but it is also packed with design tricks and cool workflows about building the best UIs and interactions.
4 hrs

Build a full site in Webflow
Webflow is a design tool that can build production-ready experiences without code. You can implement CSS-driven adaptive layouts, build complex interactions and deploy all in one tool. Webflow also comes with a built-in content management system (CMS) and Ecommerce for creating a purchase experience without the need of third-party tools.
3 hrs

Advanced Prototyping in ProtoPie
ProtoPie is a cross-platform prototyping tool that creates prototypes nearly as powerful as those made with code, with half of the efforts, and zero code. It's perfect for designers who want to quickly experiment with advanced interactions using variables, conditions, sensors and more.
3 hrs

Build an app with SwiftUI Part 1
This course was written for designers and developers who are passionate about design and about building real apps for iOS, iPadOS, macOS, tvOS and watchOS. SwiftUI works across all of those platforms. While the code is not a one-size-fits-all, the controls and techniques involved can apply to all platforms. It is beginner-friendly, but it is also packed with design tricks and cool workflows about building the best UIs and interactions.
4 hrs

React Native for Designers Part 2
React Native is a popular Javascript framework that builds on top of React by using native components to create a real mobile app indistinguishable from one made using Xcode or Android Studio. The main difference with native development is that you get to use CSS, hot-reload, Javascript and other familiar techniques that the Web has grown over the past decades. Most importantly, you're building for both iOS and Android using the same codebase.
3 hrs

React Native for Designers
React Native is a popular Javascript framework that builds on top of React by using native components to create a real mobile app indistinguishable from one made using Xcode or Android Studio. The main difference with native development is that you get to use CSS, hot-reload, Javascript and other familiar techniques that the Web has grown over the past decades. Most importantly, you're building for both iOS and Android using the same codebase.
5 hrs

Design System in Figma
Learn how to use and design a collaborative and powerful design system in Figma. Design Systems provide a shared library of reusable components and guidelines and that will let you build products much faster
3 hrs

React for Designers
Learn how to build a modern site using React and the most efficient libraries to get your site/product online. Get familiar with Grid CSS, animations, interactions, dynamic data with Contentful and deploying your site with Netlify.
3 hrs

Swift Advanced
Learn Swift a robust and intuitive programming language created by Apple for building apps for iOS, Mac, Apple TV and Apple Watch
9 hrs

Learn Swift
Learn Swift a robust and intuitive programming language created by Apple for building apps for iOS, Mac, Apple TV and Apple Watch
4 hrs

Learn Sketch
Learn Sketch a design tool entirely vector-based and focused on user interface design
5 hrs

Learn iOS 11 Design
Learn colors, typography and layout for iOS 8
1 hrs
