React for Designers
Add to favorites
Learn to design and code a Website using React
Play video
React for Designers
1
React for Designers
21:59
2
Basic Styling with CSS
24:23
3
Adaptive Layouts with CSS Grid
22:18
4
Interactions and Animations
12:48
5
SVG Animation
14:12
6
Components and Props
20:27
7
States and Events
9:25
8
Styled Components
18:09
9
Static Data with JSON
16:45
10
GraphQL with Contentful
28:38
11
Publish to Netlify
6:47
12
Payments with Stripe
15:18
Project
Feel free to use your own designs and apply your own styling. You can also use my Figma design if you wish to follow exactly what I have. You can access all the React files.
About this Course
In this course, you’ll learn React as a designer, starting with styling your layout using CSS Grid, animating your user interface and creating a full-blown React site that can be deployed on Netlify in seconds. You’ll also work with dynamic data and charge customers with Stripe. The techniques taught here can help you build a beautiful page selling your product, or create a personal portfolio with a dynamic blog. Most importantly, you’ll gain valuable insights into how developers work, and how you can build too, making your job even more essential to your team.
This is a course for visual learners. It focuses on learning by building a real product, which is my personal approach to learning new things quickly and efficiently. I highly recommend applying your own logos, images, colors and content to make your site completely unique. At any time during your progress, I suggest clicking on the resources provided to learn more in-depth about the frameworks that we use. 
Why designers should learn React
Using React components is a perfect way to translate your Libraries of UI elements to code and affect change in the final product. For example, instead of creating a button that exists in a single place, and that needs to be re-built in code by another person, you create a React component that is perfectly consistent with your Sketch Symbol or Figma Component, and that your developer can use without needing to do the visual implementation.
This can extend to Headers, Footers, Modals, Cells, etc. All of these elements can be referenced in an organic, code-connected style guide that everyone can contribute to. This system is commonly known as a Design System. It’s essentially a style guide on steroids.
Learning React allows you not only to collaborate better with your co-workers, but also build your own site in a way that is powerful, maintainable and flexible. You’ll never get stuck again by the limitations of your design tool. Instead, you’ll invent new ways that a product can be designed.
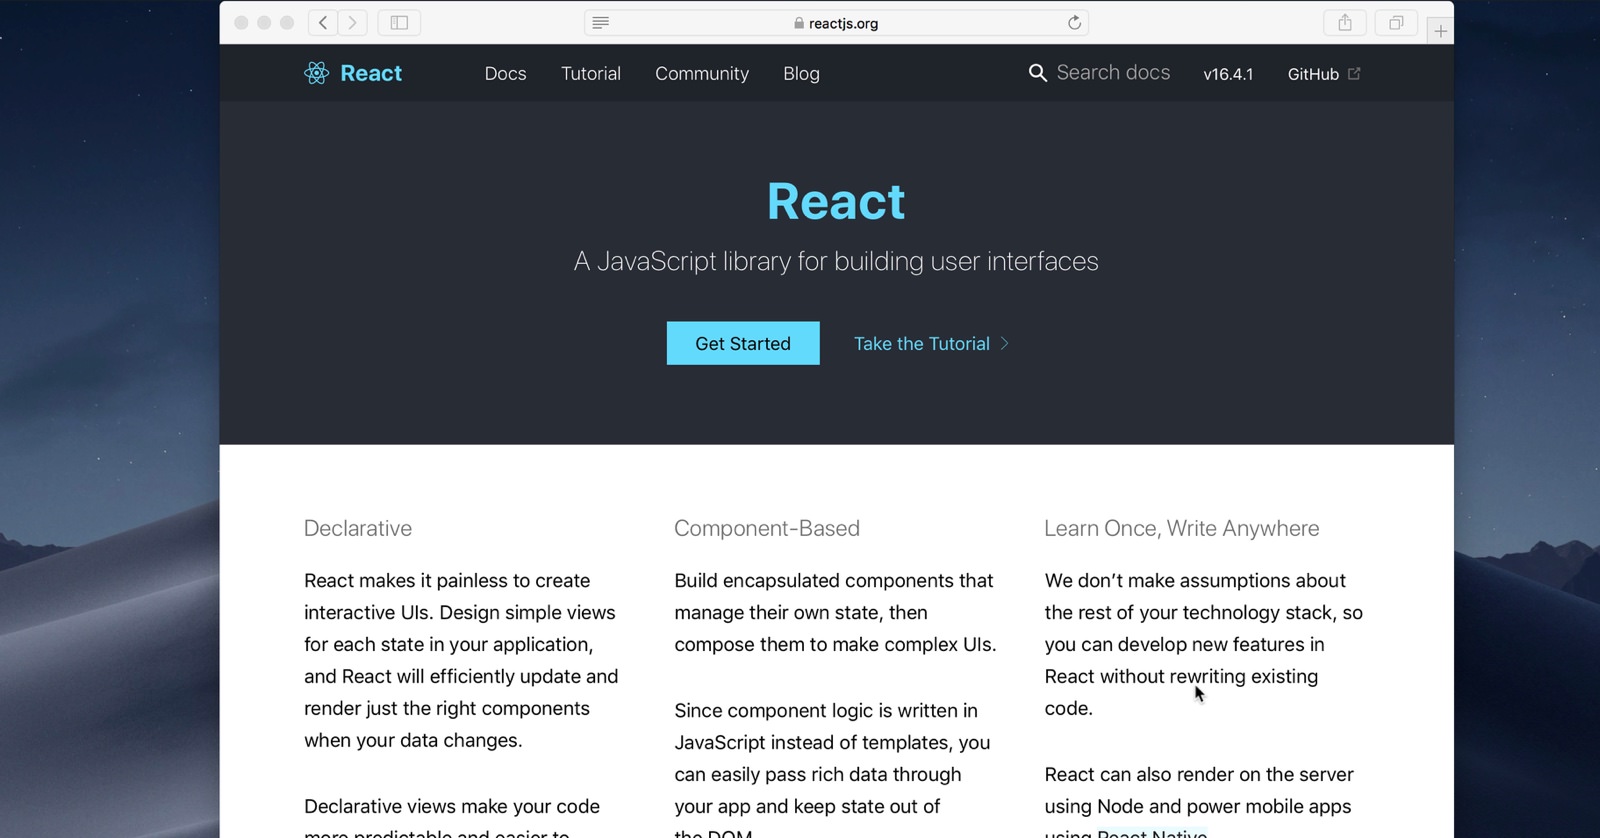
The Workflow
We’ll pick the latest and greatest tools to create the site. We’ll use Gatsby as a starting template for React, which allows us to have a number of features at our fingertips, like Router for multiple pages, GraphQL for database, Helmet for SEO. Then, we’ll work with CSS Grid, the most flexible way to implement your layout. We’ll learn to create fully customizable React components for buttons, the header, footer, navigation bar and more. Finally, we’ll put all of our content in a content management system (CMS) called Contentful, create a payment system using Stripe Checkout and deploy to Netlify by just dragging and dropping our site folder.

Terminal
To install pretty much any library or system such as Git or React, you’ll need to use the Terminal. It’s essentially a place you can write commands to run programs for you, such as installing new frameworks or updating your libraries. To open the Terminal, run Spotlight (Command + Space) and type Terminal.

Installing Node
Before installing React, you’ll need Homebrew, which makes it easy to install libraries for your Mac. Please note that this installation process requires a Mac. If you’re on a PC, you’ll just need to install Node another way.
To install Homebrew, go to brew.sh and copy and paste this command from their site in Terminal.
/usr/bin/ruby -e "$(curl -fsSL https://raw.githubusercontent.com/Homebrew/install/master/install)"Installing Node.
brew install node
Installing Gatsby
We’re going to use Gatsby for this course. It comes with a fantastic template that has essential features such as multiple pages, database, caching and SEO from the start.
https://www.gatsbyjs.org/docs/
npm install --global gatsby-cliIf you experience a permission error while installing gatsby, run
sudo npm install --global gatsby-cliThis should fix it.
Create your first React App using Gatsby
Create your new site in your Documents folder.
cd Documents
gatsby new my-app https://github.com/mengto/gatsby-starter-default/
Your app folder
cd my-app
gatsby develop
Previewing your app
Wait a few seconds for your development environment to run. Open your main browser and type this in your address bar.
http://localhost:8000Voila! This is your site and it’s fully functional. Now, let’s start editing your code.

Installing Visual Studio Code
You’ll need a code editor to start working on the site. Go to https://code.visualstudio.com

Open Project
After you install and open VSCode, press Command + O to open your app project. Go to your Documents folder and select my-app. Click Open.

Gatsby Template
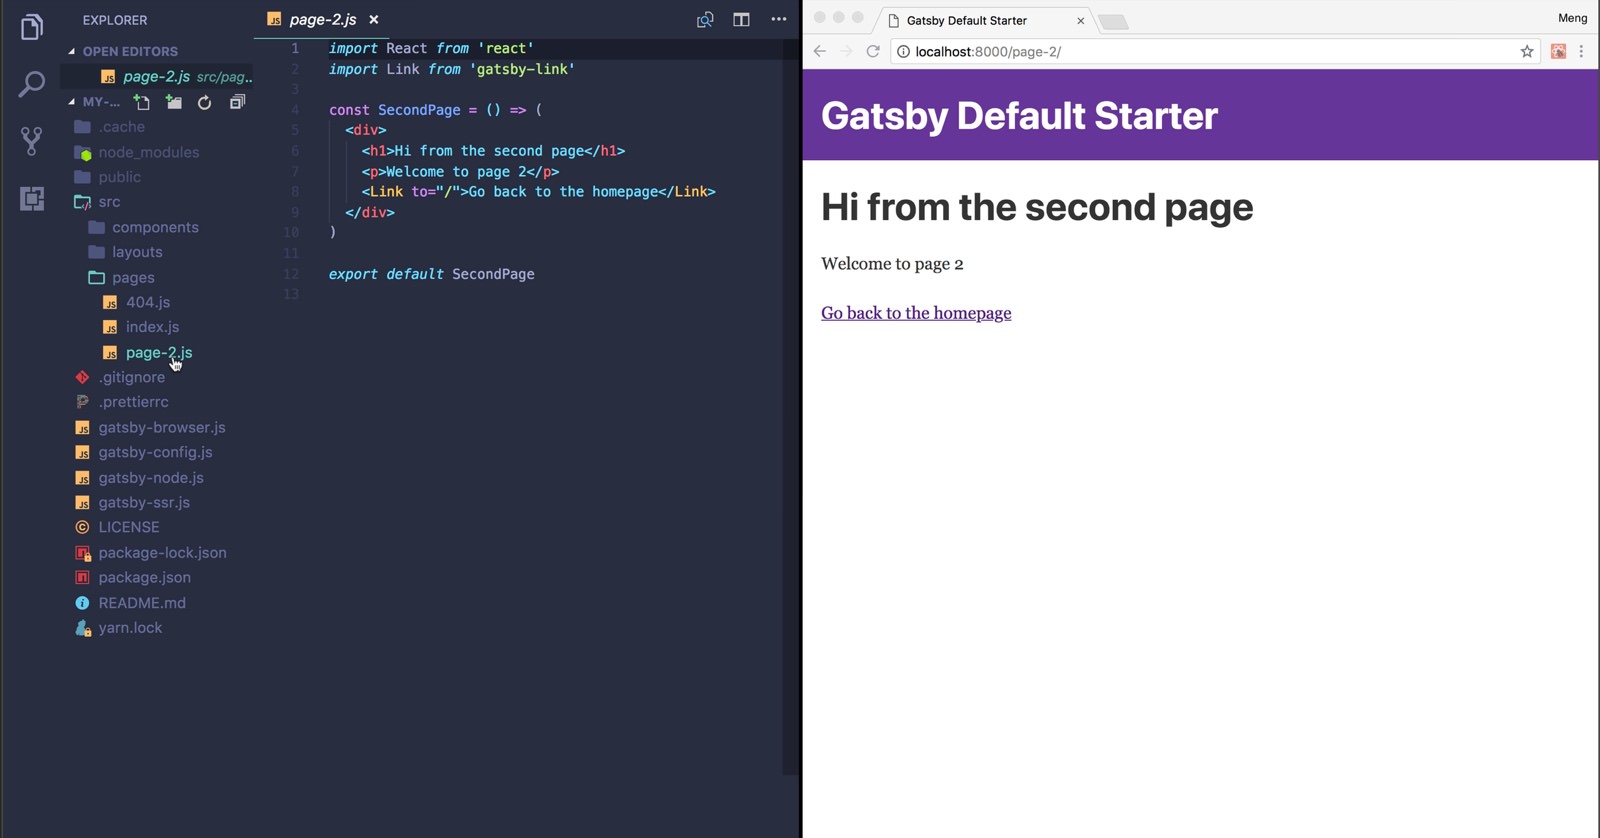
Your files in VSCode will look like this. Next to it is your site, started with a default template provided by Gatsby. Gatsby also provides dozens of other templates, such as Blog or the community-provided Material or Bootstrap. But for simplicity’s sake, we’ll stick to default, since templates tend to be more complex and may require knowledge of their respective platform.

Site Folder
At the beginning of this course, you won’t touch anything else than what’s in the src folder. If you open it, you’ll find 3 folders.
- components: this is where we’ll create those re-usable elements such as buttons, the header and footer.
- layouts: this is mainly for global styles and scripts.
- pages: when the content is vastly different, you’ll want to create a new page. For example, you’ll need a page for index (home), about, contact.
![Screen%20Shot%202018-07-15%20at%204.20.24%20PM]()
Multiple Pages
Gatsby comes with a router that automatically maps URLs to pages with the same name. For example, clicking on Go to page 2 goes to the URL /page-2, which automatically loads page-2.js. This auto-routing technique drastically simplifies the process of creating new pages and making sure that they’re perfectly linked using beautiful URLs.
Site Title
You can change the site title by going to gatsby-config.js file and edit the title property.
// gatsby-config.js

module.exports = {
  siteMetadata: {
    title: 'Design+Code 3',
  },
  plugins: ['gatsby-plugin-react-helmet'],
}
VSCode theme
If you’d like to change your theme, click on Extensions tab and type Material. Look for Material Theme and click Install, wait a sec and then, click on Reload. Do Command + Shift + P and type theme and select Preferences: Color Theme. Finally, select Material Theme Palenight.

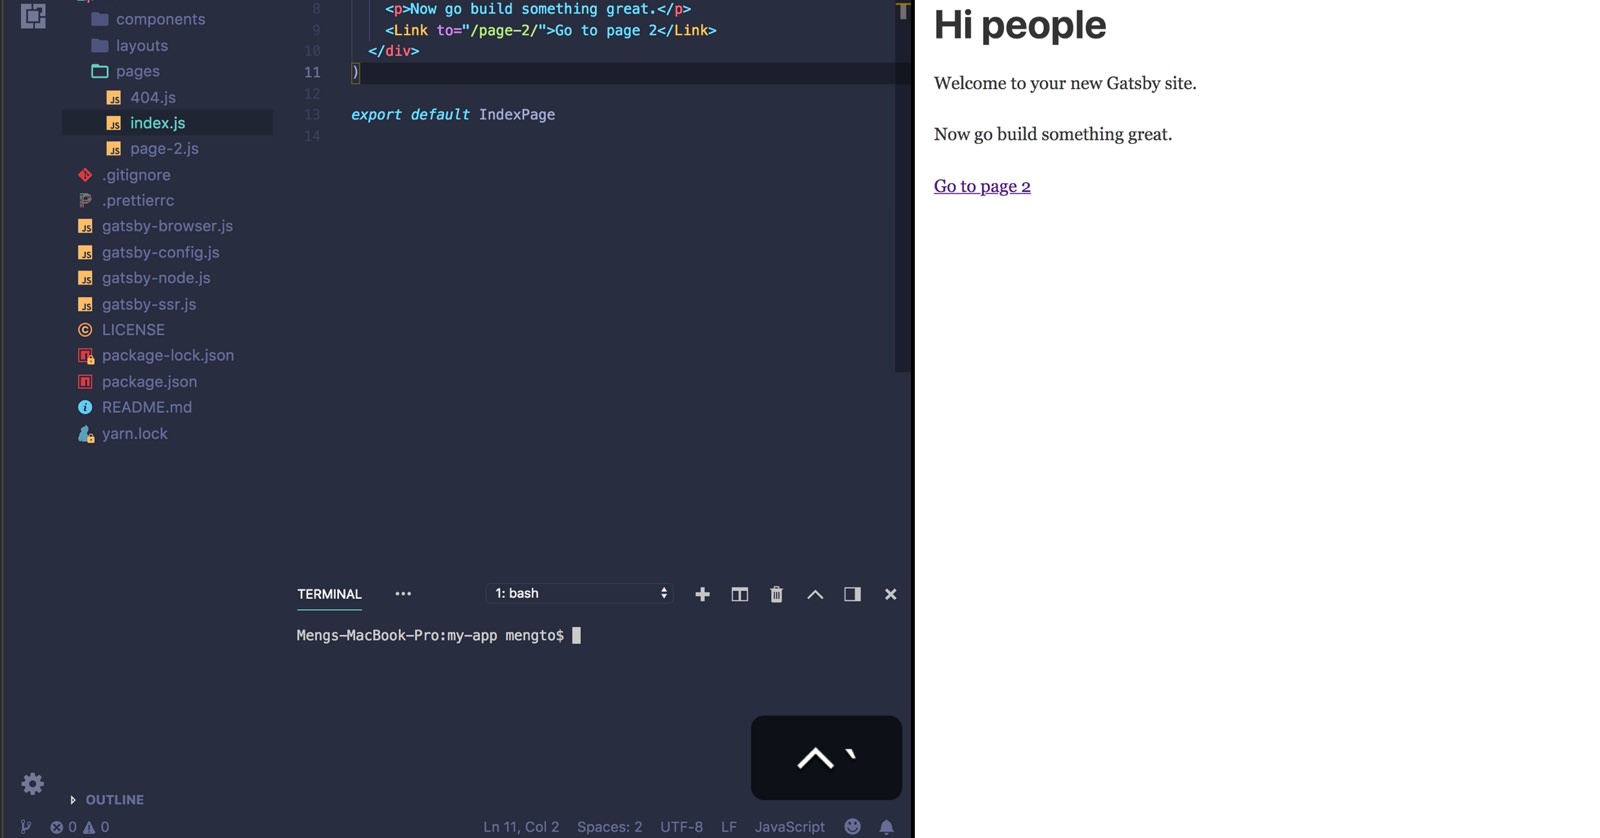
Integrated Terminal (optional)
This allows you to do your commands without having to leave VSCode. To enable the Integrated Terminal, press Control + backslash. This step is optional because it's a convenience rather than a requirement. Terminal works perfectly fine and it is already running your brand new site, so let's leave it alone.
VSCode Shortcuts
- Command + O: open a project.
- Command + B: toggle the side navigator. Good when you lack real estate.
- Command + Shift + P: quick open and command. It’s like Runner for Sketch. Extremely useful.
- Option + Z: toggle word wrap. Also good when you have limited space and the code lines are too long to be visible.
- Control + backslash: toggle the integrated terminal. Note that you have multiple terminals at once. Typically, you'll have one running the environment, and another for commands, such as installing new libraries.
- Command + Click: goes to component or definition.
- Option click: edit multiple places.
- Command + D: edit multiple selected text.
Editing the Code
Let’s start editing the code and give this new thing a test run. Open pages/index.js. Change the h1 and p content to the following.
<h1>Learn to <br />design and code React apps</h1>
<p>Complete courses about the best tools and design systems. Prototype and build apps with React and Swift.</p>
As soon as you press Command + S, it’ll save your file and it’ll automatically update your site! Nifty, right?
Of course, feel free to put your own site content. I highly encourage trying to implement your own design and share it on Twitter by tagging @MengTo! I love retweeting beautiful projects made from the techniques taught in my courses!
Real-time Errors
One of the important things to learn in programming is to debug. Let’s delete the following line
<p>Now go build something great.</p>
<p> // gives an error because the tag isn't closed.
When you code in React and make errors, it’ll give you the errors in your browser. A common error that a lot of designers make is that they forget to close their tags. For example, if you open a bracket, always make sure to close it later. Same for HTML tags. Errors can happen during this course, so make sure to read the line number carefully. Google if you can’t figure it out, or send us a ticket.
Fix the error by deleting the remaining p tag.
Committing to Git (optional)
It’s good practice to commit your files to Git, so that you have version control of every change that you make. If you’re not familiar with Git, I suggest skipping this step for now as it won’t really affect your project.
Create a new Repository on GitHub and paste these commands in the integrated terminal (Control + backslash). These commands are provided to you by GitHub. Replace YOURGITADRESS with your own.
git init
git add README.md
git commit -m "first commit"
git remote add origin YOURGITADRESS
git push -u origin master
Then, do Command + Shift + P, type commit all and press enter. Finally, type the text for your first commit, such as initial commit.
Do Command + Shift + P again and type git push, then enter. At this point, this version of your site will exist on Github and you may return to it any time in the future.

Common HTML Tags
These are the most common tags you’ll use for setting up the skeleton for your site. Think of them as layers in Sketch or Figma.
- img for images
- h1, h2, h3 for titles
- p for paragraph
- a for links
- button
- div for everything else.
Conclusion
Up until now, we’ve managed to get our development environment ready and functional. We can start designing our layout and slowly learn React to build a full-fledged site.
Templates and source code
Download source files
Download the videos and assets to refer and learn offline without interuption.
Design template
Source code for all sections
Video files, ePub and subtitles
Videos
ePub
Assets
Subtitles
1
React for Designers
Learn to design and code a Website using React
21:59
2
Basic Styling with CSS
Creating your first design using basic HTML and CSS
24:23
3
Adaptive Layouts with CSS Grid
Design a page that adapts to any screen size
22:18
4
Interactions and Animations
Timeline-based animation using keyframes
12:48
5
SVG Animation
Morph vector shapes using SVG code
14:12
6
Components and Props
Create a reusable layout element using React
20:27
7
States and Events
Add scroll interactions to your React site
9:25
8
Styled Components
Take your CSS to the next level
18:09
9
Static Data with JSON
Add basic data to your app
16:45
10
GraphQL with Contentful
Adding dynamic data that can be updated outside of the site
28:38
11
Publish to Netlify
Deploy your site for everyone to see
6:47
12
Payments with Stripe
Start selling your product easily and efficiently
15:18
Meet the instructor
We all try to be consistent with our way of teaching step-by-step, providing source files and prioritizing design in our courses.
Meng To
I design, code and write
Meng To is the author of Design+Code. Meng started off his career as a self-taught designer from Montreal and eventually traveled around the world for 2 years as his US VISA was denied. During his travels, he wrote a book which now has 35,000 readers.
40 courses - 194 hours

Master AI Prompting for Stunning UI
Learn how to leverage AI tools like Aura for creating beautiful designs, working with templates, and experimenting with advanced prompts. A concise guide for designers and developers to level up their skills.
10 hrs

Build SwiftUI apps for iOS 18 with Cursor and Xcode
In this course, we'll explore the exciting new features of SwiftUI 6 and Xcode 16 for building iOS 18 apps. From mesh gradients and text animations to ripple effects, you'll learn how to create polished, highly custom apps using the latest workflows. We'll also dive into using Cursor and Claude AI for AI-driven coding, helping you start strong and customize your apps.
5 hrs

Create your Dream Apps with Cursor and Claude AI
Learn to build your dream web apps from the ground up using Cursor, Claude AI, and a suite of powerful AI tools. This course covers everything you need, including React for frontend development, Firebase for backend integration, and Stripe for handling payments. You’ll also dive into advanced AI tools like Claude Artifacts, Galileo AI, v0.dev for UI, Ideogram for design generation, and Cursor Composer for full-scale development.
6 hrs

Build a React Site from Figma to Codux
In this course, you'll learn to build a website from scratch using Codux, starting with a Figma template. You’ll master responsive design, collaborate with developers on a real React project, export CSS from Figma using Locofy, set up breakpoints with media queries, add CSS animations, improve SEO, create multiple pages with React Router, and publish your site. By following best practices, you’ll bridge design and development, improve your web design skills.
2 hrs

Create 3D UI for iOS and visionOS in Spline
Comprehensive 3D Design Course: From Basics to Advanced Techniques for iOS and visionOS using SwiftUI
3 hrs

Master No-Code Web Design with Framer
In this free Framer course, you'll learn to create modern, user-friendly interfaces. Start with dark mode and glass designs, then move from Figma to Framer, using vectors and auto layout for responsive websites. Add animations, interactive buttons, and custom components with code. Finally, you'll craft a design system suitable for teamwork or solo projects, all in a straightforward and practical approach.
4 hrs

Build SwiftUI Apps for iOS 17
In this course, we’ll be exploring the fresh and exciting features of SwiftUI 5! As we craft a variety of iOS apps from the ground up, we'll delve deep into the treasure trove that is SwiftUI's user interface, interactions, and animations.
4 hrs

Build Beautiful Apps with GPT-4 and Midjourney
Design and develop apps using GPT-4 and Midjourney with prompts for SwiftUI, React, CSS, app concepts, icons, and copywriting
4 hrs

Build SwiftUI apps for iOS 16
Create animated and interactive apps using new iOS 16 techniques using SwiftUI 4 and Xcode 14
5 hrs

Build a 3D Site Without Code with Framer
Design and publish a responsive site with 3D animation without writing a single line of code
3 hrs

Create 3D Site with Spline and React
Design and code a landing page with an interactive 3D asset using Spline and CodeSandbox
1 hrs

Build an Animated App with Rive and SwiftUI
Design and code an iOS app with Rive animated assets, icon animations, custom layouts and interactions
3 hrs

Build a SwiftUI app for iOS 15 Part 3
Design and code a SwiftUI 3 app with custom layouts, animations and gestures using Xcode 13, SF Symbols 3, Canvas, Concurrency, Searchable and a whole lot more
4 hrs

Build a SwiftUI app for iOS 15 Part 2
Design and code a SwiftUI 3 app with custom layouts, animations and gestures using Xcode 13, SF Symbols 3, Canvas, Concurrency, Searchable and a whole lot more
3 hrs

Build a SwiftUI app for iOS 15
Design and code a SwiftUI 3 app with custom layouts, animations and gestures using Xcode 13, SF Symbols 3, Canvas, Concurrency, Searchable and a whole lot more
4 hrs

React Livestreams
Learn how we can use React Hooks to build web apps using libraries, tools, apis and frameworks
4 hrs

Design Founder Livestreams
A journey on how we built DesignCode covering product design, management, analytics, revenue and a good dose of learning from our successes and failures
2 hrs

SwiftUI Advanced Handbook
An extensive series of tutorials covering advanced topics related to SwiftUI, with a main focus on backend and logic to take your SwiftUI skills to the next level
4 hrs

iOS Design Handbook
A complete guide to designing for iOS 14 with videos, examples and design files
2 hrs

SwiftUI Handbook
A comprehensive series of tutorials covering Xcode, SwiftUI and all the layout and development techniques
7 hrs

Build a web app with React Hooks
Learn how we built the new Design+Code site with React Hooks using Gatsby, Netlify, and advanced CSS techniques with Styled Components.
4 hrs

UI Design Handbook
A comprehensive guide to the best tips and tricks for UI design. Free tutorials for learning user interface design.
2 hrs

Figma Handbook
A comprehensive guide to the best tips and tricks in Figma. Not affiliated with or endorsed by Figma, Inc.
6 hrs

SwiftUI for iOS 14
Build a multi-platform app from scratch using the new techniques in iOS 14. We'll use the Sidebar and Lazy Grids to make the layout adaptive for iOS, iPadOS, macOS Big Sur and we'll learn the new Matched Geometry Effect to create beautiful transitions between screens without the complexity. This course is beginner-friendly and is taught step-by-step in a video format.
3 hrs

SwiftUI Livestreams
This is a compilation of the SwiftUI live streams hosted by Meng. Over there he talks and teaches how to use design systems, typography, navigation, iOS 14 Design, prototyping, animation and Developer Handoff.
19 hrs

UI Design Livestreams
This is a compilation of the UI live streams hosted by Meng. Over there he talks and teaches how to use design systems, typography, navigation, iOS 14 Design, prototyping, animation and Developer Handoff.
26 hrs

UI Design for Developers
In this course we'll learn how to use design systems, set up break points, typography, spacing, navigation, size rules for adapting to the iPad, mobile and web versions, and different techniques that translate well from design to code.
3 hrs

Build an app with SwiftUI Part 3
This course was written for designers and developers who are passionate about design and about building real apps for iOS, iPadOS, macOS, tvOS and watchOS. SwiftUI works across all of those platforms. While the code is not a one-size-fits-all, the controls and techniques involved can apply to all platforms. It is beginner-friendly, but it is also packed with design tricks and cool workflows about building the best UIs and interactions.
4 hrs

Build an app with SwiftUI Part 2
This course was written for designers and developers who are passionate about design and about building real apps for iOS, iPadOS, macOS, tvOS and watchOS. SwiftUI works across all of those platforms. While the code is not a one-size-fits-all, the controls and techniques involved can apply to all platforms. It is beginner-friendly, but it is also packed with design tricks and cool workflows about building the best UIs and interactions.
4 hrs

Build a full site in Webflow
Webflow is a design tool that can build production-ready experiences without code. You can implement CSS-driven adaptive layouts, build complex interactions and deploy all in one tool. Webflow also comes with a built-in content management system (CMS) and Ecommerce for creating a purchase experience without the need of third-party tools.
3 hrs

Advanced Prototyping in ProtoPie
ProtoPie is a cross-platform prototyping tool that creates prototypes nearly as powerful as those made with code, with half of the efforts, and zero code. It's perfect for designers who want to quickly experiment with advanced interactions using variables, conditions, sensors and more.
3 hrs

Build an app with SwiftUI Part 1
This course was written for designers and developers who are passionate about design and about building real apps for iOS, iPadOS, macOS, tvOS and watchOS. SwiftUI works across all of those platforms. While the code is not a one-size-fits-all, the controls and techniques involved can apply to all platforms. It is beginner-friendly, but it is also packed with design tricks and cool workflows about building the best UIs and interactions.
4 hrs

React Native for Designers Part 2
React Native is a popular Javascript framework that builds on top of React by using native components to create a real mobile app indistinguishable from one made using Xcode or Android Studio. The main difference with native development is that you get to use CSS, hot-reload, Javascript and other familiar techniques that the Web has grown over the past decades. Most importantly, you're building for both iOS and Android using the same codebase.
3 hrs

React Native for Designers
React Native is a popular Javascript framework that builds on top of React by using native components to create a real mobile app indistinguishable from one made using Xcode or Android Studio. The main difference with native development is that you get to use CSS, hot-reload, Javascript and other familiar techniques that the Web has grown over the past decades. Most importantly, you're building for both iOS and Android using the same codebase.
5 hrs

Design System in Figma
Learn how to use and design a collaborative and powerful design system in Figma. Design Systems provide a shared library of reusable components and guidelines and that will let you build products much faster
3 hrs

React for Designers
Learn how to build a modern site using React and the most efficient libraries to get your site/product online. Get familiar with Grid CSS, animations, interactions, dynamic data with Contentful and deploying your site with Netlify.
3 hrs

Swift Advanced
Learn Swift a robust and intuitive programming language created by Apple for building apps for iOS, Mac, Apple TV and Apple Watch
9 hrs

Learn Swift
Learn Swift a robust and intuitive programming language created by Apple for building apps for iOS, Mac, Apple TV and Apple Watch
4 hrs

Learn Sketch
Learn Sketch a design tool entirely vector-based and focused on user interface design
5 hrs

Learn iOS 11 Design
Learn colors, typography and layout for iOS 8
1 hrs

