
Intro to Vue.js
Add to favorites
Learn to Create an Admin Dashboard using Vue
Play video
Vue for Designers
1
Intro to Vue.js
7:52
2
Global Styling with Sass
23:18
3
Single File Components
28:27
4
Dark Mode Part 1
20:35
5
Dark Mode Part 2
18:54
6
Animations and transitions
35:02
7
Accounts with Netlify
35:29
8
Accounts with Slack
18:07
9
Charts and Data Visualization
40:27
10
Database with Firestore
21:36
11
Lambda Functions with Netlify
22:05
Why this course?
Vue and React are very similar. They are currently the 2 most popular JavaScript frameworks and are both component-based. However, Vue is more tailored to designers. It is simpler to get started and they officially support and maintain things like animations, transitions, and application state.
Downloads
Throughout this course, you may use your own assets, styles, and design. Or, if you prefer to follow the course exactly, you can download the Vue project code and the Figma file, which contains all the design assets.
Install Node and Yarn
Vue requires Node.js version 8.9 or above. Yarn is a Node package manager that is slightly faster and has a more friendly terminal output than npm. We will be using it in this project instead of npm. Installing Yarn will automatically install Node if you don't already have it.
Go to the Yarn installation website and choose your operating system. Then follow the instructions to install Yarn on your computer. There may be multiple ways to install Yarn depending on your operating system.
If you are on Mac, you can use Homebrew to install Yarn. Open the Terminal by running Spotlight (Command + Space) and type Terminal. If you don't have Homebrew, enter the following command and press Enter:
$ /usr/bin/ruby -e "$(curl -fsSL https://raw.githubusercontent.com/Homebrew/install/master/install)"Then install Yarn by using the following command:
$ brew install yarnInstall Vue CLI 3
The Vue CLI is a command line toolbox that provides support for Vue projects with a graphical user interface (GUI) to manage projects. To download it, use the following command:
$ yarn global add @vue/cliCreating your first Vue project
Open the Vue Project Manager by using the following command:
$ vue uiAwesome! We're now in the Vue Project Manager.

From here, follow these steps:
- Go to the "Create" tab.

- Go into your Documents folder and hit the button at the bottom called "Create a new project here".

- Now name your project. I named mine "vue-admin-dashboard". Leave the settings at default and hit next.

- Select "Manually select features". Hit next.
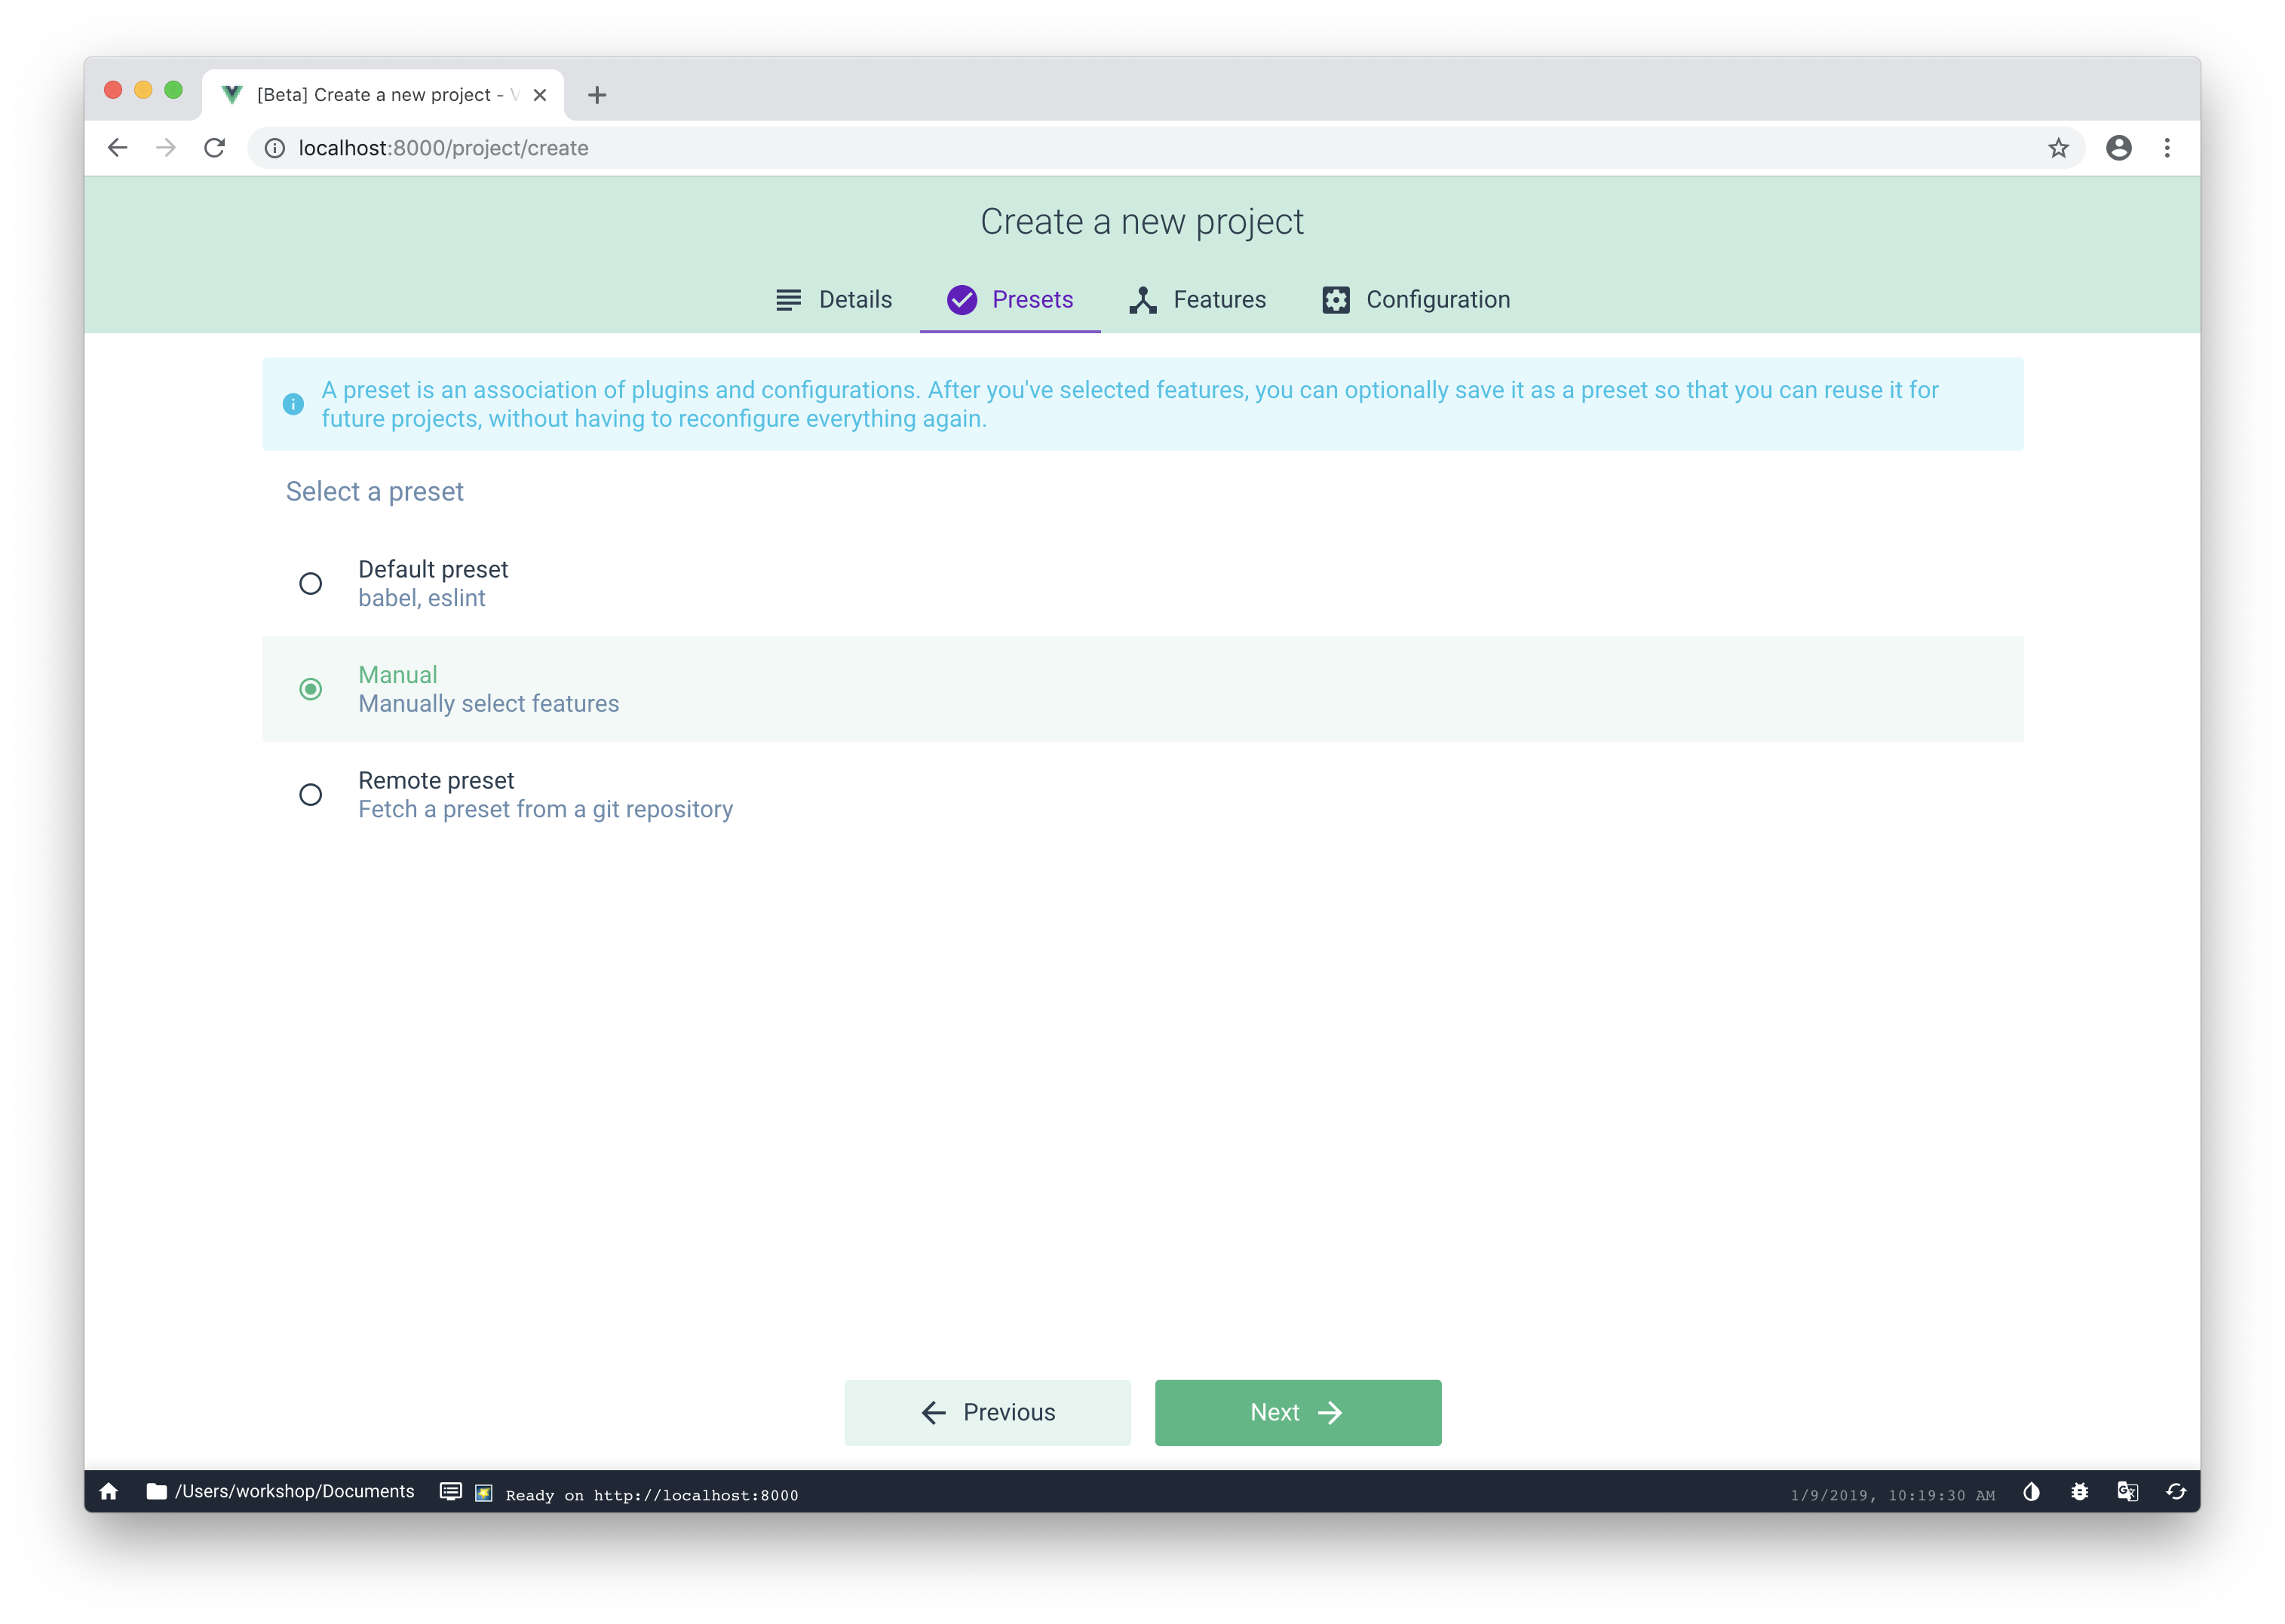
- Turn on Router, Vuex, and CSS Pre-processors. We will use these in our project for page routing, dark mode, and styling, respectively. Hit next.

- Turn on history mode for router for nice URLs, select "Sass/SCSS(with node-sass)" as the CSS pre-processor, and select "ESLint + Prettier" as the linter/formatter config.
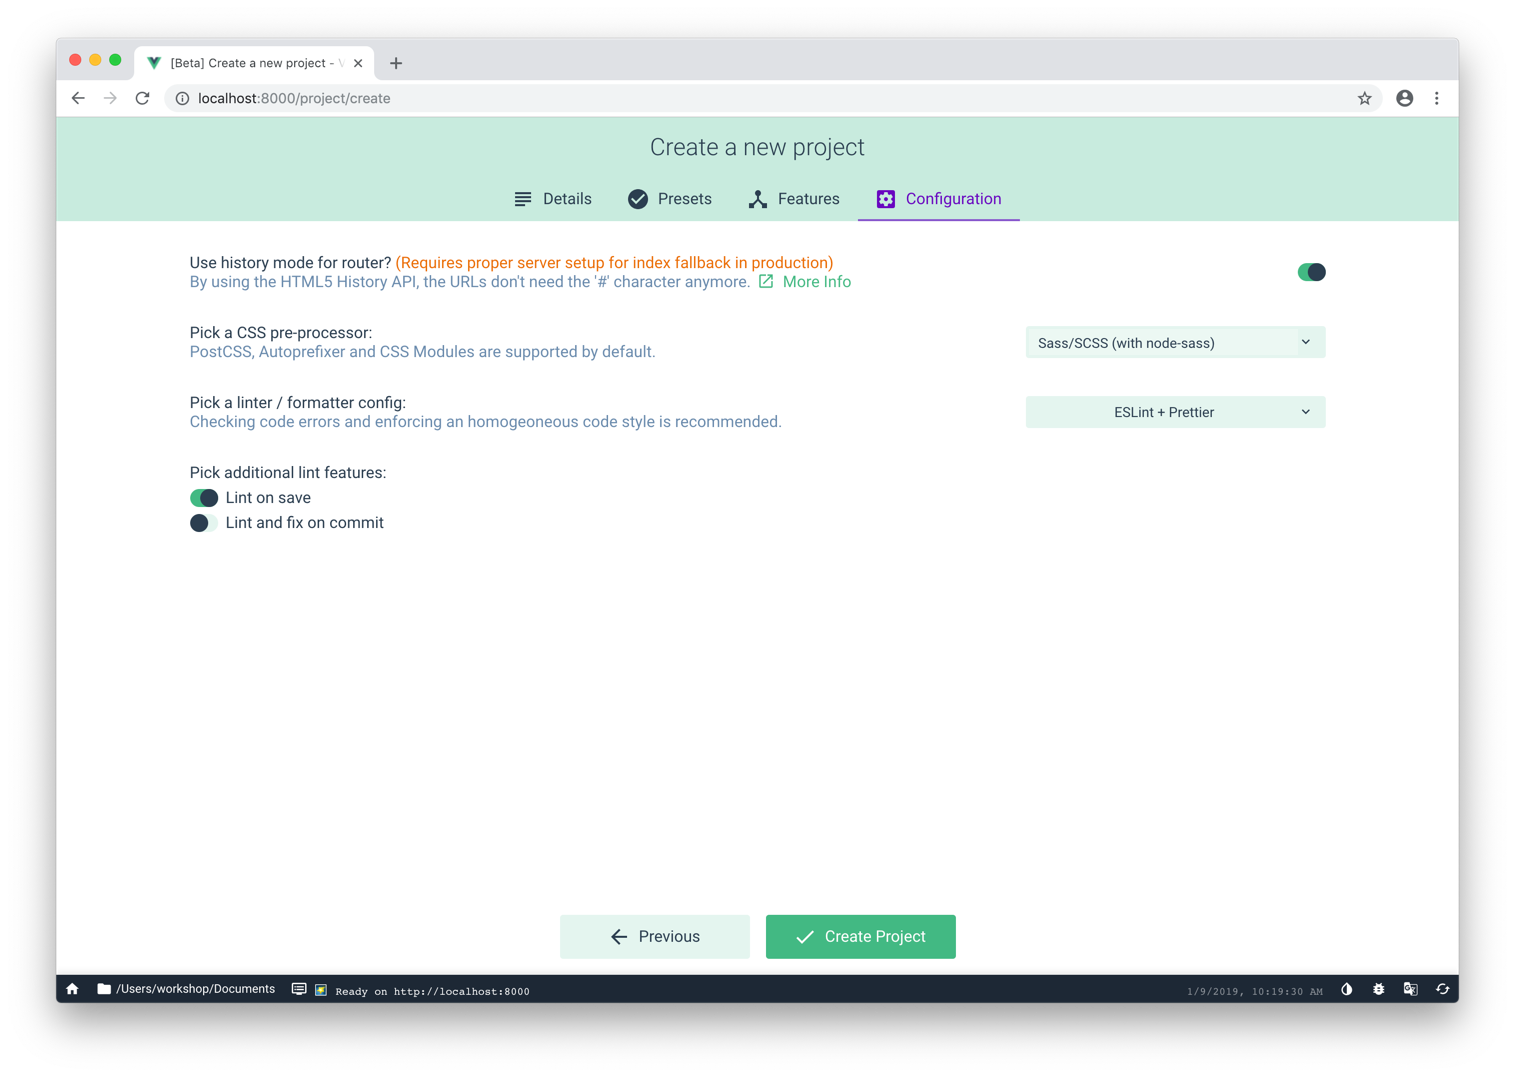
- Hit the "Create Project" Button and choose if you would like to save the preset or not. I will continue without saving.

Great! We're now in our Project dashboard. All the configuration is now done, and it's time to run the project to see what we're working with. Here's how we do that:
- Go to "Tasks" on the left menu and click on "serve" in the Project tasks.
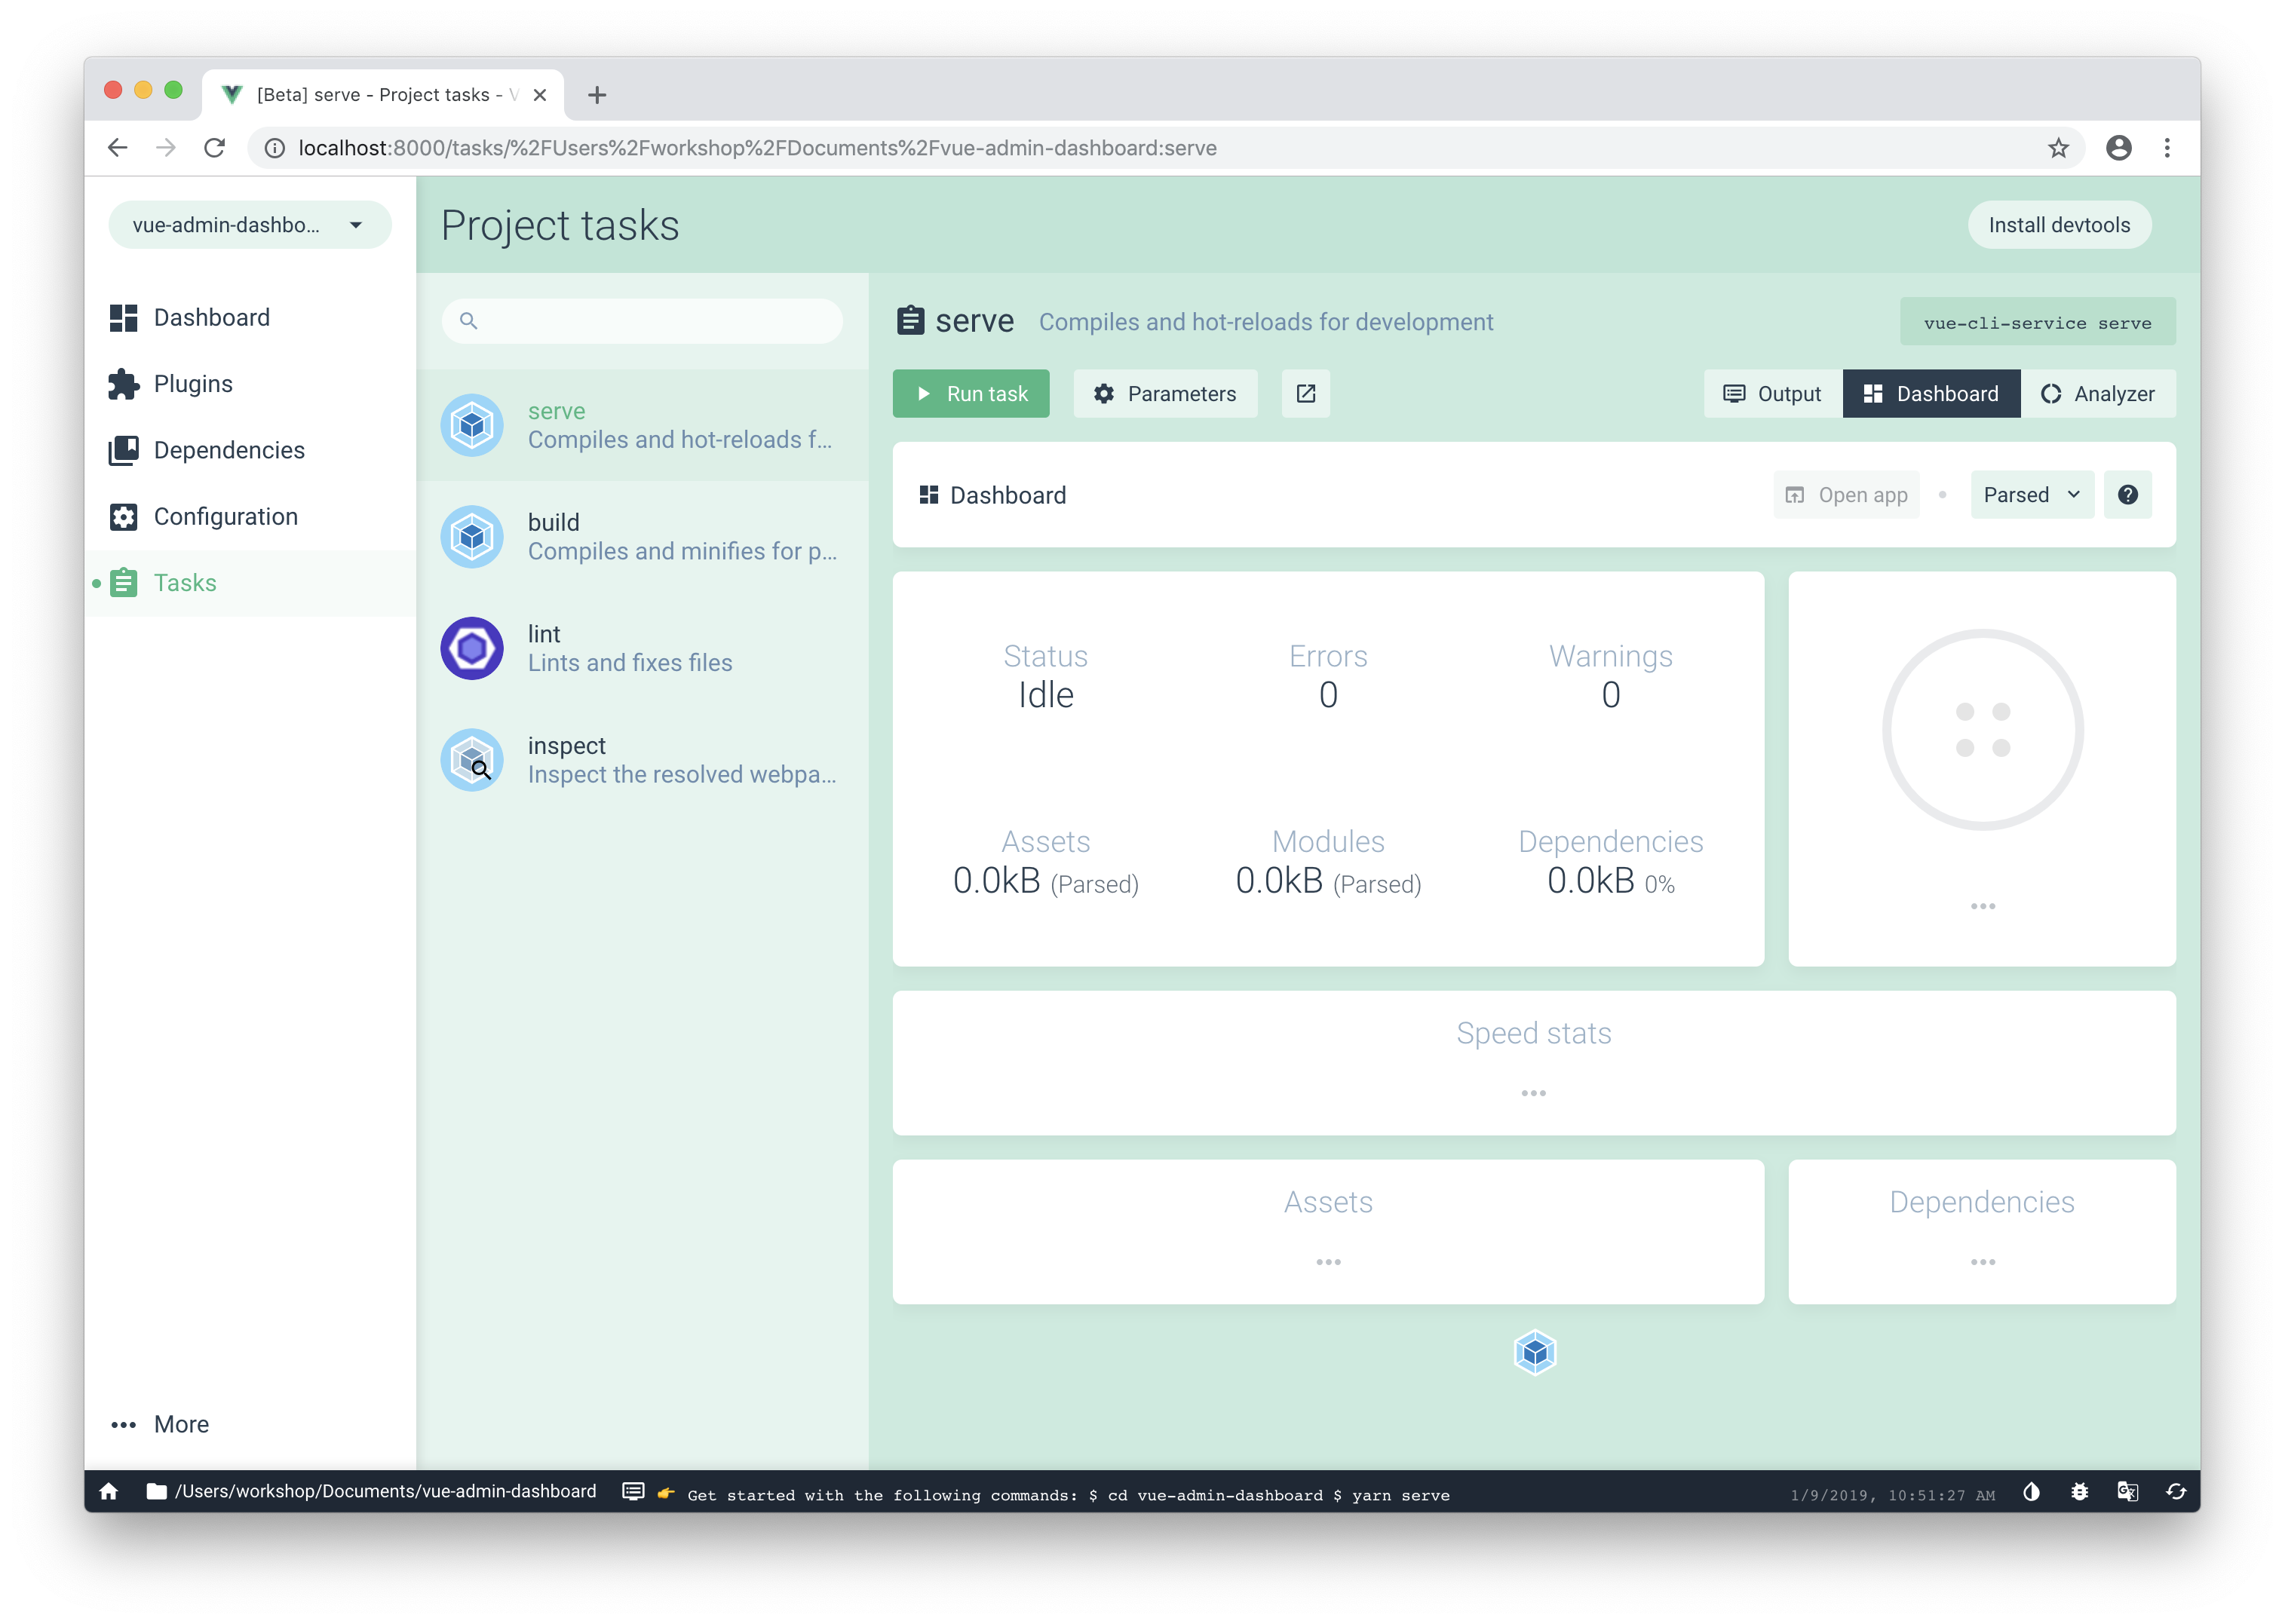
- Hit the "Run task" button. Wait a little for the site to build, then hit "Open app".


Final Thoughts
Congratulations! You've just successfully configured and run your first fully-functional Vue website. Setting up is always challenging, and sometimes it's the hardest part about building websites. However, the Vue team has done a great job making the process as smooth as possible.
Now comes the exciting part – customizing our Vue app!
Templates and source code
Download source files
Download the videos and assets to refer and learn offline without interuption.
Design template
Source code for all sections
Video files, ePub and subtitles
Videos
ePub
Assets
Subtitles
1
Intro to Vue.js
Learn to Create an Admin Dashboard using Vue
7:52
2
Global Styling with Sass
Use Sass to supercharge your CSS
23:18
3
Single File Components
Work with components, props, and page routing
28:27
4
Dark Mode Part 1
Switch from light and dark mode with component state
20:35
5
Dark Mode Part 2
Bring light and dark mode to your entire app with VueX
18:54
6
Animations and transitions
Create easy effects on elements and components
35:02
7
Accounts with Netlify
Deploy your site and set up sign in flow
35:29
8
Accounts with Slack
Reset password and request account access using Slack API
18:07
9
Charts and Data Visualization
Add data and visualize it with Apex Charts and Google Data Studio
40:27
10
Database with Firestore
Connect your app to a database
21:36
11
Lambda Functions with Netlify
Manage users with a serverless backend
22:05
Meet the instructor
We all try to be consistent with our way of teaching step-by-step, providing source files and prioritizing design in our courses.
Thomas Wang
UI Developer
Thomas is a designer and developer who loves JavaScript and CSS. He gets inspiration from beautifully designed products, and grew up in Southern California 🌴