
Getting Started with Principle
Add to favorites
Working with Drivers & Events
Play video
Figma import
Let's go to the Figma project and select the Artboard with all the layers on it. Then go back to Principle and on the toolbar click on import. A new window will pop up. Select the Figma tab, Principle will be smart enough to realize which were the latest documents you opened on Figma. Make sure that on Document you are selecting Principle cards and as resolution choose 2x. Finally, click Import Selected Frames.

Reordering your layers on Principle
Make sure to have your cards layers on this order from top to bottom: Card 1, Card 2, and Card 3.

Downsize the cards
Select Card 2 and change its Scale to 0.9 and in Card 3 change its Scale to 0.8.

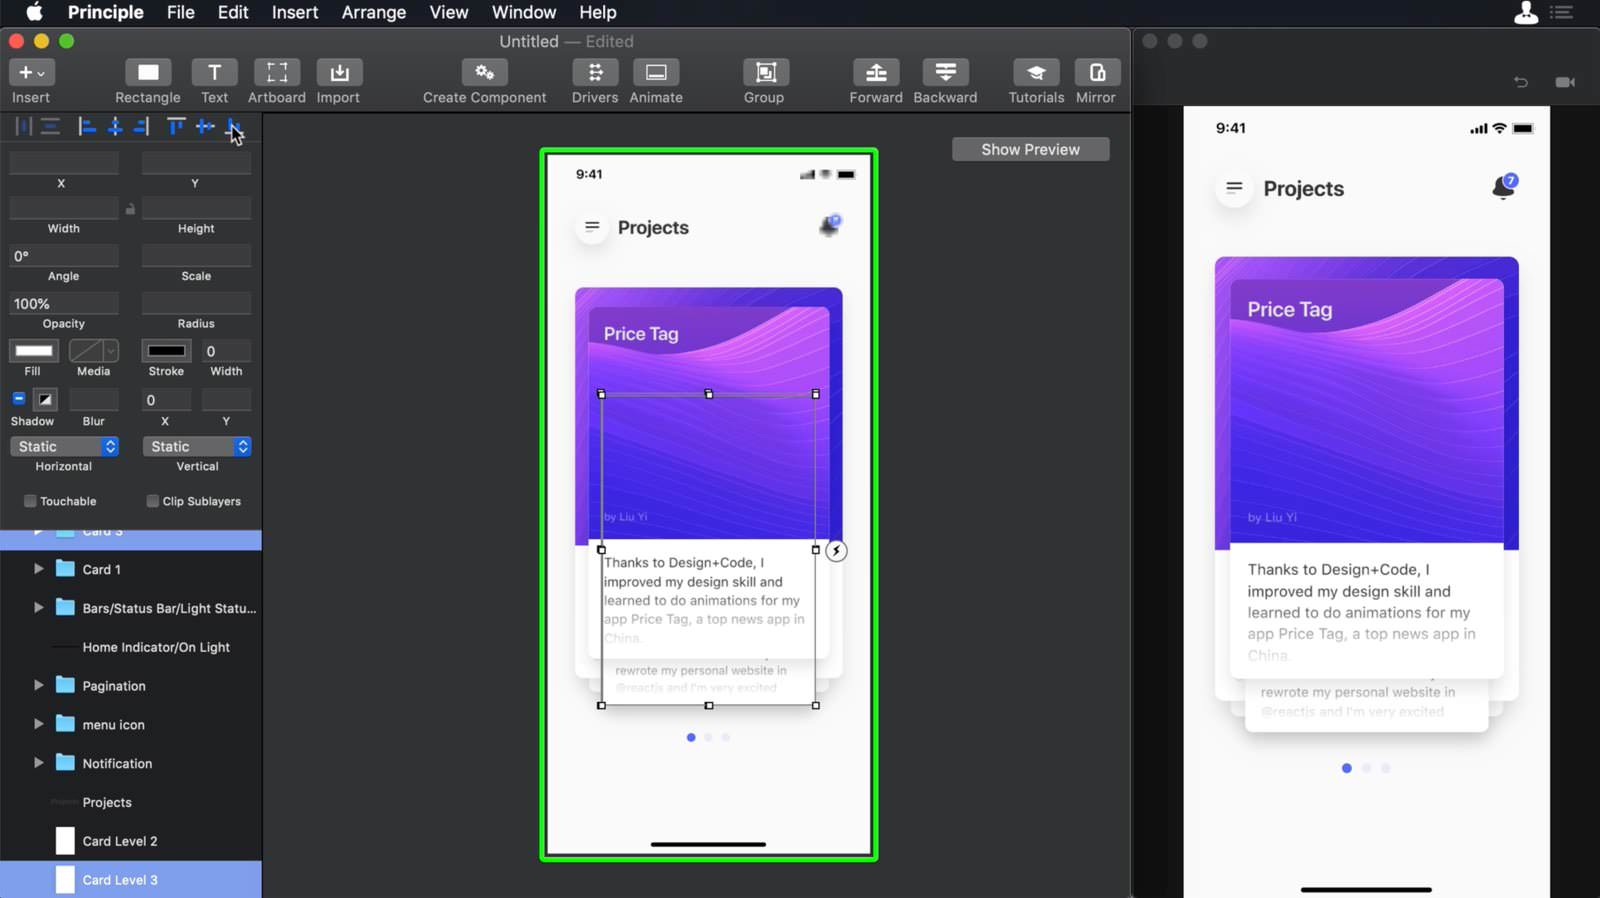
Aligning to the Bottom Edge
Select the Card 3and then selectCard Level 3 from the inspector and click on Align Bottom Edges which is the button on top of the inspector.
Do the same process for Card 2 and Card-Level 2. Once the card will be aligned you can delete Card Level 2 and Card-Level 3.
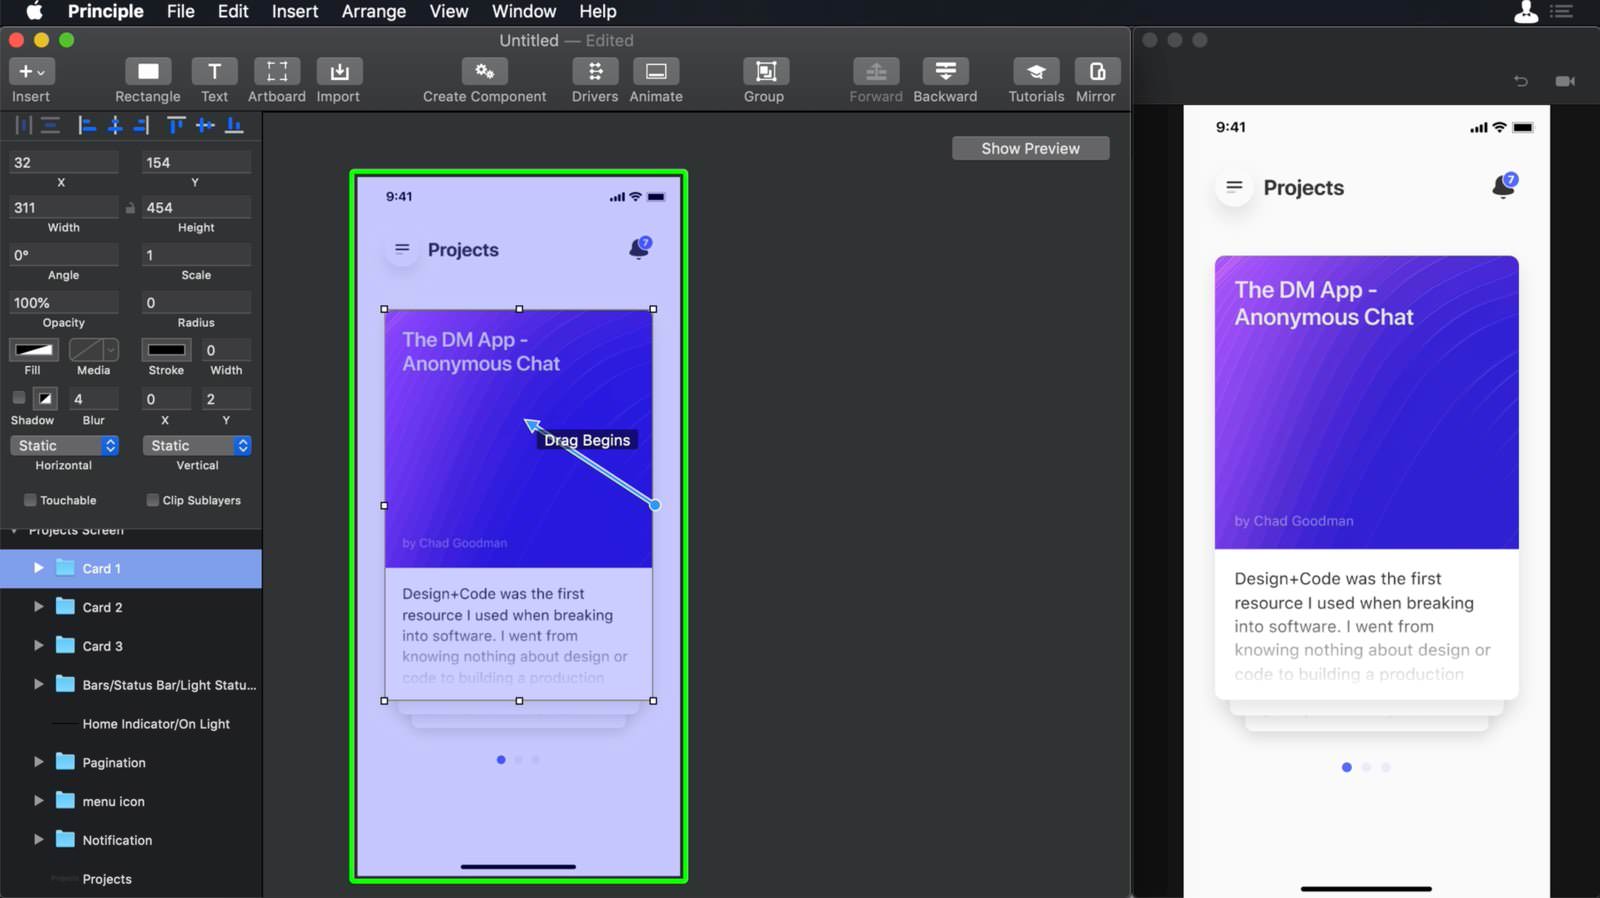
Events
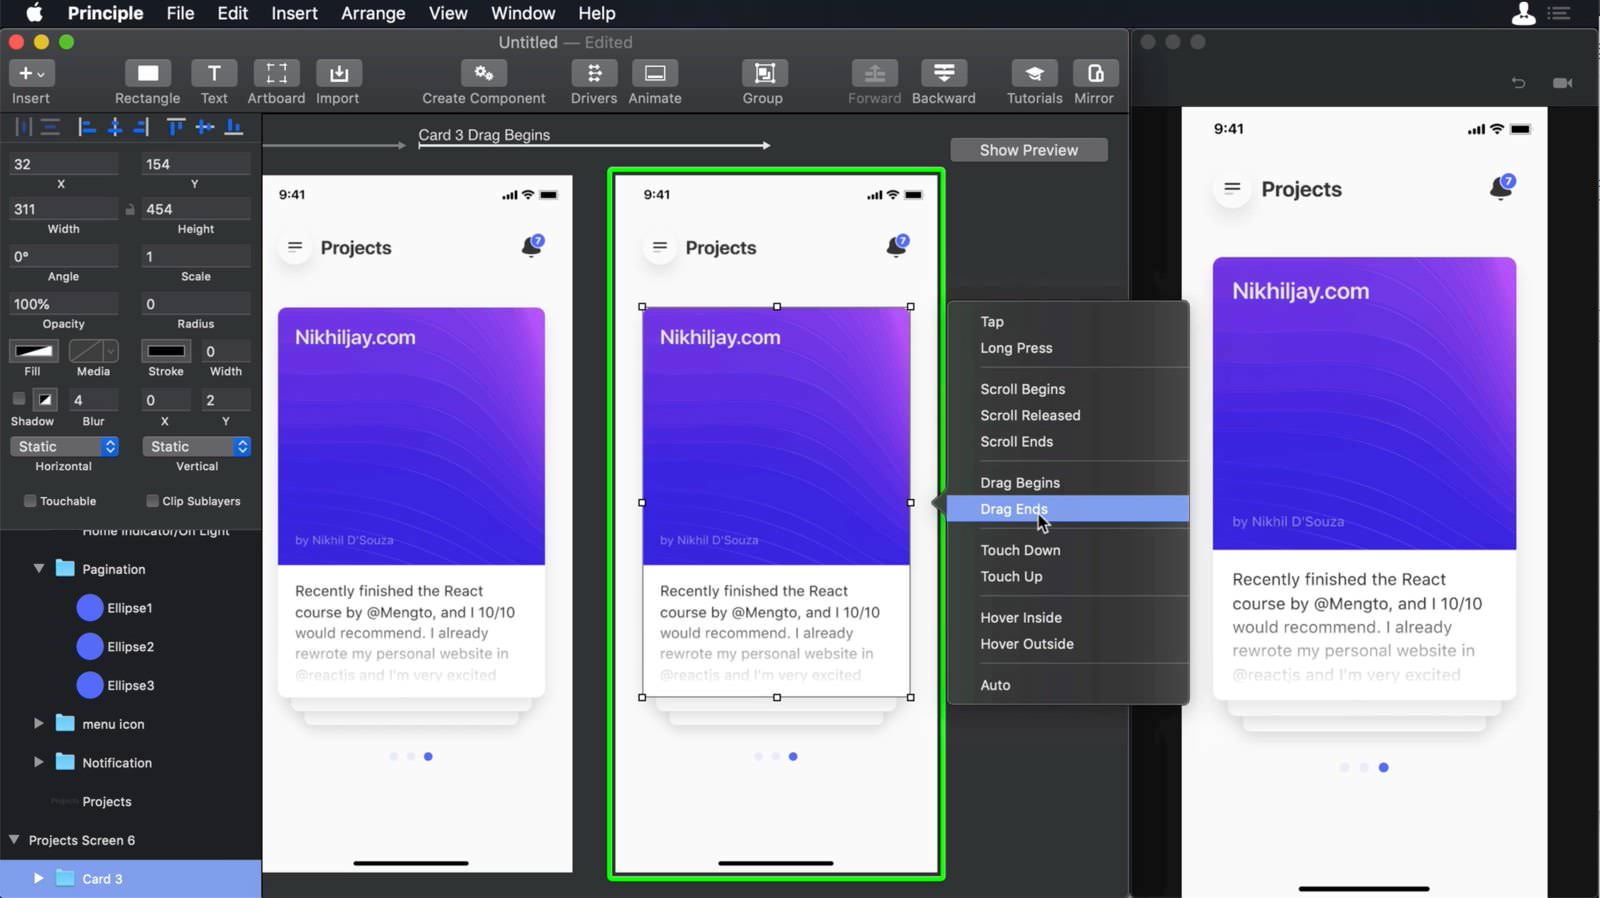
Select Card 1 and on the middle of the card, you will spot a white button with a Thunderbolt icon on it. Click on the button and a pop up will appear with plenty of options. Select Drag Begins and an arrow will appear, point the arrow to the same Artboard. This will create a new Artboard. Lets select Card 1 from the second Artboard create a new event and choose Drag Ends and point it to the second Artboard itself. We will create a third Artboard.
Card sequence
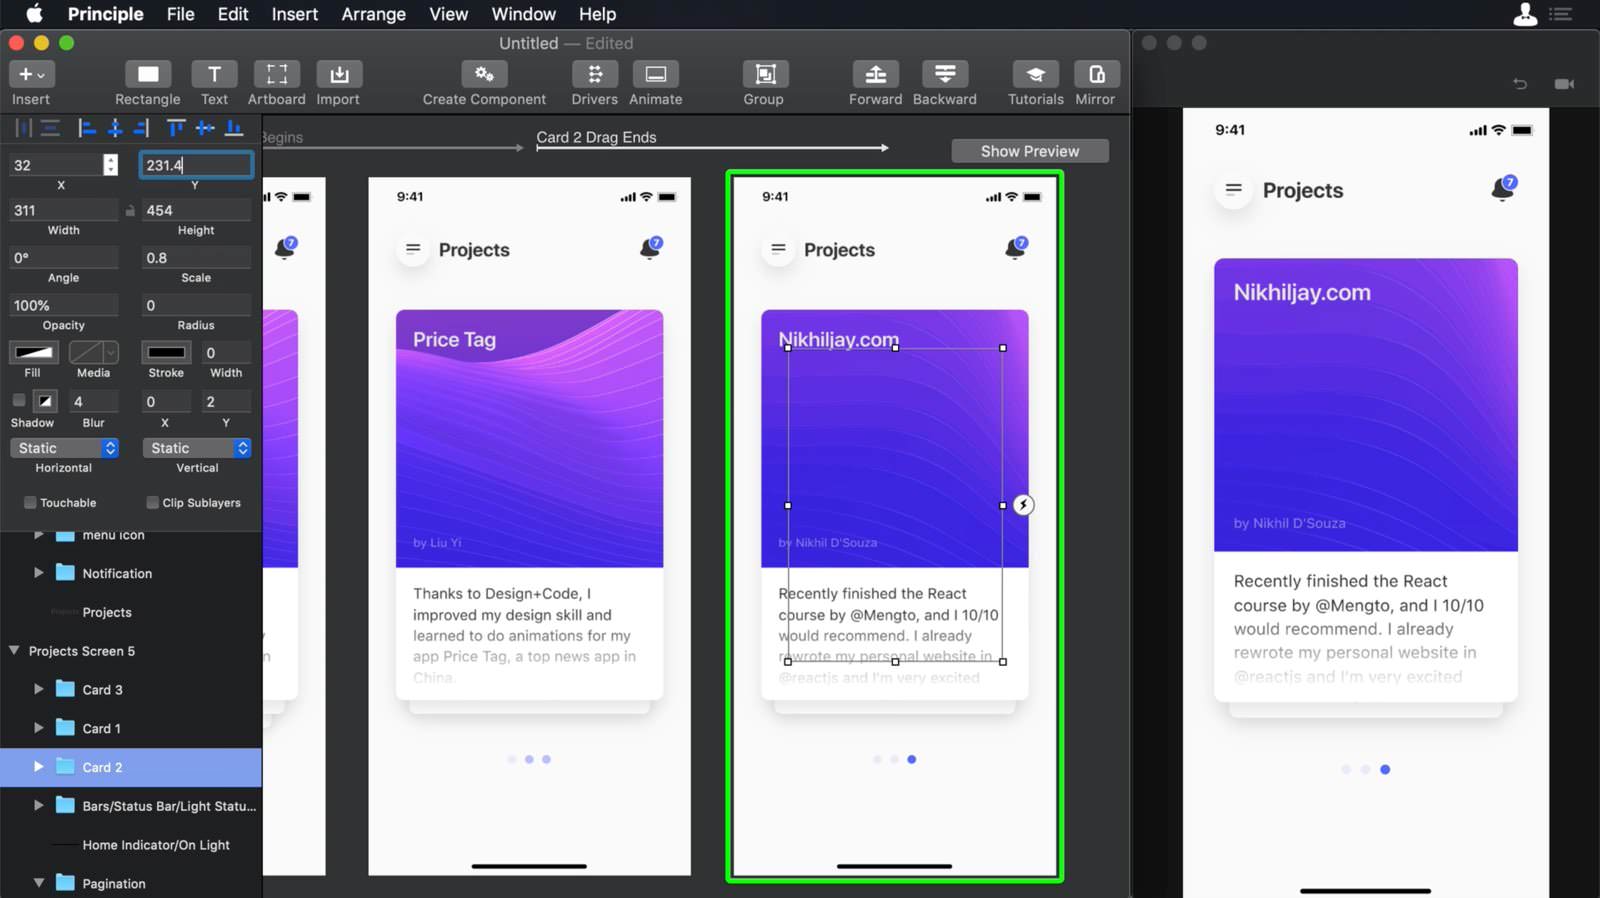
On Artboard 3 let's reorganize the card on this sequence from top to bottom Card 2, Card 3 and Card 1. Choose Card 2 and scale it to 1, choose Card 3 and scale it to 0.9 finally let’s choose Card 1 and scale it down to 0.8. Finally give the right Y axis to the cards, for Card 2 Change its Y axis to 154, lets select Card 3 and change its Y axis to 192.7, for Card 1 let's give a Y-axis of 231.4.

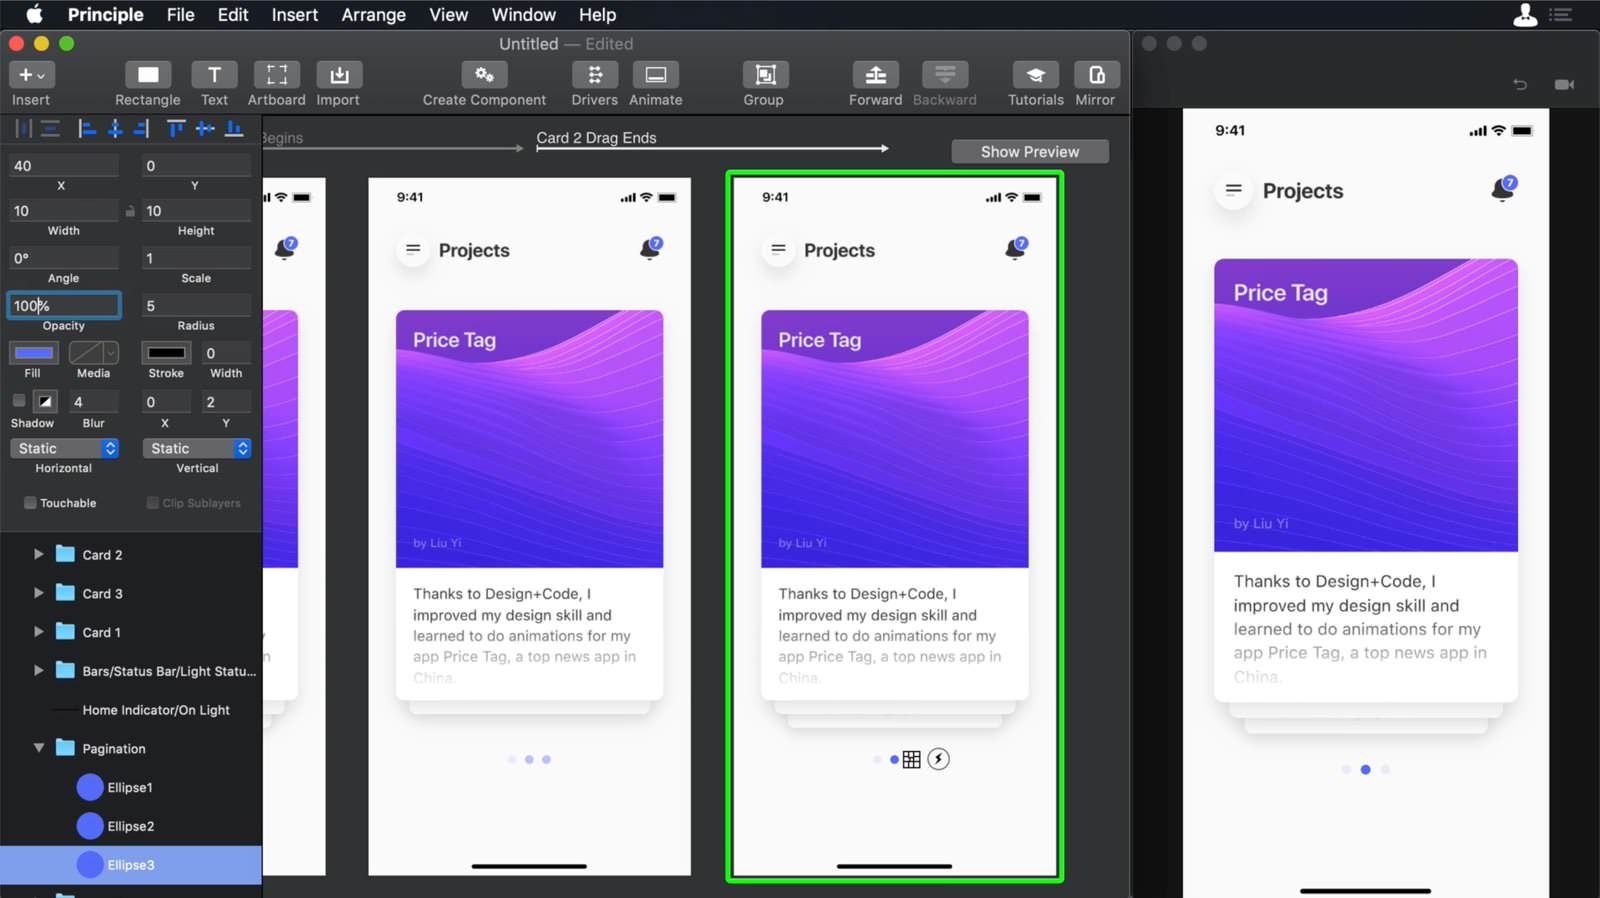
Bullet points animation
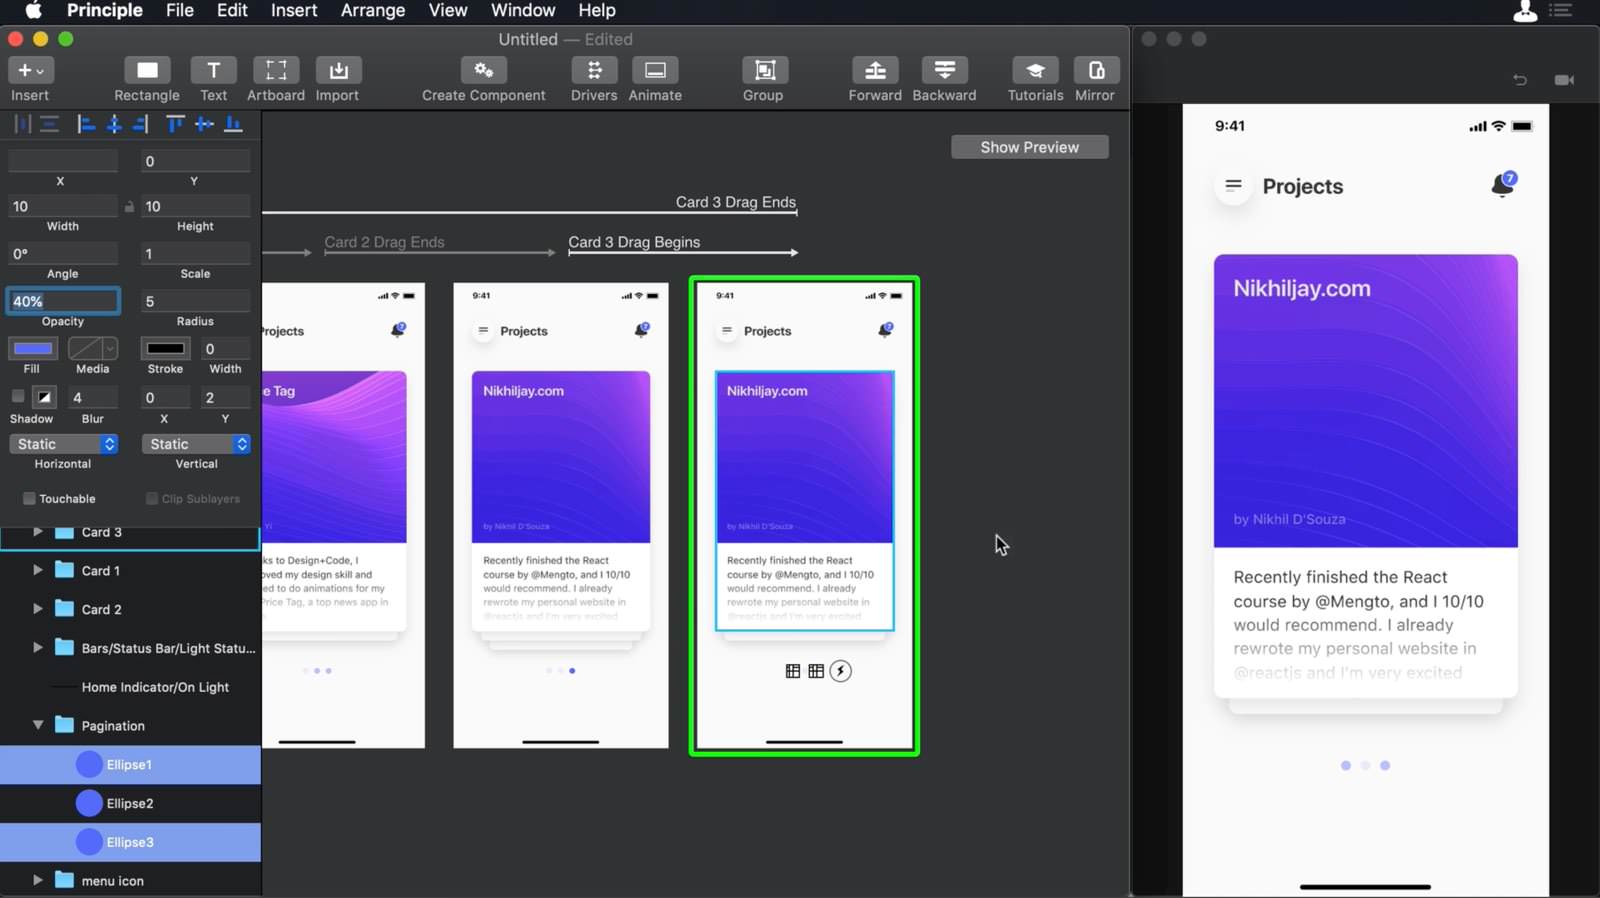
Let's add a little bit of motion to our animation. Choose Card 3 from the second Artboard and change its Opacity to 0%. Now on the same Artboard open the pagination folder from the inspector. Select Ellipse 1 and Ellipse 2 and reduce their opacity to 40%. Then go to the third Artboard and over there select the second bullet point Ellipse 2 and increase its opacity to 100%, next select Ellipse 1 and change its opacity to 10%
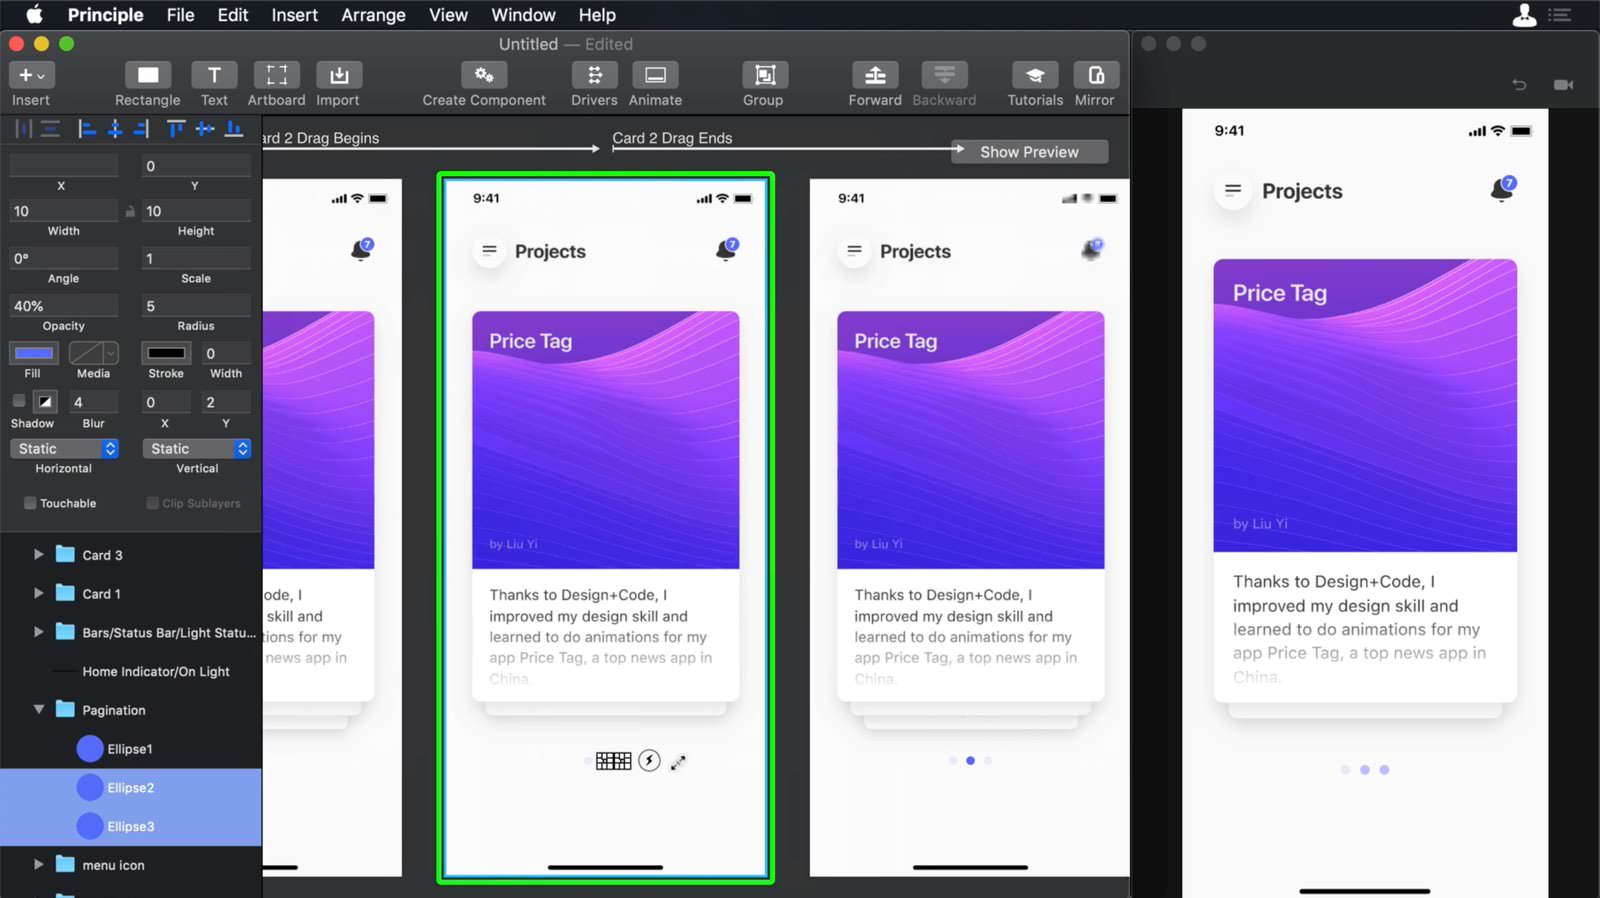
Repeat the animation
Now that we have the animation for the first card done, we need to recreate the same animation for the rest of the cards and close the loop of the animation. Like that when we will finish the swipe of the third card our animation will go automatically to the beginning. Go to the third Artboard and from there select Card 2 and create an event Drag Begins then point the event to the Artboard, this action will create a fourth Artboard. Go to the fourth Artboard and from there select Card 2 create an event and select Drag Ends and point it to itself and this will create a fifth Artboard.

Artboard 4 setup
Let's choose Card 1 from Artboard 4 and change its opacity to 0%, then choose the bullets points from the Artboard, Ellipse 2 and 3 and reduce their opacity to 40%
Artboard 5 setup
Select the Ellipse 3 from Artboard 5 and change to 100% Opacity and reduce Ellipse 2 to 10%. Choose Card 2 and scale it down to 0.8. Select Card 3 and scale it up to 1 and choose Card 1 and scale it to 0.8. Now let's reorder the cards from top to bottom Card 3>Card1>Card2. Finally, change the Y-axis of the cards, choose Card 3 and change its Y axis to 154 , then chooseCard 1 and change its Y axis to 192.7 and for Card 2 change it to 231.4.
Artboard 6
Let's create our last Artboard. To do so on Artboard 5 let’s select Card 3 and add an event to it, click on the thunderbolt icon and select Drag Begins and point it to itself this will create a new Artboard. On the new Artboard select Card 3, then create an event Drag Ends and point it to the first Artboard. Like that, we will be closing the whole cycle
Artboard 6 setup
Select Card 2 from the inspector and change its opacity to 0 %. Then select Ellipse 1 and 3 and change its opacity to 40%
Angle animation
If you want to make the animation of the cards even better, we can animate the angle of the card every time that we are swiping it. We will add Drivers to create these animations to every even screen, Artboard 2,4 and 6. Select every first card on the inspector and change Drag Vertical for Static Vertical on the Inspector. Select Card 1 from Artboard 2 and then open the drivers.

Drivers
Select Card 1 from the Drivers timeline and create two keyframes for the Center Y and Angle properties. Let's add keyframes for both properties in these frames; 100, 187 and 274. On frame 274 change the Angle of the card to 12 and the Center Y to 120, then move the scrubber to 100 and change the angle to -12 and the Center Y to 120. Finally, repeat the same steps for the first cards in Artboard 4 and 6.

Conclusion
In this section, we learned how to import from Figma, Principle’s UI, drivers, events and some basic tools that Principle has.
Templates and source code
Download source files
Download the videos and assets to refer and learn offline without interuption.
Design template
Source code for all sections
Video files, ePub and subtitles
Videos
ePub
Assets
Subtitles
1
Getting Started with Principle
Working with Drivers & Events
15:38
2
Multiple Scrolling
Horizontal and Vertical Scrolling
14:33
3
Working with multiple Screens
Using Animate (Timeline)
13:15
4
Advanced Animations
Using Drivers & Events to the next level
7:59
5
Components & Handover
Integrate all your compositions and share them
9:54
Meet the instructor
We all try to be consistent with our way of teaching step-by-step, providing source files and prioritizing design in our courses.
Daniel Nisttahuz
Senior Product Designer at Design+Code
Motion Designer @Design+Code
7 courses - 12 hours

UX Design Handbook
Learn about design thinking, with exercises. Free tutorials for learning user experience design.
2 hrs
UI Design Handbook
A comprehensive guide to the best tips and tricks for UI design. Free tutorials for learning user interface design.
2 hrs
Create a Promo Video in After Effects
In this course we will show you how to create a promo video using After Effects.
2 hrs
Animating in Principle
Learn how to animate interactive user interfaces from Figma to Principle. Get to design the app flow for multiple screens, interactions, and animations. At the end of the course, you will have a beautiful prototype that you can share with stakeholders.
1 hrs
Video Editing in ScreenFlow
Learn different techniques, transitions actions and effects to edit a video using Screeflow
1 hrs
Motion Design in After Effects
Learn animation and motion design with After Effects
3 hrs
Learn iOS 11 Design
Learn colors, typography and layout for iOS 8
1 hrs