
3D Camera Angles
Add to favorites
A step-by-step guide to set 3D perspective camera angles to your videos.
Play video
Create a Promo Video in After Effects
1
3D Camera Angles
23:04
2
Collage Grids
11:03
3
Text Animations
14:06
4
Advanced Text Animation
11:19
5
Masking Techniques Part1
17:15
6
Masking Techniques Part2
9:22
7
Animated Backgrounds
8:26
8
Strobe effect
13:24
9
Export your assets from a Design Tool to AE
15:46
10
Extrusion Depth
11:27
11
Animated Shape Burst
8:07
12
Dynamic Shape Animation
7:33
Getting Started
Let's start with opening After Effects. Head over to the Assets folder you recently downloaded. Drag and drop all the video files there to AE.

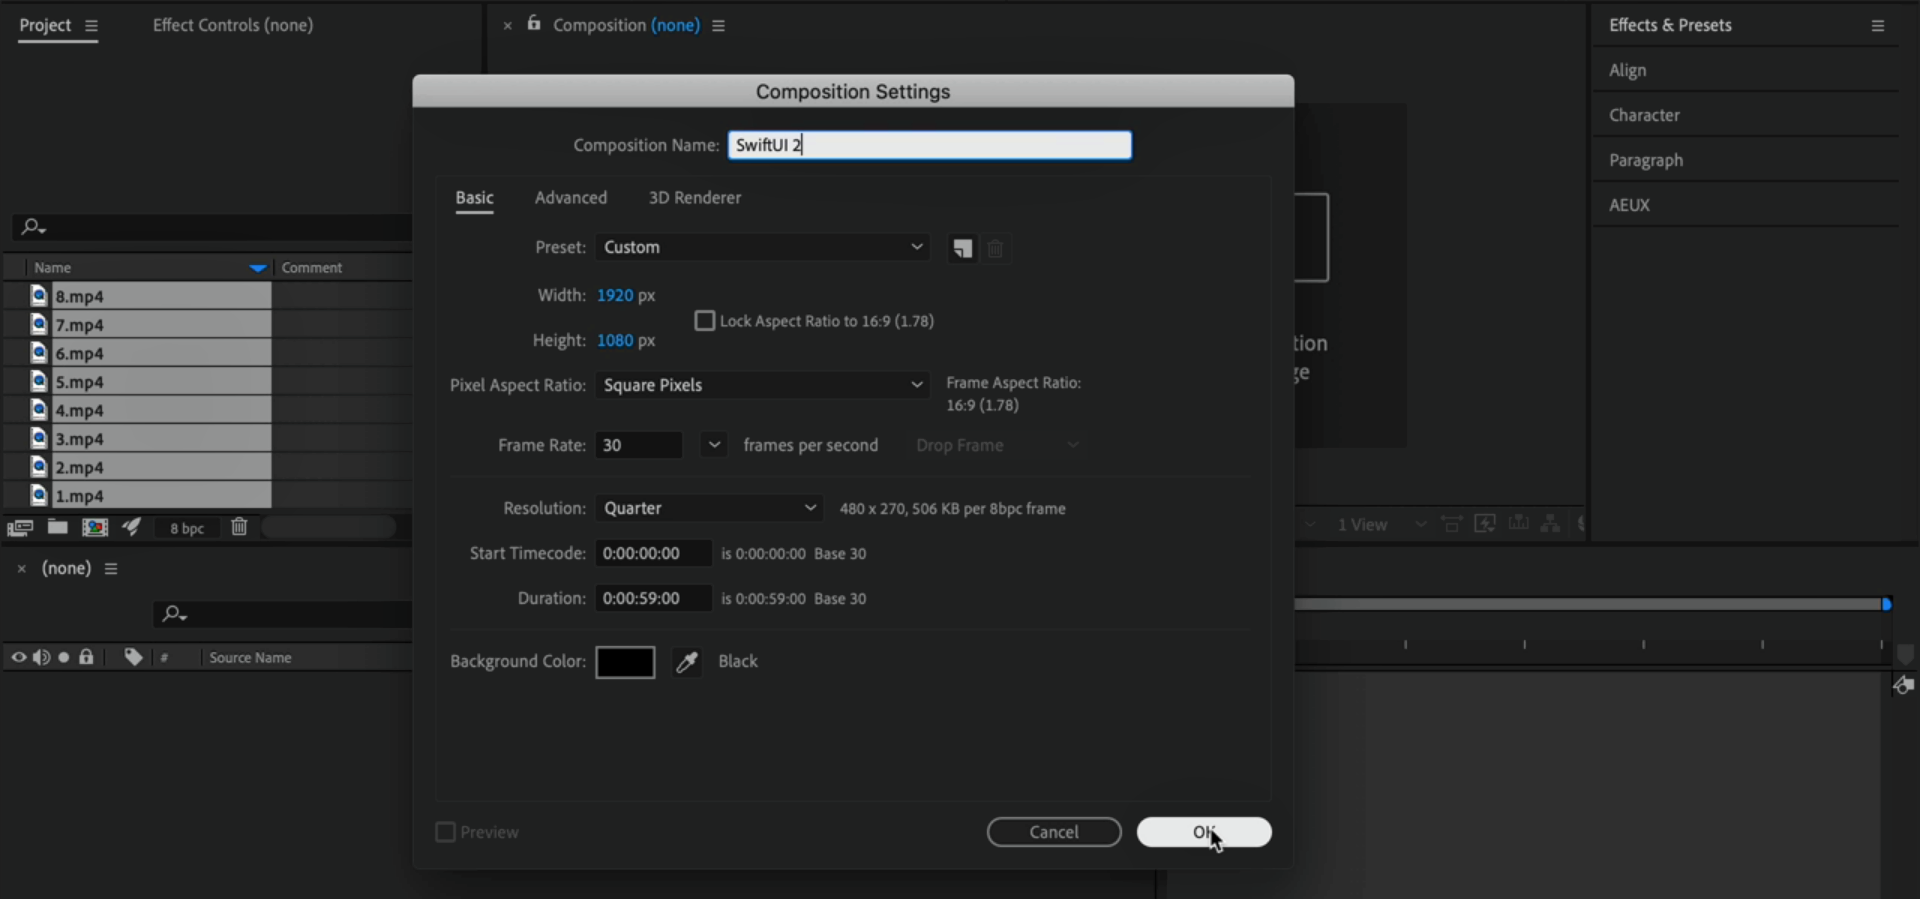
Composition
Next, click on the Composition settings icon which is the third icon from the left.
- Name it 'SwiftUI 2' or whatever name you prefer
- Make sure that the width is set to 1920 and height to 1080
- The Pixel Aspect Ration should be set to 'Square Pixels'
- Set Frame Rate to 30 and duration to 59 seconds
- Set the background color to black and click 'OK'

Preview
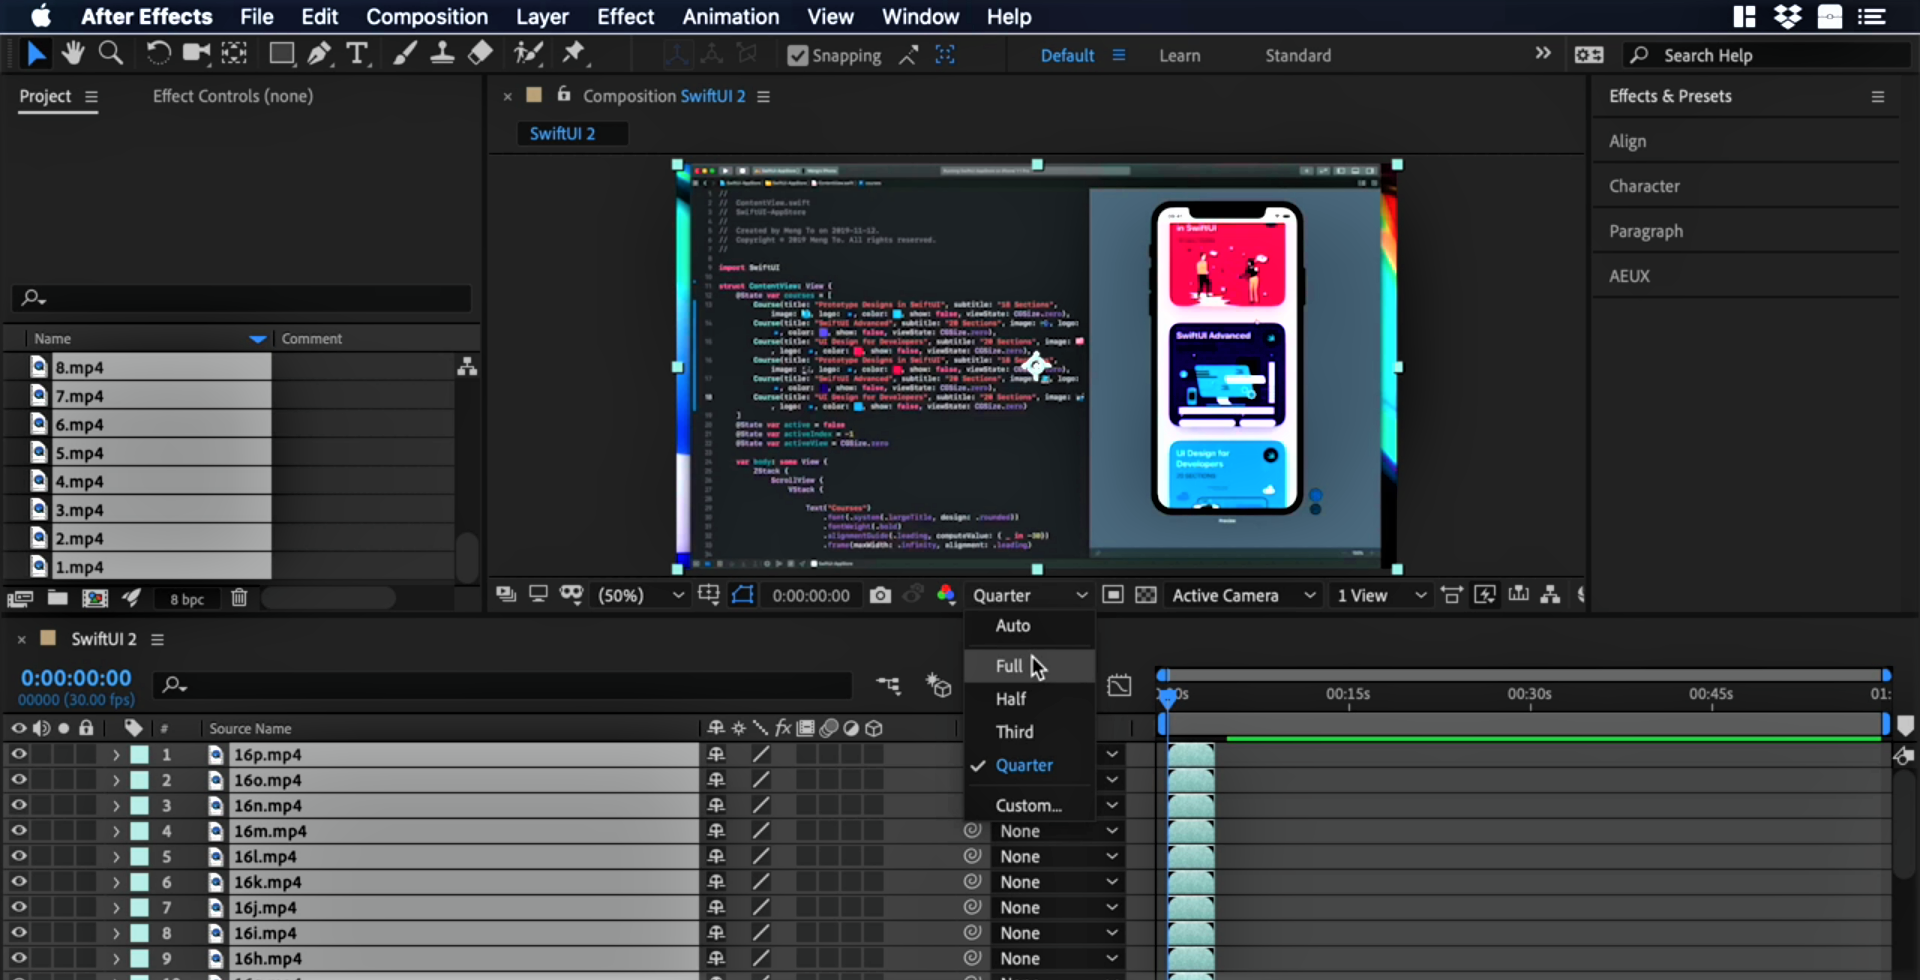
Firstly, select and drag all the videos to the layers panel at the bottom. Make sure to turn off the sound for all the videos. The preview does not look good currently, this is because we're using a quarter of the resolution. To fix this, click on the dropdown menu and select 'Full'.
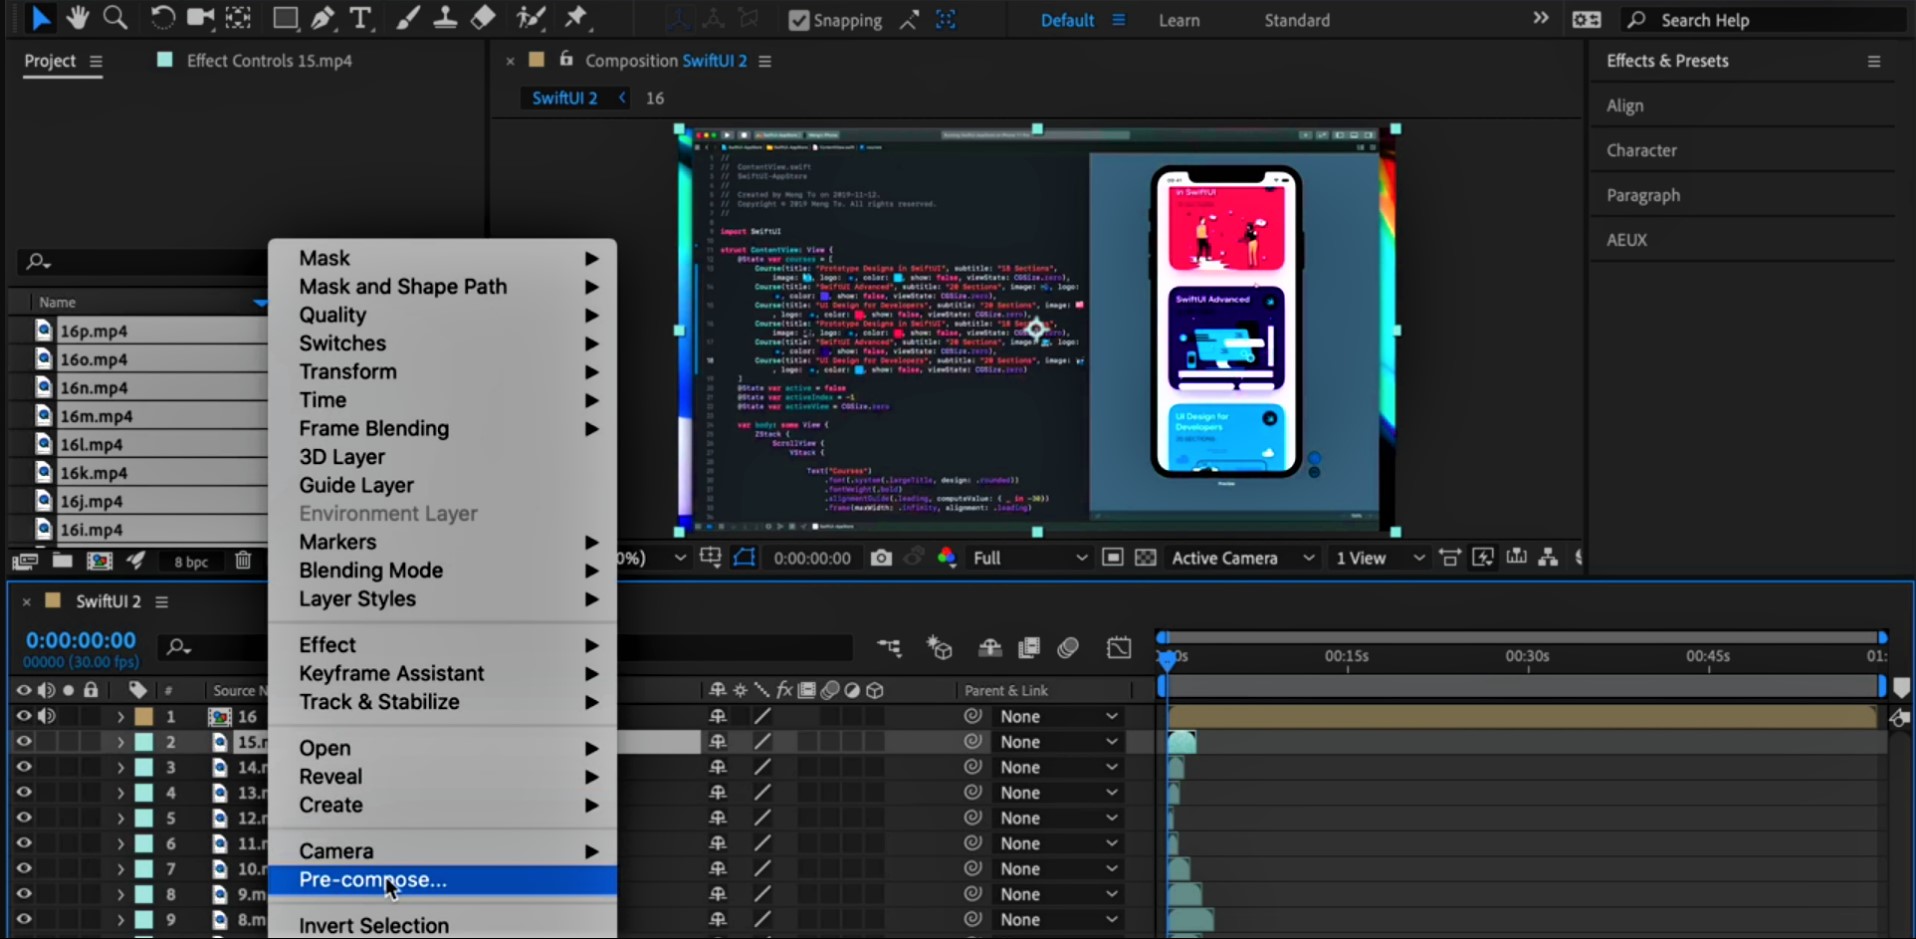
Organize Assets
In this step, we'll organize all the files that we've by grouping them. Select all the files that have '16' in their name, right-click and then 'Pre-compose...'. Name it '16' or whatever name you prefer and then click 'OK'. Follow the same steps for the remaining files.
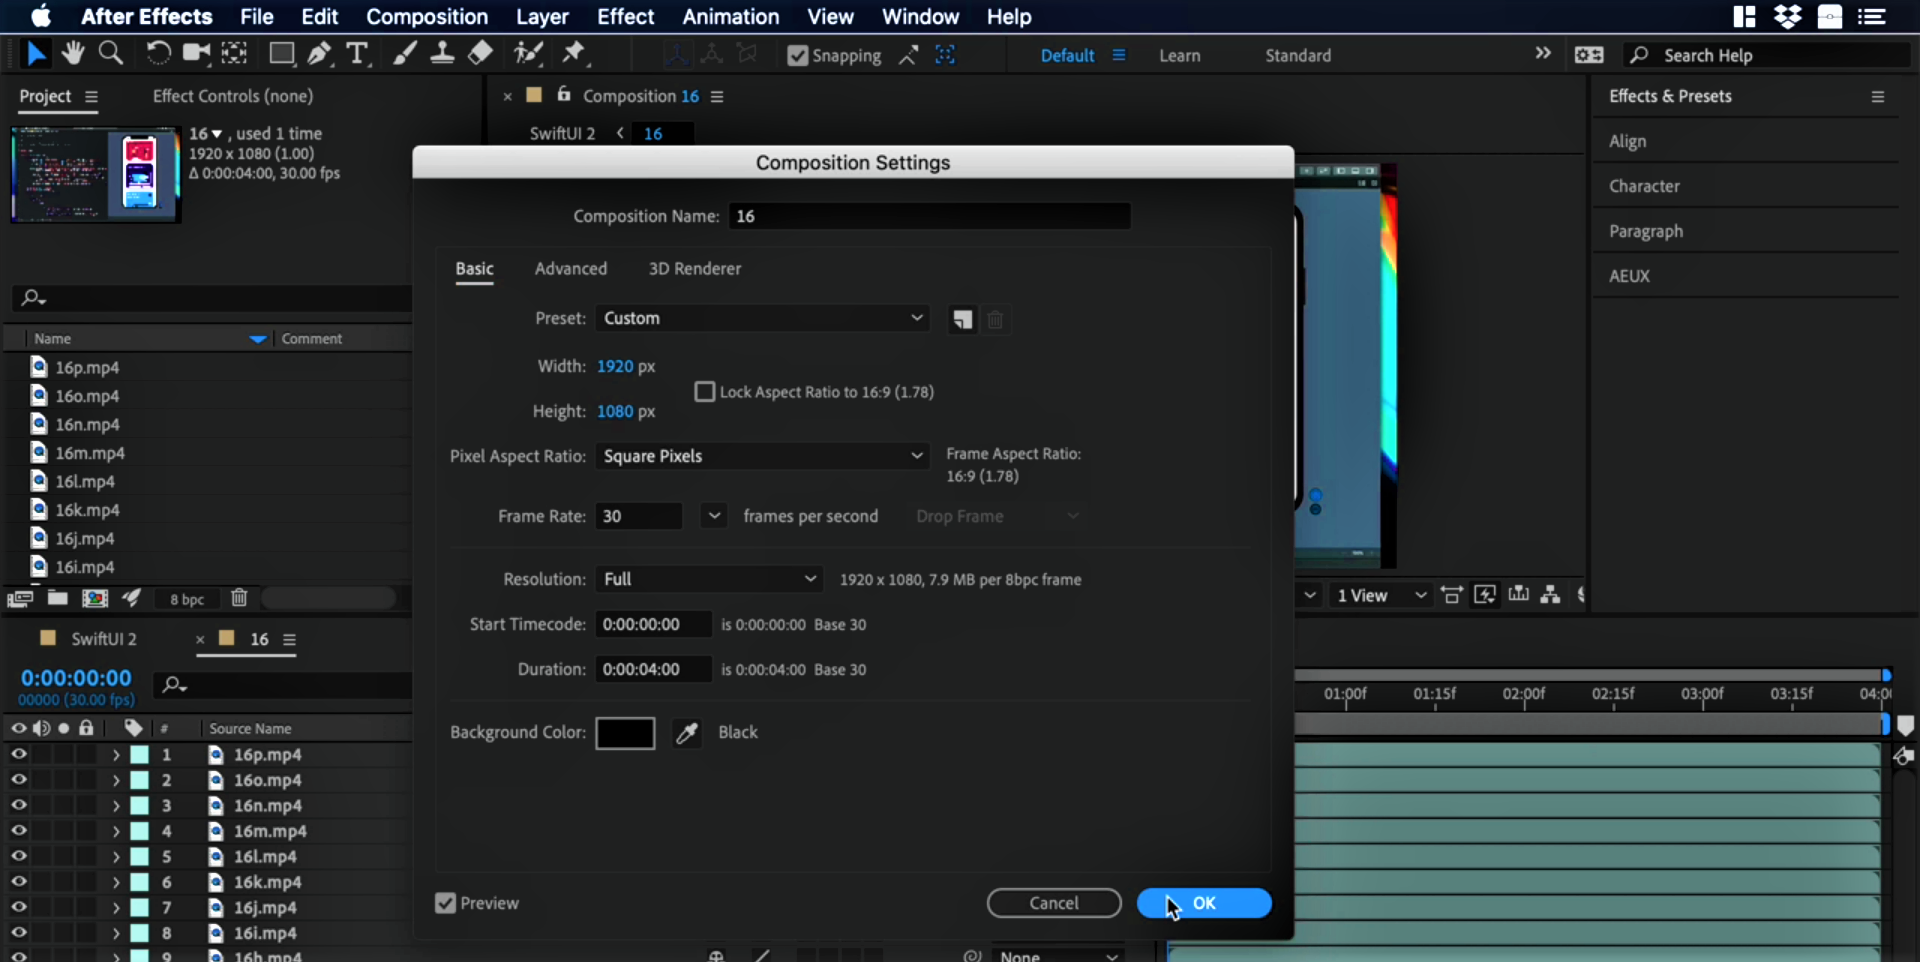
Pre-compose Fix
Now that we have each one of our videos inside a pre-compose, you may notice that each one of the pre-composes took the same duration as their original video, except 16. To fix this, press Cmd + K to open Compositions settings and set the duration to 4s.
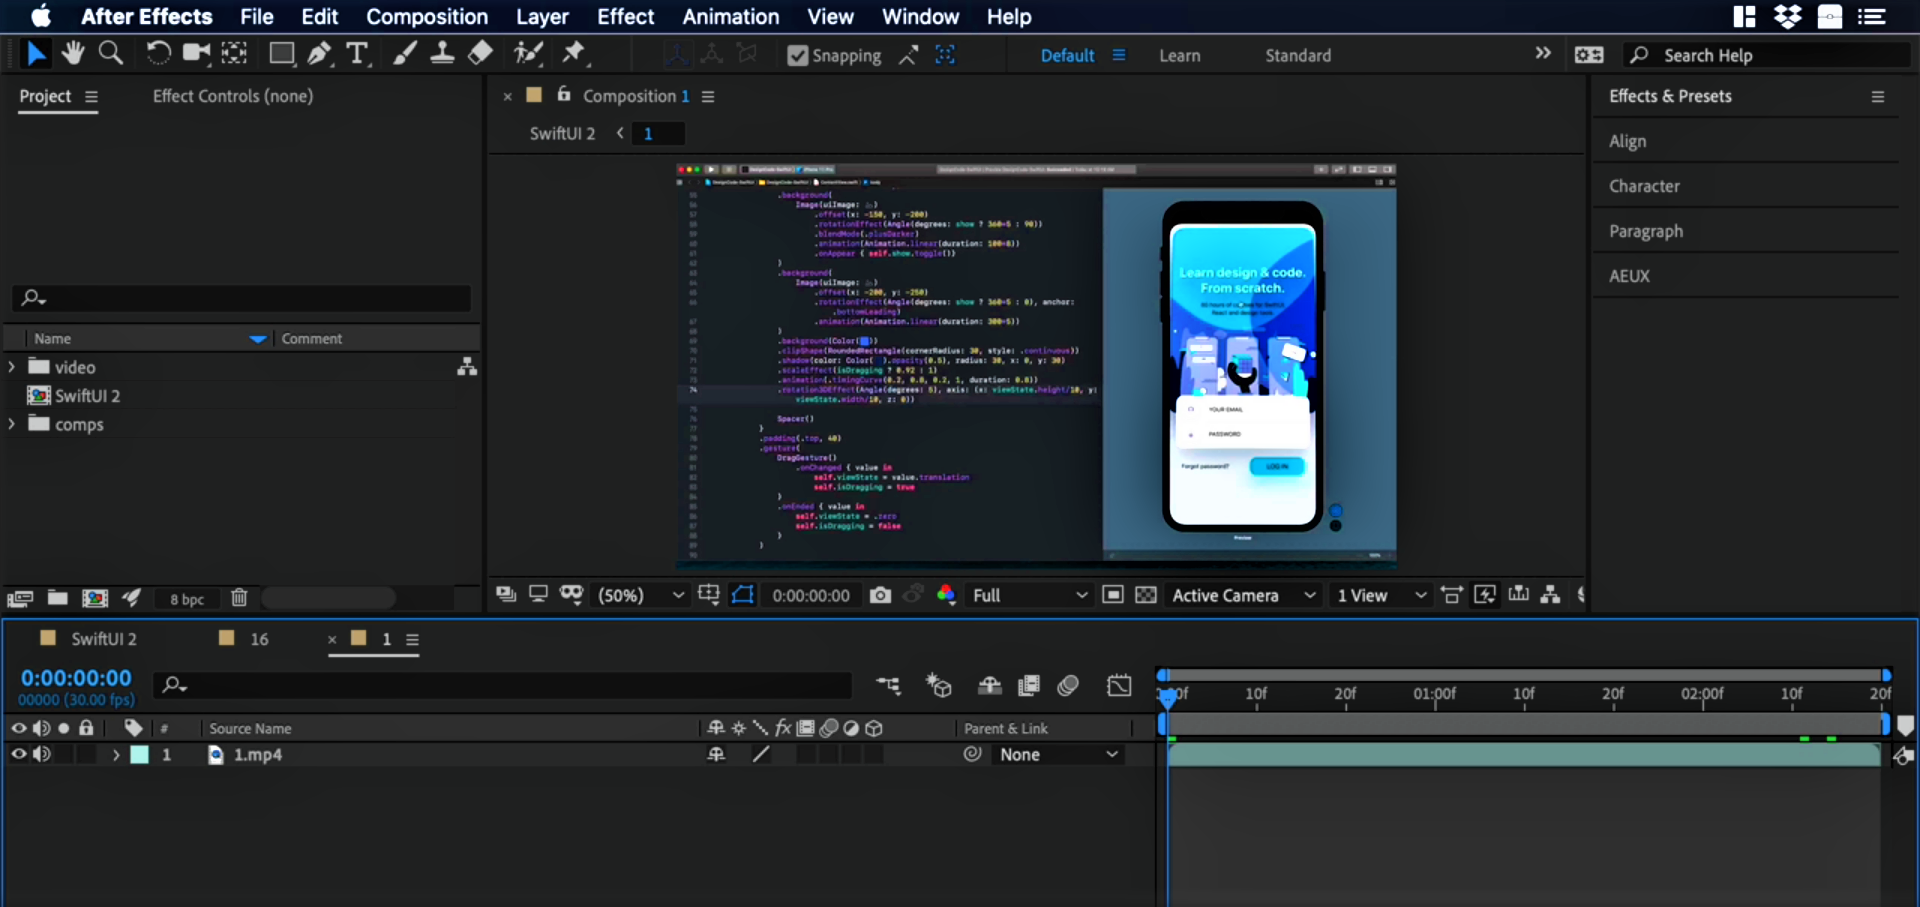
Sequence Layers
Let's go back to our main composition which is SwiftUI. Please ensure that you've the sound turned off for pre-compose 16. Now, let's organize all the layers by sequence. To do so:
- Select all the layers and then, right-click
- Here, click on Keyframe Assistant and then, Sequence Layers
- Lastly, click on 'OK'
![AE S01 6]() *Please make sure that you've your first video at the bottom.
*Please make sure that you've your first video at the bottom.
 *Please make sure that you've your first video at the bottom.
Folders
We're almost done with organizing assets.
- Next, let's create a new folder and name it 'video'. Select all the MP4 files, drag and drop these in the newly create folder.
- Create another folder called 'comps'. Drag and drop all the pre-compose files in this folder.
![AE S01 7]()
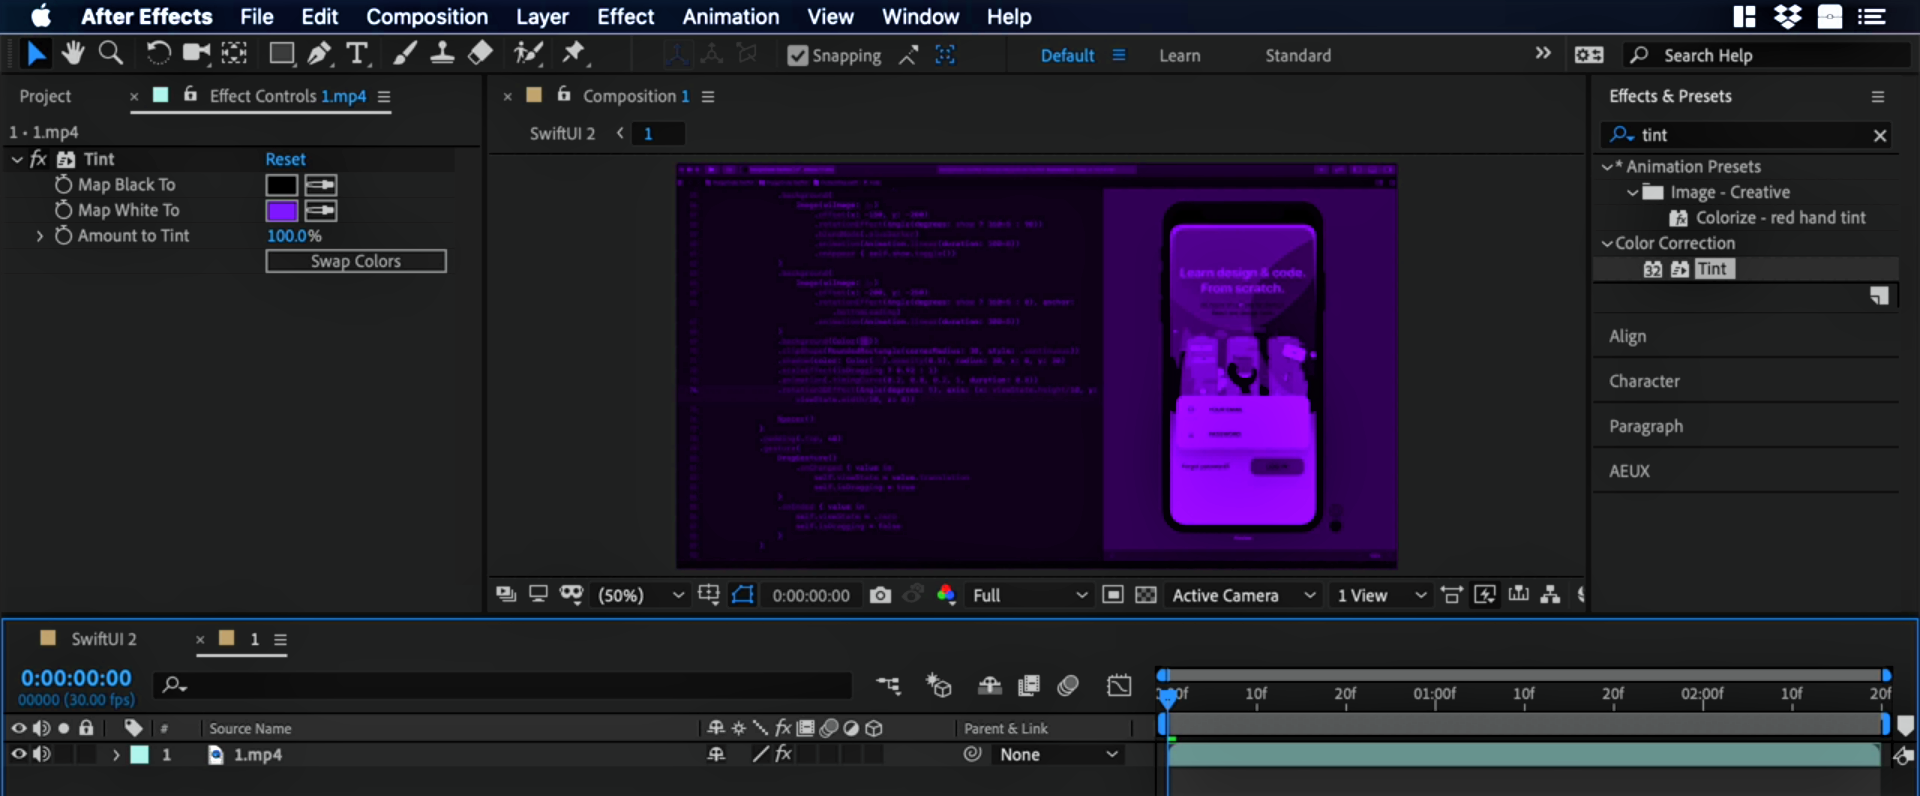
Color Tint
Here, we'll create the same purple tint we had in the promo video. To do so:
- At the top-right click on Effect & Presets and search for 'Tint'
- Set "#7C24F9' as the color value for the second color
![AE S01 8]()
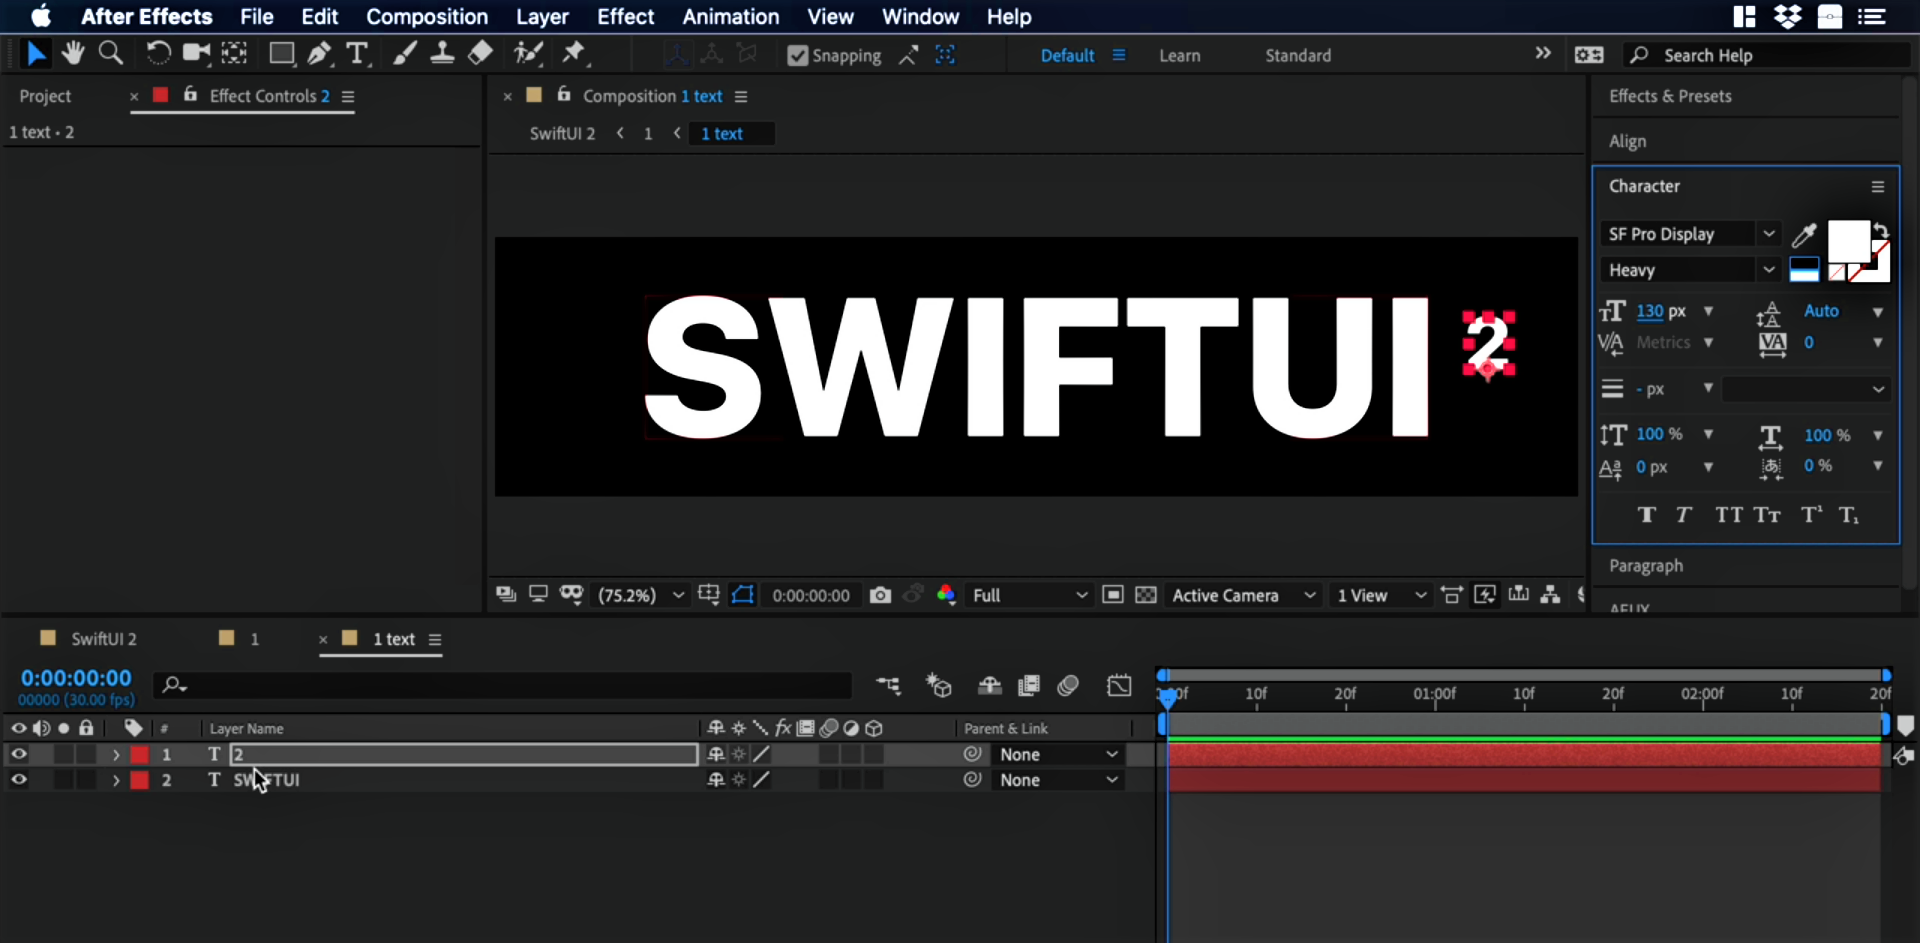
Text
Now, let's add in some text by clicking on the 'T' icon in the toolbar.
- Type in 'SWIFTUI' and set its color to white
- Next, click on 'Align' and align it both horizontally as well as vertically
- Create a pre-compose for the text the same way we did for the MP4 files
- Double click the composition 'text' and press Cmd + K, set the height here to 461
- To add '2' to our 'text', click the 'T' again and type in '2'. Move it to the right of the text and set its size to 130
![AE S01 9]()
Positioning
We'd like to re-position the text elements. To do so, follow the below-mentioned steps:
- Select '2' and press P. This opens the position values, set x to 1674.7 and y to 151.7
- Do the same for 'text', set x here to 922 and y to 379.4
![AE S01 10]()

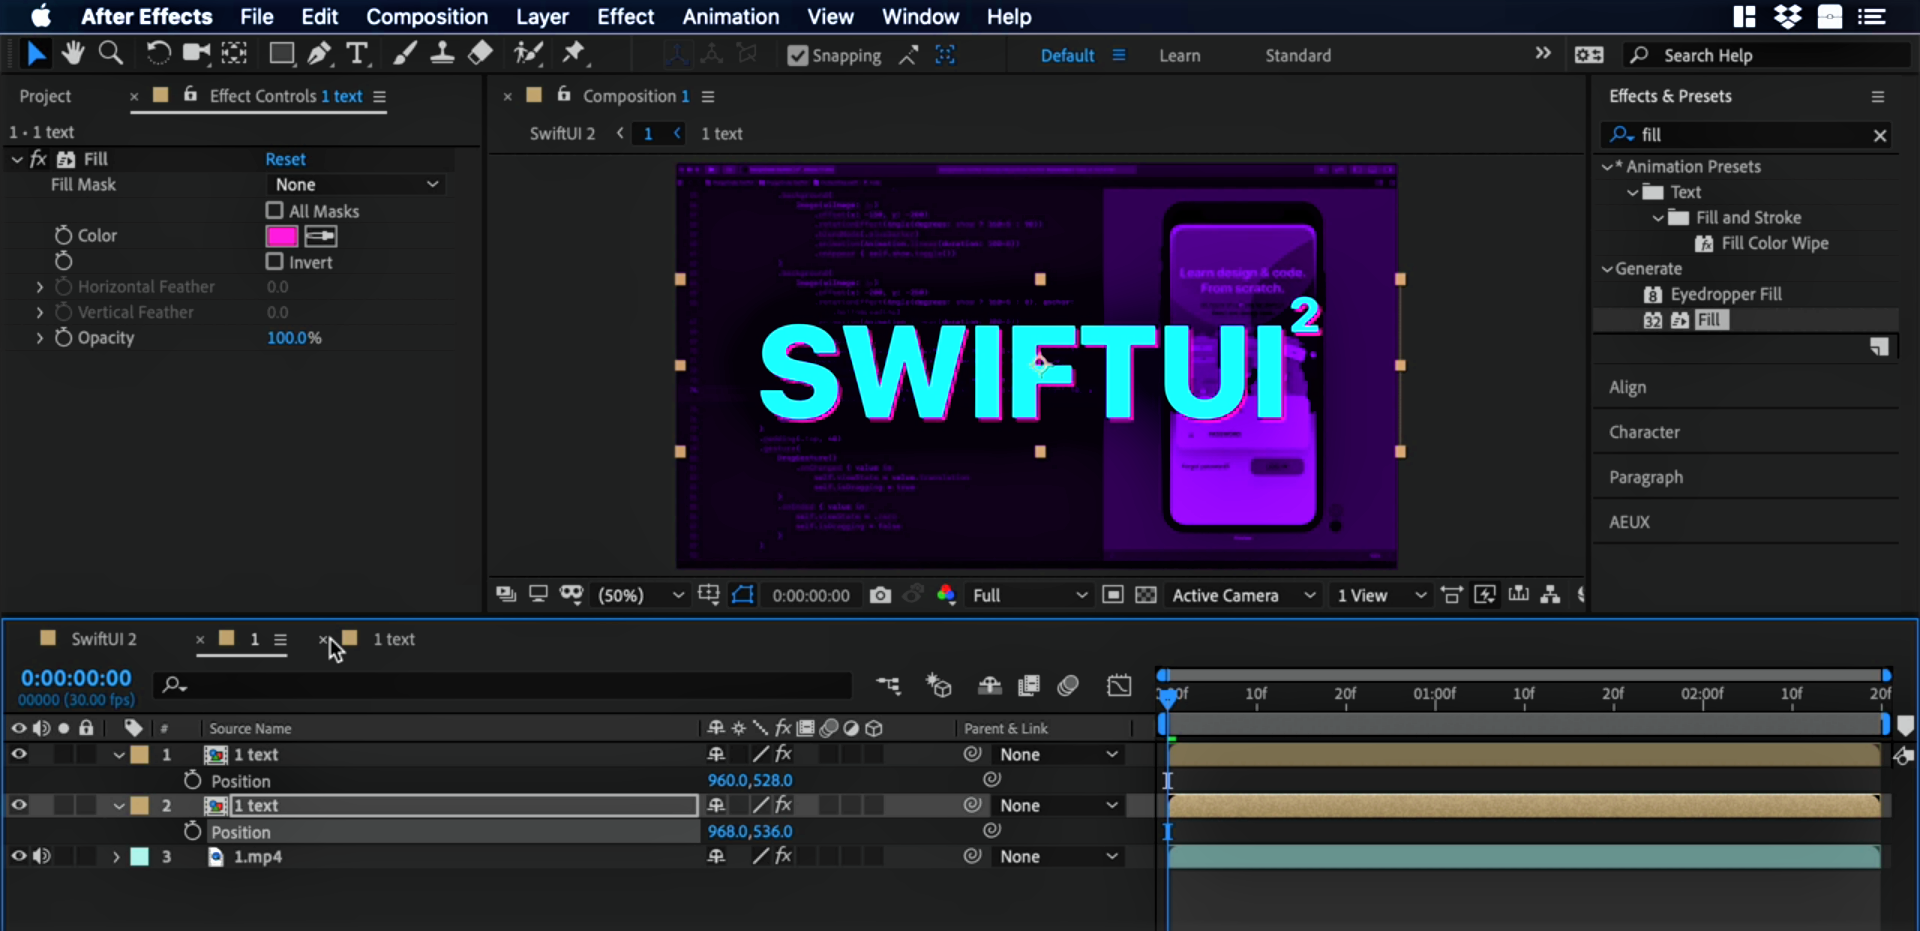
Text Color
Go back to the main text composition which is '1 text'. Now, let's add color to the text!
- In Effects & Presets, search for 'fill'
- Set the color value to '#4DFDEF'
- Copy and paste the text layer and set the color for this one to '#FF816C8'
- Click on the first text and press P, set y to 528
- Next, click on the second text and press P. Set x to 968 and y to 536
![AE S01 11]()
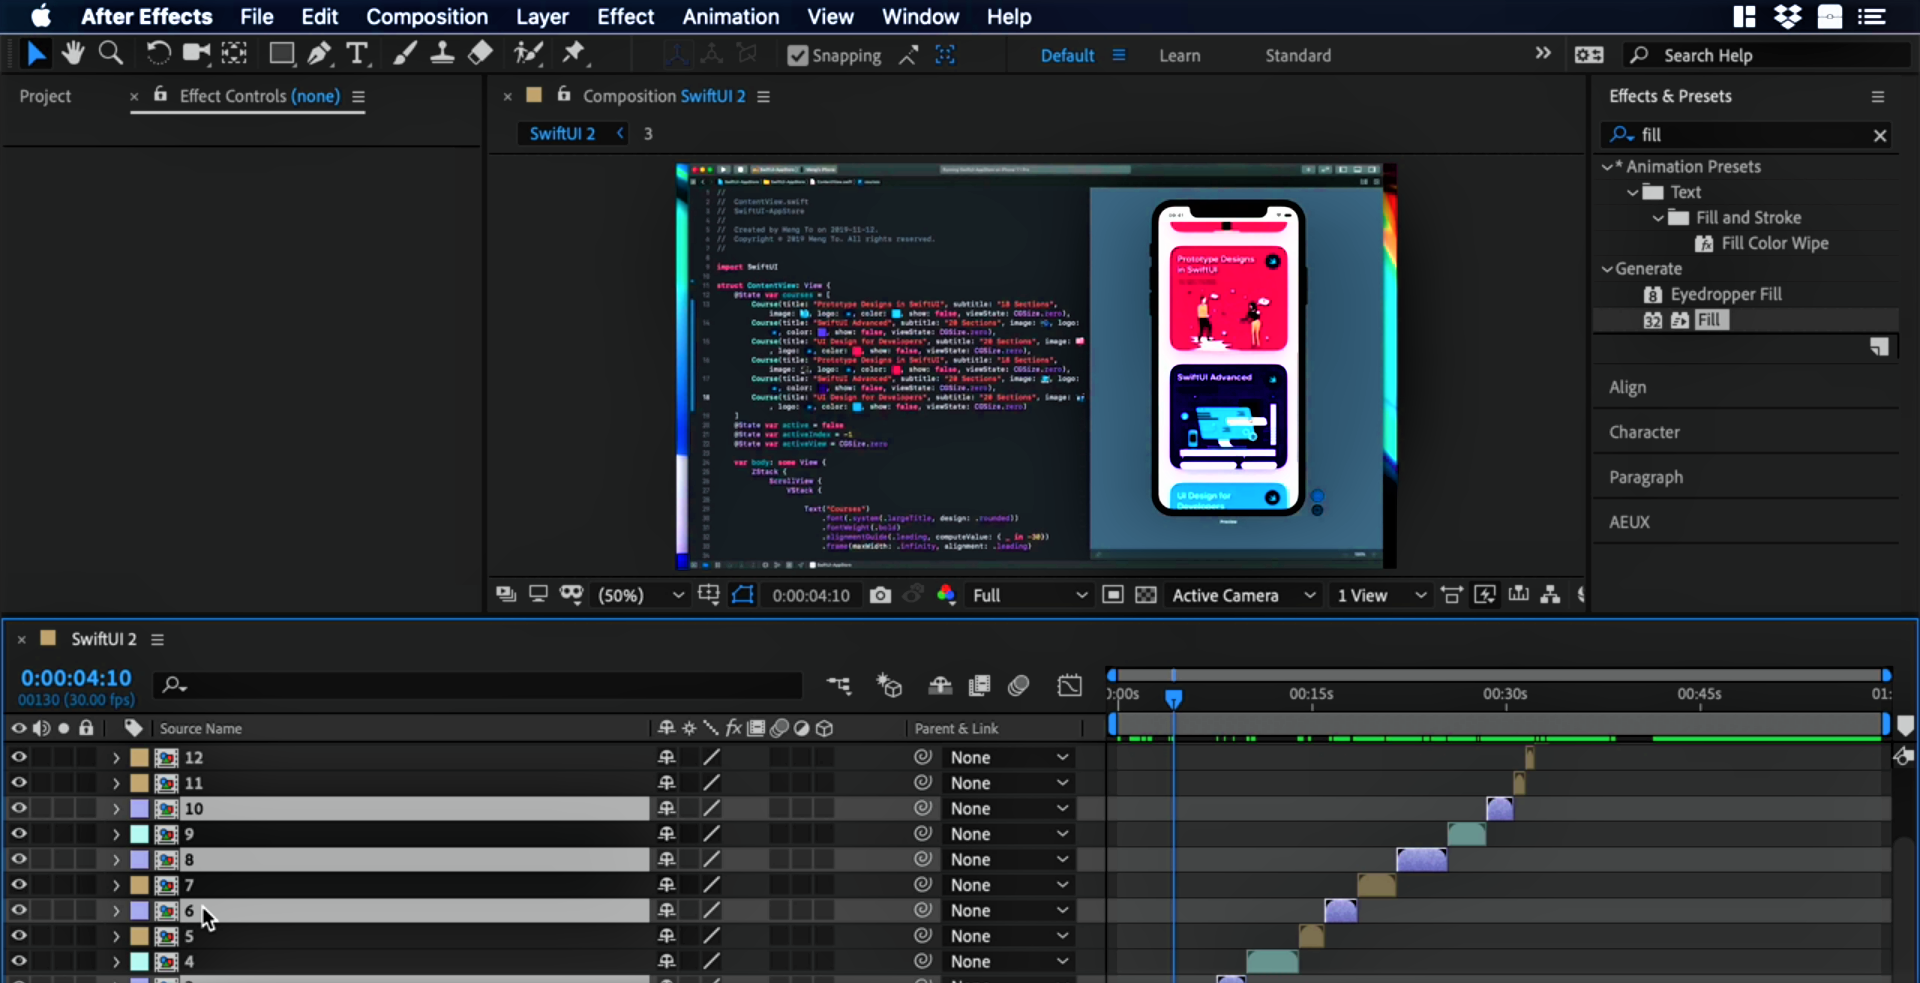
Organize Compositions
We can classify our compositions by colors to make these more organized.
- Select the compositions 15, 9, 4 and 2, right-click and choose Aqua
- Next, select 16, 10, 8 and 6, set these to Lavender
![AE S01 12]()
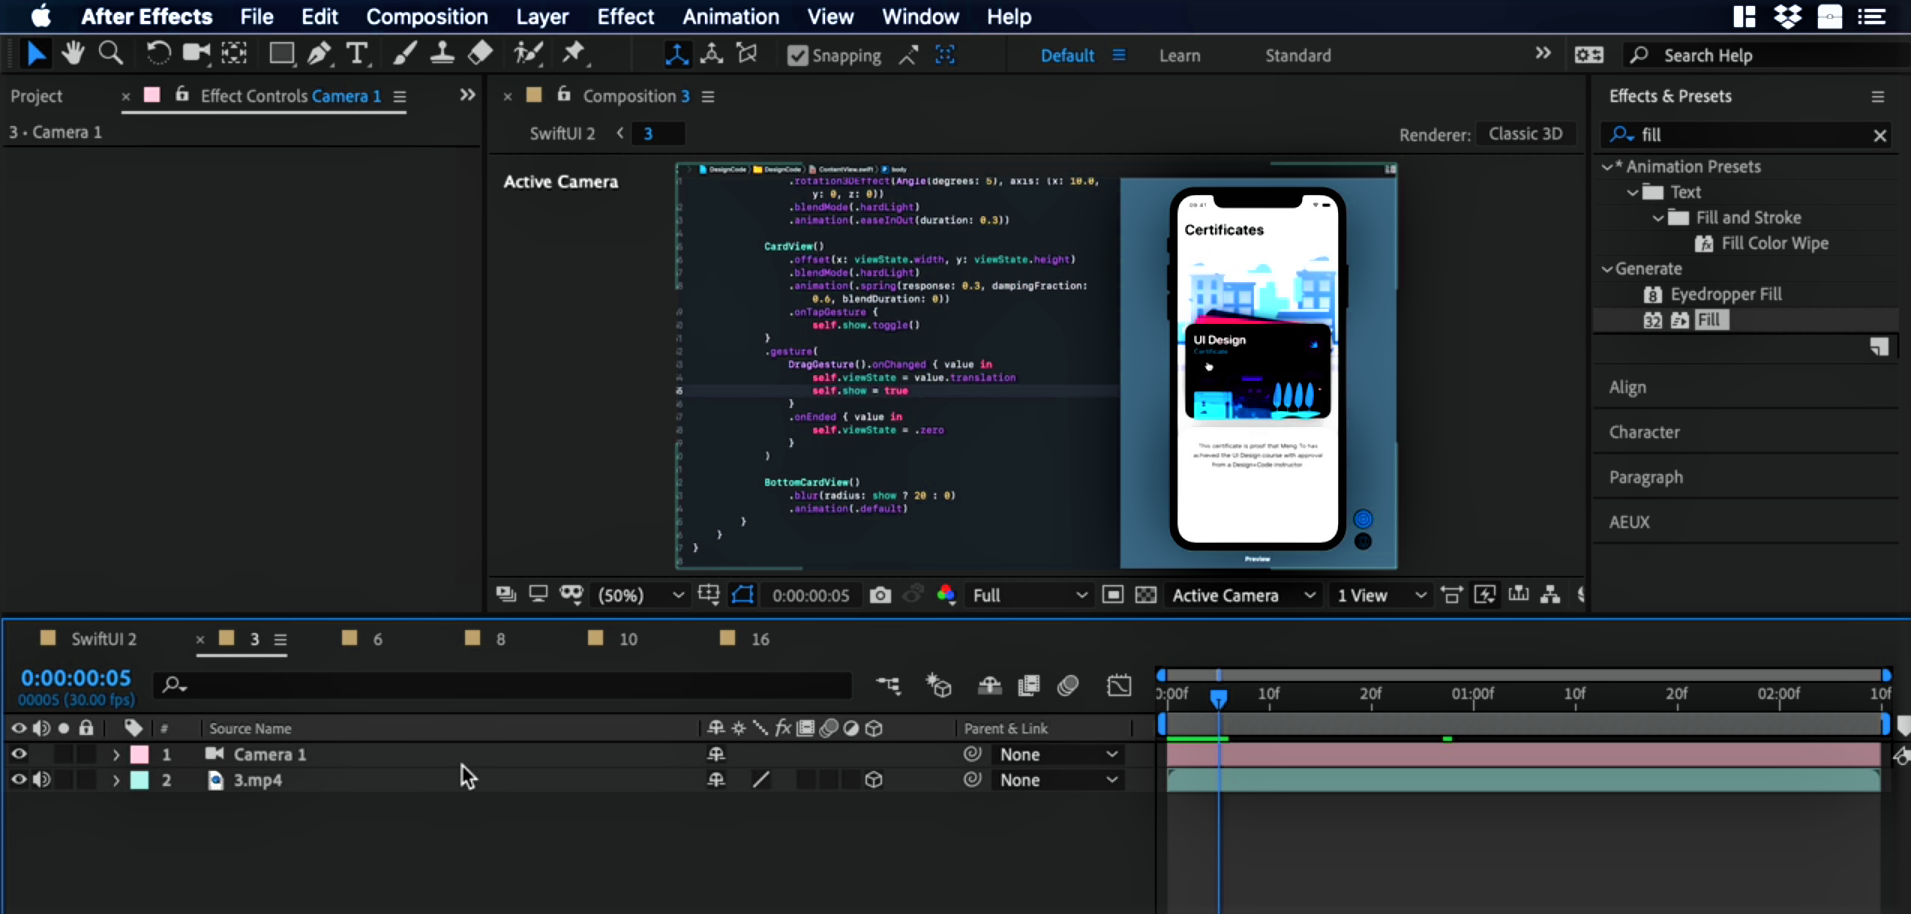
Camera Angles
Select all the compositions with the color lavender. These are the ones to which we'll apple 3D camera angles.
- Click on composition '3' and right-click on it. Here, click on 'New' and then 'Camera...'
- Ensure that you've a two node camera with a preset of 50mm, focal length set to 36 and angle of view to 39.60 and then, click 'OK'
- To convert the MP4 to a 3D layer, click on the 'cube' icon
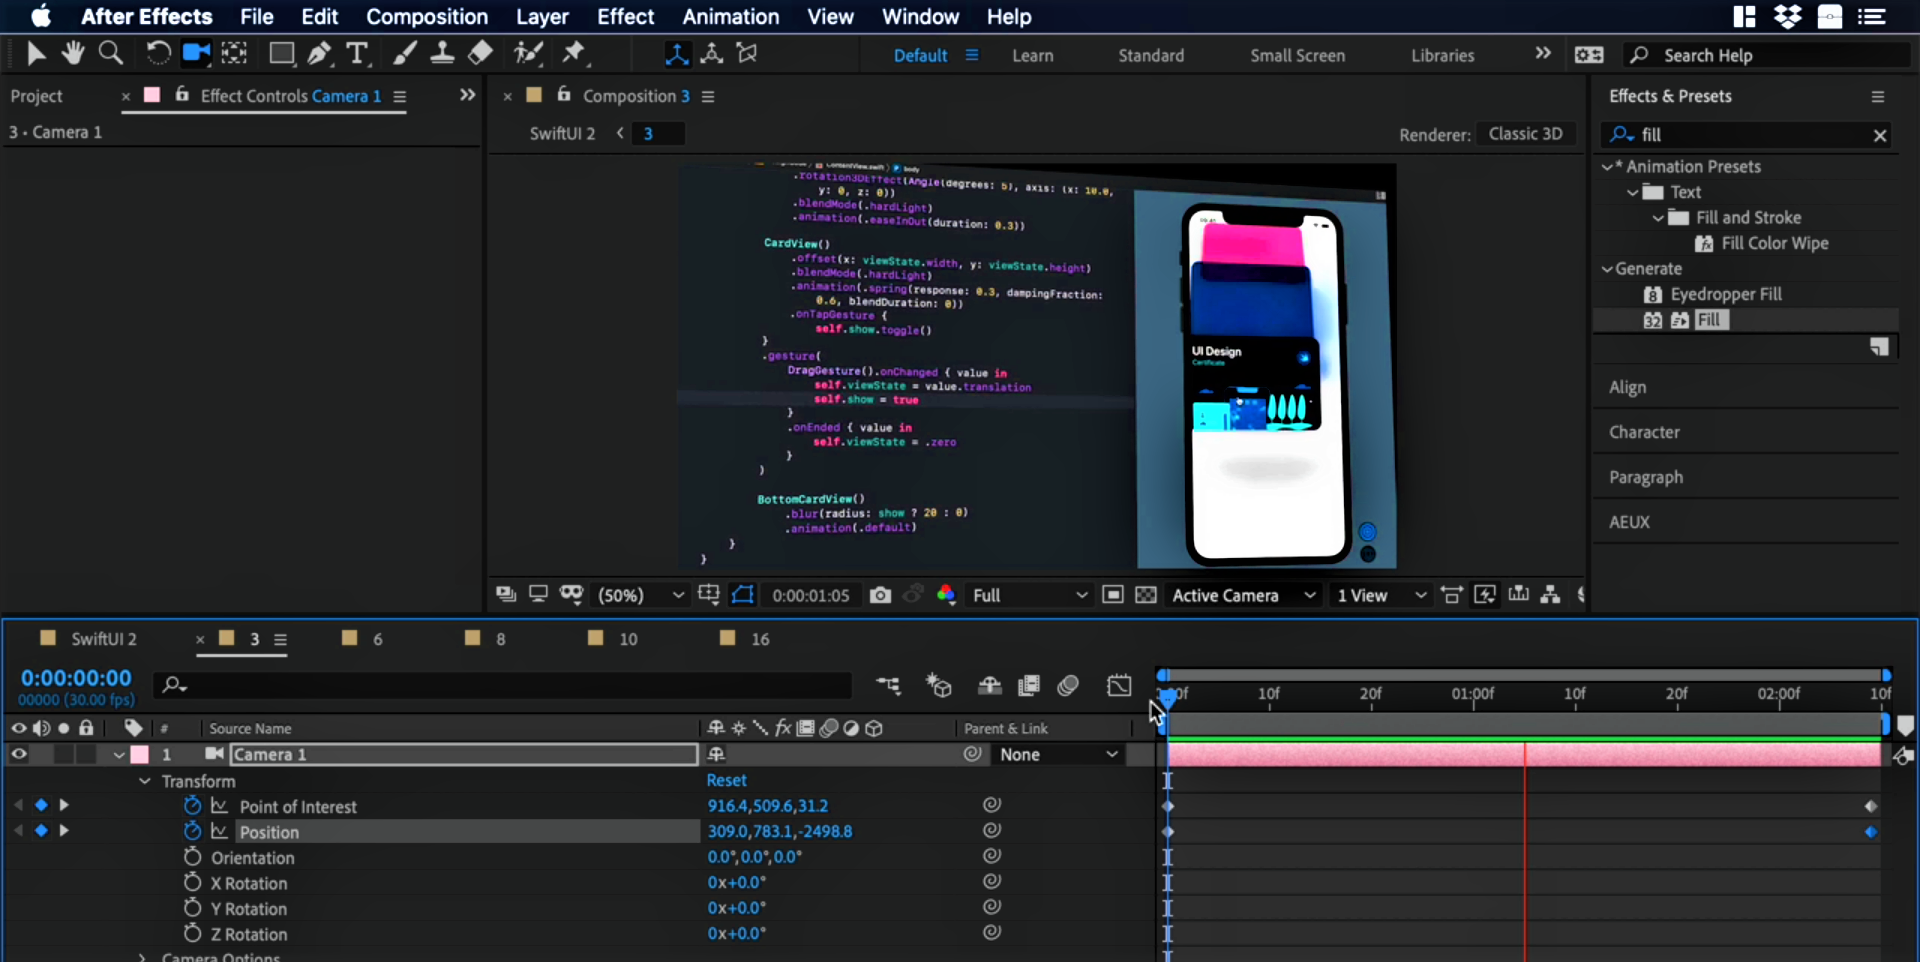
Keyframes
- To add keyframes, click on transform and then on 'Point of interest' and 'Position' simultaneously
- In the timeline, move all the value to the far left
- For Point of interest, set x to 916.4, y to 509.6 and z to 31.2
- In Position, set x to 309, y to 783.1 and z to -2498.8
- Next, move the scroller towards the end in the timeline
- Set the following values for Point of interest - 934.1, 513.4 and 33.9
- For the Position, set these - 539.4, 733.8 and -2519.9
![AE S01 14]()
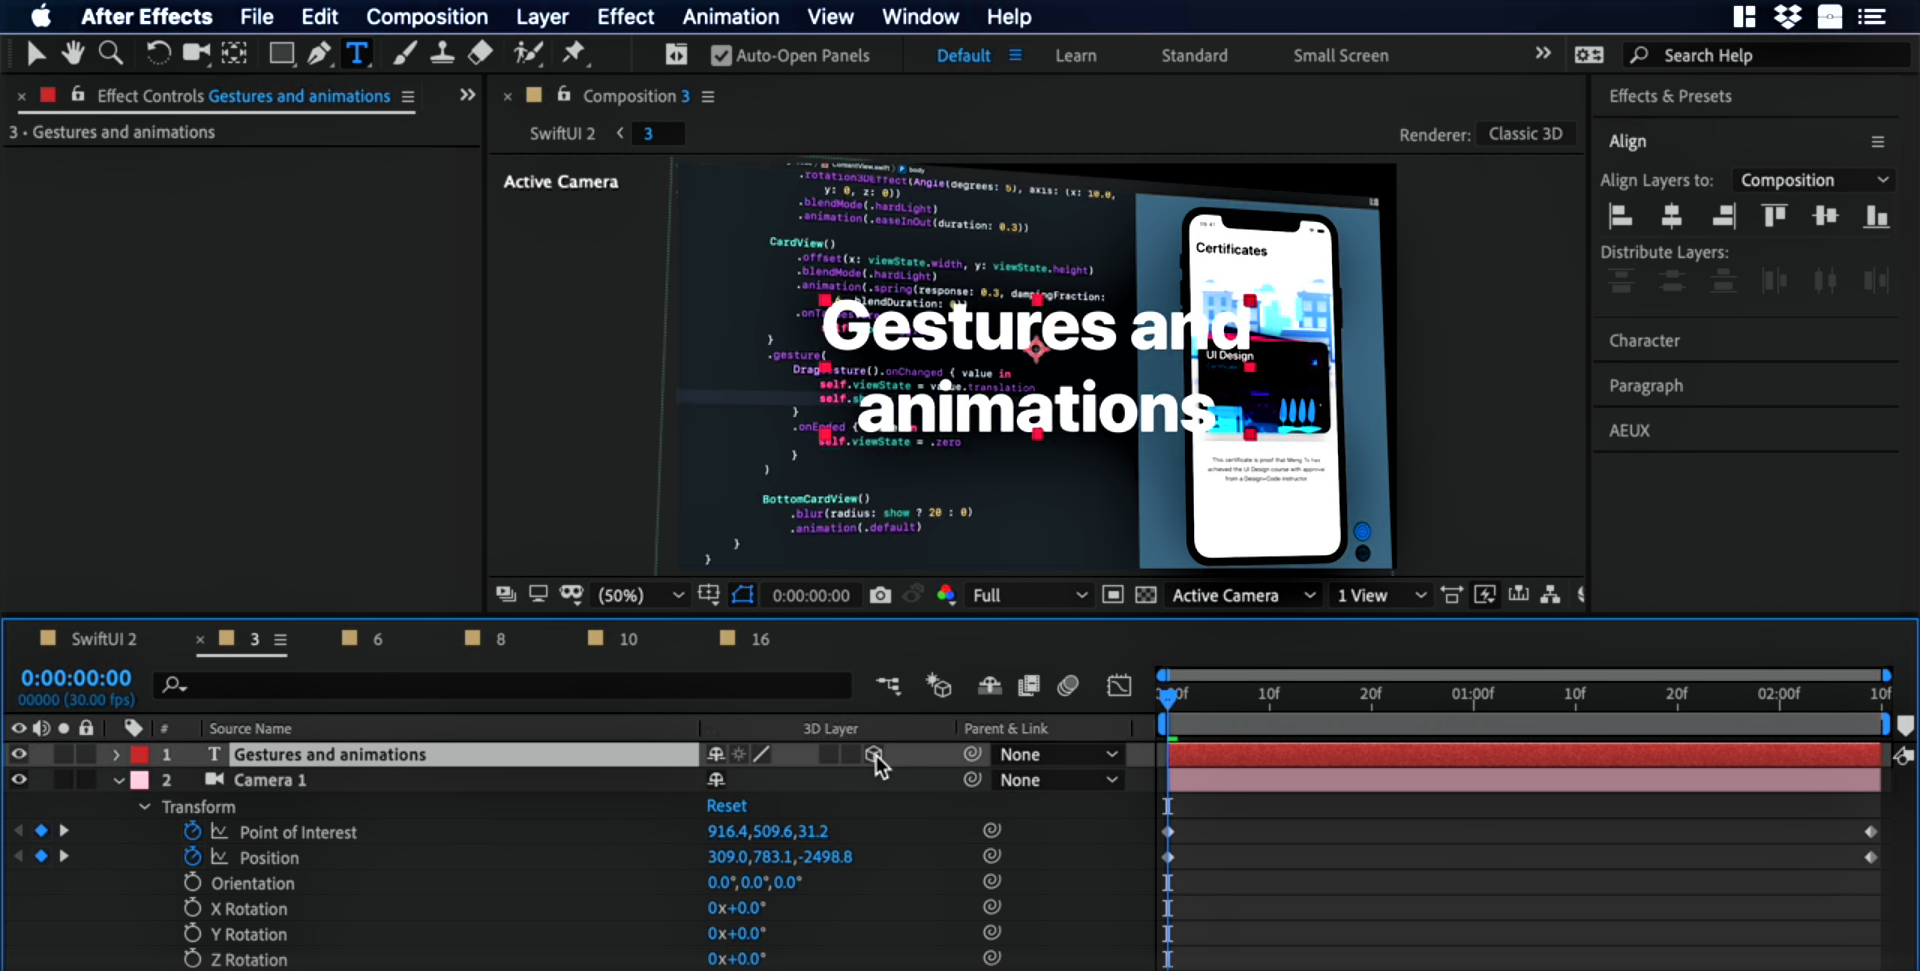
Text
Add the text similarly to how we added it previously.
- Type in 'Gesture and animations' and set its size to 183px
- Align it horizontally as well as vertically
![AE S01 15]()
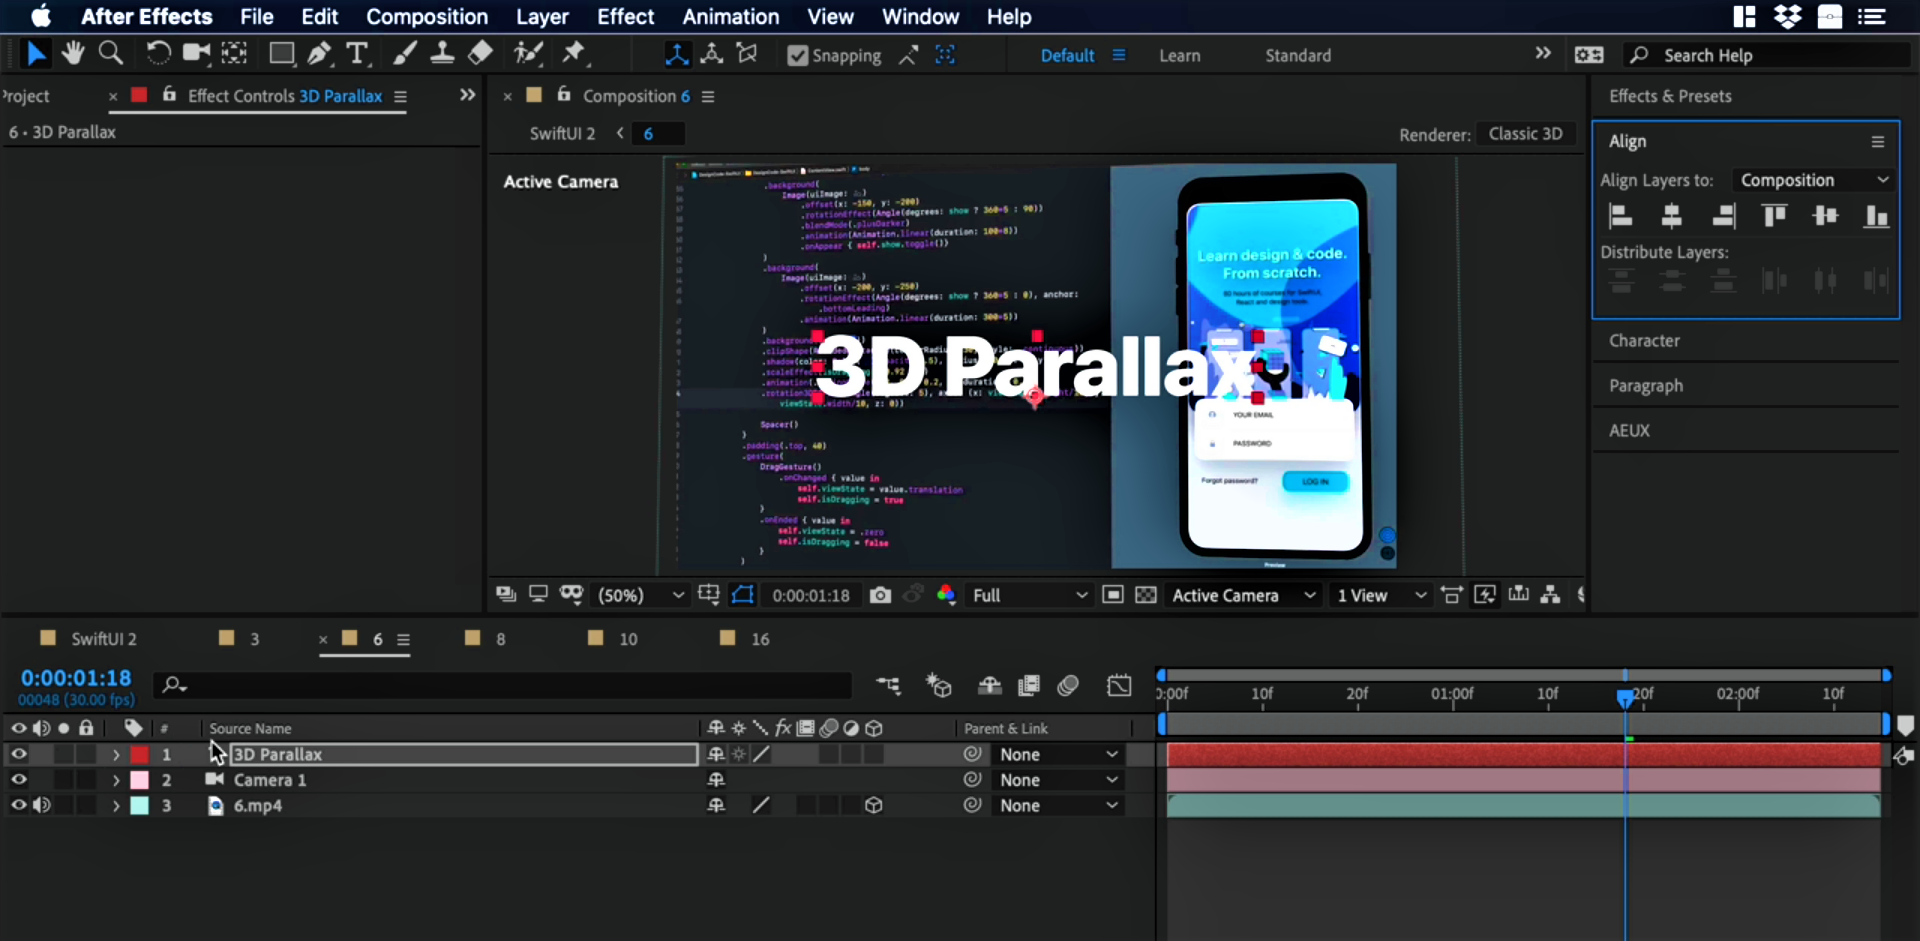
Composition 6
Let's move to the next video.
- Click on composition '6' and right-click on it. Here, click on 'New' and then 'Camera...'
- Add in a keyframe to 'Position' when the scroller is at zero frames
- Now, move the scroll bar to between 1s and 18 frames. Here, set the values of the axes for Position to 1311.8, 643.9 and -2354.3
- Add text with a value of '3D Parallax', set its size to 223px and align it both horizontally as well as vertically
![AE S01 16]()
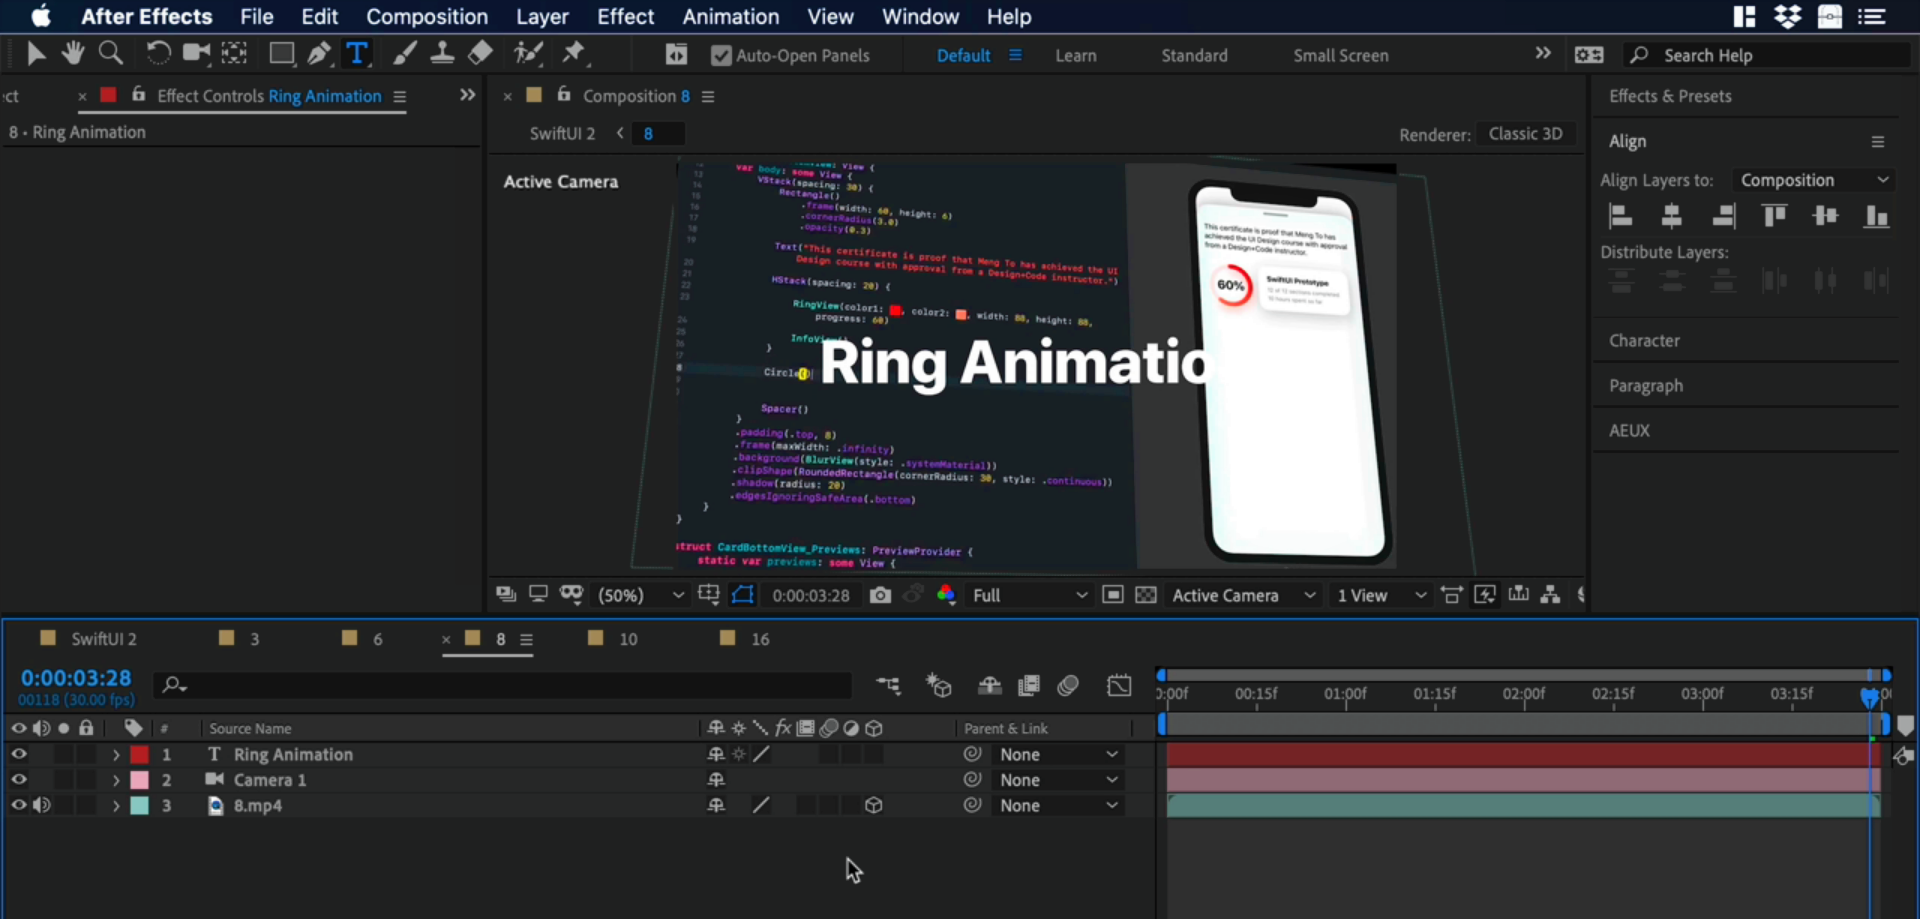
Composition 8
Head over to composition 8 now.
- Create a new camera like we did for the other compositions
- Make sure the scroller is on 0s and add keyframes on 'Point of interest' as well as 'Position'
- Set the axes value for 'Point...' to 951.4, 582.9 and 20.3
- For 'Position', set these to 1086.1, 1496.9 and -2182
- Move the scroller to the end and set the value for 'Point...' to 153.1, 586.4 and 40.5. As for 'Position', set it to 417.3, 1284.6 and - 2201.4
- Lastly, add text with a value of 'Ring Animation' and resize it to 161px. Align it both vertically and horizontally
![AE S01 17]()
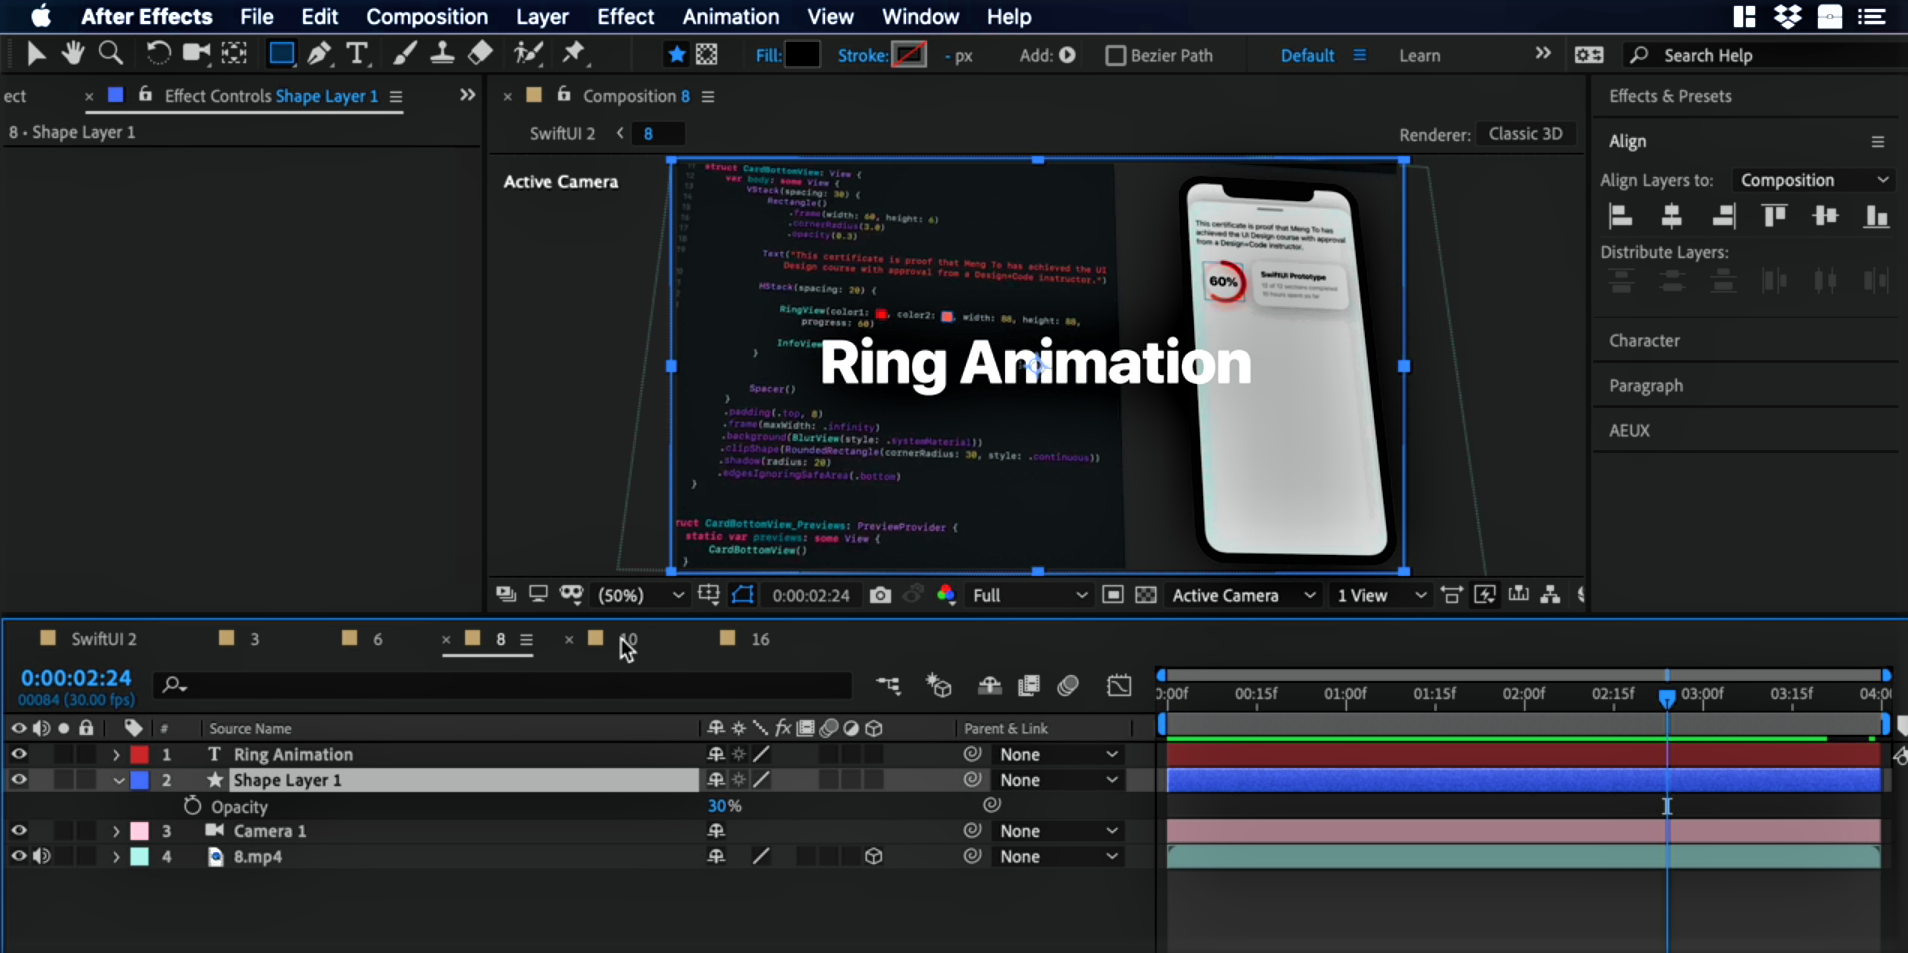
Overlay
Let's add some overlay here, this will help us highlight our text.
- Click on the rectangle icon and make sure you select no stroke
- Select fill and set the color to black
- Set opacity to 30% in properties and position the rectangle beneath the text
![AE S01 18]()
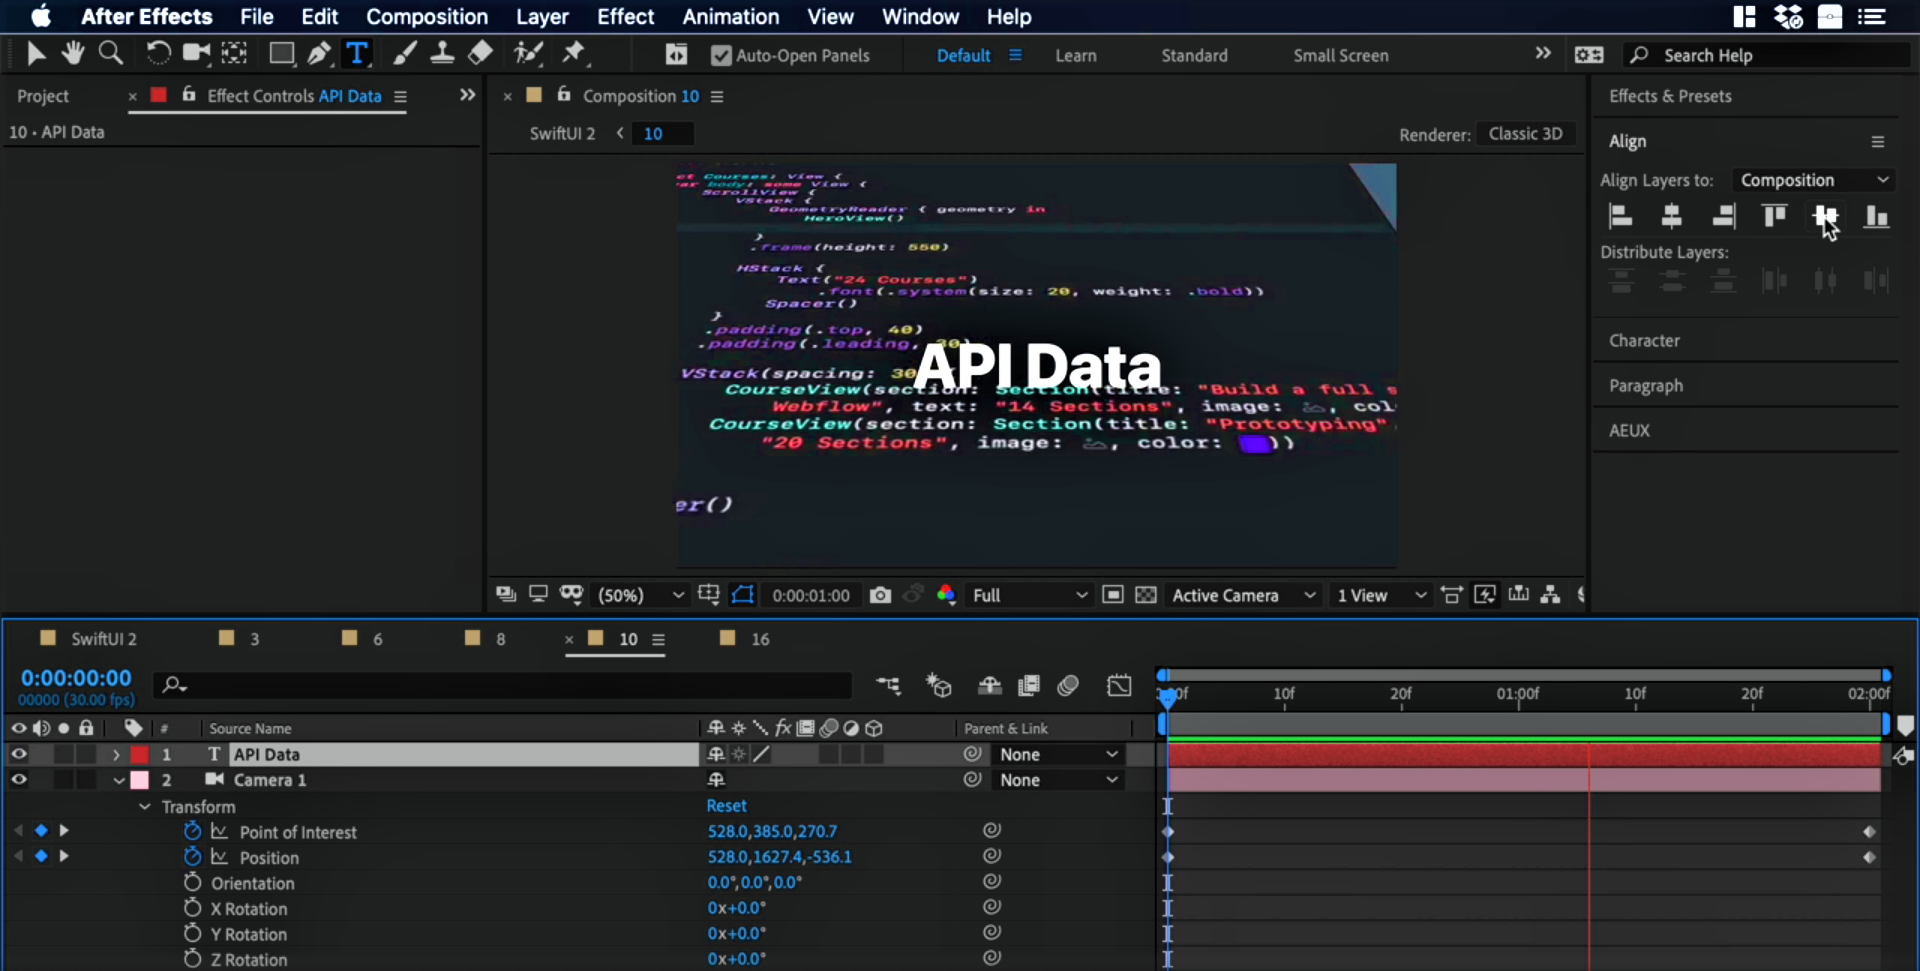
Composition 10
Finally, click on the last composition which is no. 10.
- Create a new camera for it
- Then, let's add keyframes to 'Point...' and 'Position'
- Ensure that the scroller is at 0s and set the value of axes for 'Point...' to 528, 385 and 270.7. Set the axes for 'Position' to 528, 1627.4 and -536.1
- Move to the scroller to the end and set the x-axis for 'Point...' as well as 'Position' to - 700.8
- Lastly, add text with the value of 'API Data' and resize it to 165px. Align it vertically and horizontally
![AE S01 19]()
Templates and source code
Download source files
Download the videos and assets to refer and learn offline without interuption.
Design template
Source code for all sections
Video files, ePub and subtitles
Videos
ePub
Assets
Subtitles
1
3D Camera Angles
A step-by-step guide to set 3D perspective camera angles to your videos.
23:04
2
Collage Grids
Create a visual cloning effect displaying multiple scenes in one screen.
11:03
3
Text Animations
Create dynamic and smooth titles animations
14:06
4
Advanced Text Animation
Build a slot machine and a 3D text animations
11:19
5
Masking Techniques Part1
Create a mask for the iPhone and add a venetian blind effect to the background.
17:15
6
Masking Techniques Part2
Working with the venetian-blind effect in shapes and adding masks to the videos
9:22
7
Animated Backgrounds
Animated shapes to create a background animation.
8:26
8
Strobe effect
Generate a stroboscopic effect for background animations.
13:24
9
Export your assets from a Design Tool to AE
Export your assets from Sketch, Figma or Adobe Xd to After Effects.
15:46
10
Extrusion Depth
Extrude 2D shapes into 3D assets using the C4D Render
11:27
11
Animated Shape Burst
Build a burst animation using basic shapes
8:07
12
Dynamic Shape Animation
Using parenting to create advanced shape animations
7:33
Meet the instructor
We all try to be consistent with our way of teaching step-by-step, providing source files and prioritizing design in our courses.
Daniel Nisttahuz
Senior Product Designer at Design+Code
Motion Designer @Design+Code
7 courses - 12 hours

UX Design Handbook
Learn about design thinking, with exercises. Free tutorials for learning user experience design.
2 hrs
UI Design Handbook
A comprehensive guide to the best tips and tricks for UI design. Free tutorials for learning user interface design.
2 hrs
Create a Promo Video in After Effects
In this course we will show you how to create a promo video using After Effects.
2 hrs
Animating in Principle
Learn how to animate interactive user interfaces from Figma to Principle. Get to design the app flow for multiple screens, interactions, and animations. At the end of the course, you will have a beautiful prototype that you can share with stakeholders.
1 hrs
Video Editing in ScreenFlow
Learn different techniques, transitions actions and effects to edit a video using Screeflow
1 hrs
Motion Design in After Effects
Learn animation and motion design with After Effects
3 hrs
Learn iOS 11 Design
Learn colors, typography and layout for iOS 8
1 hrs